How to Thicken a Vocal
Introduction
There are many factors that can cause a thin vocal. That can eighter be a bad microphone choice, bad mic placement, or something in the chain. But do not despair – there are some tricks that you can pull to thicken up your vocal and make it rounder and fuller.
So basically, this is what I am going to talk about in this article and provide you with some tips and tricks that you can reach for to thicken up the vocal track – no matter if it is a main or backing vocal. Let’s dig in.
2. Vocal EQing
3. Using Compression
4. Using Time-Based Effects
5. Saturating the Vocals
6. Vocal Doubling
7. Parallel Processing on the Vocal
1. Proper Recording
As I already mentioned that this might be a problem, I am going to share a few sentences on it. What I mean by proper recording is to get it right at the source and try many variations before deciding on your final vocal recording setup and take.
If you have the luxury of owning multiple microphones that are good for vocals, try every microphone out. Maybe your go-to microphone will not suit the vocalist, but the second one will fit better.
Also, you can try out the proximity effect trick, where you will place the vocalist closer to the microphone. This might not suit the genre that you are working in, but in case it suits – make sure to try it out, cause it will produce fuller and warmer vocals.
The bottom line of this point is to try out different variations and see which option will work best for you and for the type of vocal you need to work with. Sometimes a simple mic placement will solve the thin vocal and you will not need to deal with such a problem. But if you tried out everything, you can try more tricks down the mixing road.

2. Vocal EQing
The first and the most basic process that we can reach out to is the simple EQing process. This might appear too simple to be true, but maybe some slight boost in the frequencies can make the vocal fuller and you might be done in regards to rounding up your thin track.
Usually, the fullness of a vocal track lies in the lower register of frequencies, aiming at the lows and mid-lows. Even though most of the engineers’ advice is to cut frequencies and not boost, you can try out a boost to check how the vocal will sound. Here is the process that I like to do when we have such a case in our hands:
- Use ProQ3 to locate the problematic area, since it is a very precise EQ
- Once we are in the area, simply boost it
- Broaden the Q and note down all the parameter values.
- Use analog modeled EQ and apply previously noted values to match ProQ3 sound
The analog EQ or analog EQ plugin will give you some warmth that the analog gear provides, meaning that you will thicken up the vocal even more. Double-check it in solo, check it in the whole mix as well, and set the final values up to your taste. Simple right? Well yes, but if this is not helping you can always try something else.
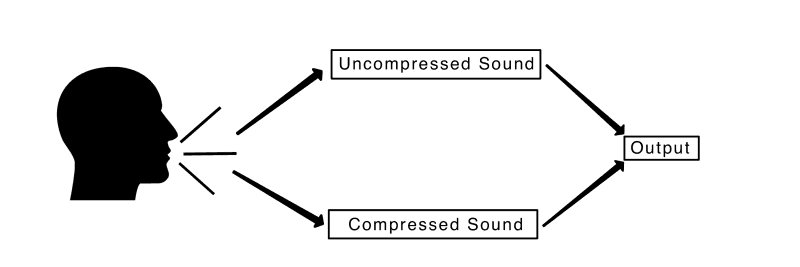
3. Using Compression
Compression is by far one of the essential instruments to use in terms of thicker lead vocals. Because a compressor is ready to squash down on the peaks of a vocal, you’re capable of pushing the general volume of the signal up – showcasing the much less present low-mids that you’ve boosted with EQ.
To set your vocal compressor, you need a quick attack and a slower release. It needs to be performing rapidly to shut down on the peaks and maintain the heavier gain reduction setting to attract out the body of the efficiency. A slow release implies that your 3-4 dB of compression from that preliminary note is held just a bit longer. It’s delicate however extraordinarily effective.
Depending on the type of tune, the ratio of your compressor can vary. It is best for you to test out different ratios and find out the best one that actually works toward thickening your vocal track. Also, using an analog-modeled plugin (if mixing in the box) will add more warmth to the signal that will actually benefit the vocal.
Setting the compressor correctly will thicken the vocal and will make it fuller and rounder if that is what you are after – and since you are here reading about this problem – probably you are facing it.

4. Using Time-Based Effects
Using reverb or delay is no strange thing do to when you need to improve the tonality of your vocal. Also, they are very good at making vocals rounder and more full than before. But besides the usual usage of using the reverb for the nice tails, or using delay at the end of vocal phrases for space, you can use them to shape the body of the vocal.
When it comes to reverb, you can achieve this with short reverb times and quick or dense reflections. My suggestion here is to go with a dedicated FX track for the reverb (or delay) to have the space to shape the effect even more. Usually, plate reverbs for best, but I suggest testing out different types of reverbs for finding the one that will suit you the best.
The same goes for the delay. You will need to go with faster delay chops, 1/32 or 1/64 will work best – and make the delay for the purpose only to round up your vocal track. Also, go with the FX track to be able to blend it with the vocal for the sole reason of thickening it.
You will be amazed how this process helps out with rounding up the vocals and making them sound more complete. Reverbs and delays can be used for such purposes as well, compared to the widely known usage of adding tails.
5. Saturating the Vocal
To be honest, I really like using saturation on every signal that sounds a little bit thin. Vocals are no exception. When I first discovered saturation, I was so happy that I used it on every track. Not that it was right, but I was caught up in the moment of discovering something that makes signals sound better.
Once the dust settled down, I started using saturation with care, but the vocals remained signals that 95% percent of the time were saturated. Even tho the vocals were not thin or missing anything, adding a proper amount of saturation will make them sound even better if you are working with a low-budget gear or microphone that is not compatible with the vocalist.
If you read my books, you will notice that I really like using SPL Twin Tube from Plugin Alliance. This is the plugin that makes the vocals we are working on shine. This is the plugin that hooked me up on saturation. I thank Plugin Alliance for developing it from my heart!
An amazing process if you are having thin vocals. I will not provide you with precise values of any saturator, because it is best for you to play out with it a little bit and find what works best for you. The added harmonics will certainly thicken up any thin signal – vocals included.
6. Vocal Doubling
Nothing beats old-style natural doubling. Have your singer return on the mic to sing a pair of extra takes of that chorus, and mix these further voices in. It’s going actually to add support to the lead vocal. Merely have your vocalist do a couple of takes on top of their current performance, edit their timing and pitching, and mix them into with the rest of the vocals.
You can too create artificial doubles. Nevertheless, it isn’t so simple as copying a track down to a distinct track and panning them out, as you want a “barely different” efficiency with a view to creating the illusion of doubles. Here you will be able to use plugins to emulate the doubles. One of our favorites for this purpose is Reel ADT from Waves. This plugin is a gem and I highly suggest it.
Another thing that you can do at this point that is similar to doubling is to try recording or emulating vocal octaves or harmonies. This will additionally thicken up any vocal recording and make it sound more complete – that is of course if your track supports having such doubles. No harm to try it out.

7. Parallel Processing on the Vocal
And the final trick I am going to share with you is to use a parallel processing chain that will add more to the vocal. I decided to share this at the end, because I usually add parallel processing after the initial mix on the inserts is done.
Here you can go crazy and combine all of the above tricks and at the end – mix it with the main vocals. You can even try adding distortion or chorus if it suits the song you are working on. The options are limitless.
For some more basic approach, stick to a parallel compression and add saturation to it, but if that is not enough, you can add more processes that have tendencies to add thickness to the vocal.
Conclusion
Thin vocals are something that you want to avoid at any cost if that is not your goal to have such vocals. Otherwise, if the vocals are thin, that suggests that you didn’t mix the song properly and that one of the main signals of the song is weak.
By having a weak main element, your whole song will be classified as a weak mixed product and as a mixing engineer, you want to give the best that you can. In case you are having any questions or any other methods that are not mentioned in this article, please share them with us in the comment section below and we will be more than happy to elaborate on them!