Compressing Vocals 101
Intro
When you’re trying to find the perfect vocal compression settings, there is one motive worth paying attention to. You need to hear every word. Yup. Color and character matter too. But they’re far less significant. Also focusing on these will often distract you away from what matters.
When in doubt, just ask yourself this question, how can I hear every word? Let the answer be your guide, and you’re going to remain on the right path.
What Is Vocal Compression?
So what’s audio compression and what can it do to assist? It’s a standard query we hear on a regular basis.
Principally, vocal compression reduces the dynamic range of your recording by bringing down the extent of the loudest elements, which means the loud and quiet elements at the moment are nearer together in volume and the pure volume variations are much less obvious.
The audio compressor unit can then enhance the general level of this compressed signal. So the end result’s that the quieter elements sound like they’ve been boosted in volume to be nearer to the louder elements.
The dynamic volume modifications of a recording are actually under extra control, and a knock-on impact is that the general stage of the compressed recording might be elevated inside your mix. The recording may even sit inside your complete mix much more easily.
A compressor does three issues:
- Modifications to the transient; with vocals, that’s the consonants
- Brings the loudest and quietest elements of a signal nearer together
- Provides “character” or not, relying on the compressor
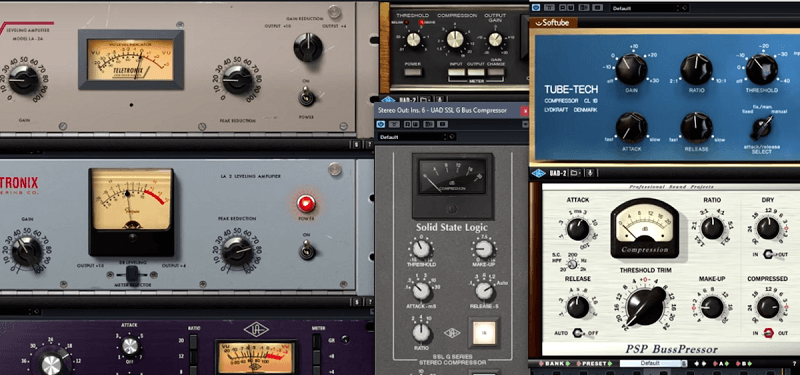
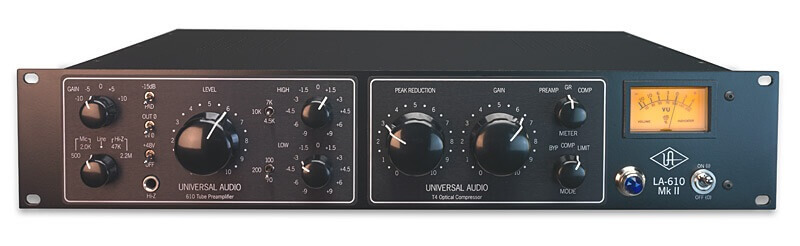
Compressor Types
Not all compressors are of an identical design. They each have their very own “character” or sound. The 4 most typical ones are:
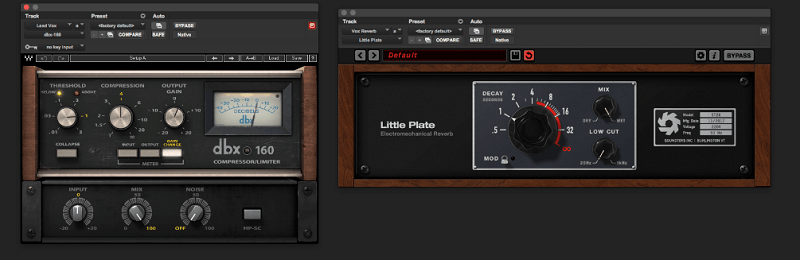
- VCA
- FET
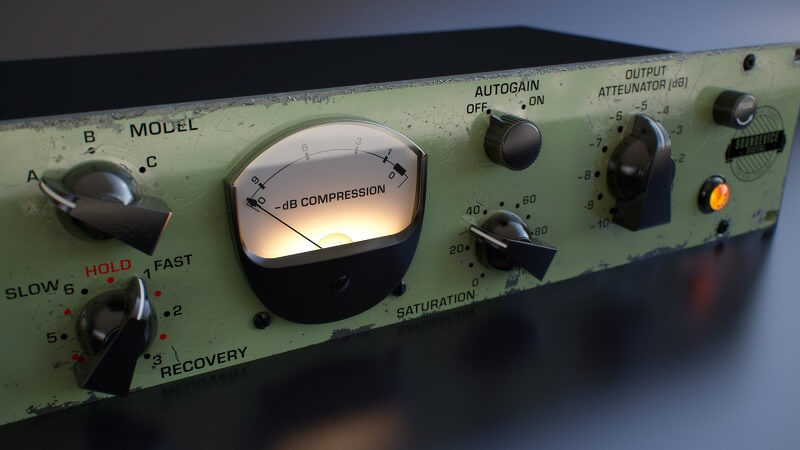
- Optical
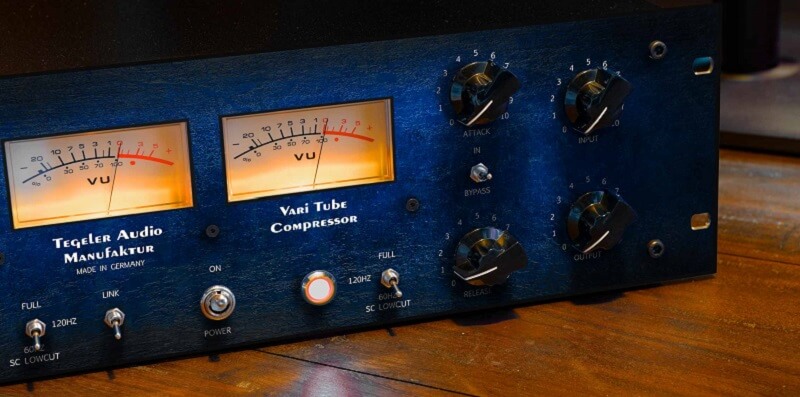
- Variable-Mu
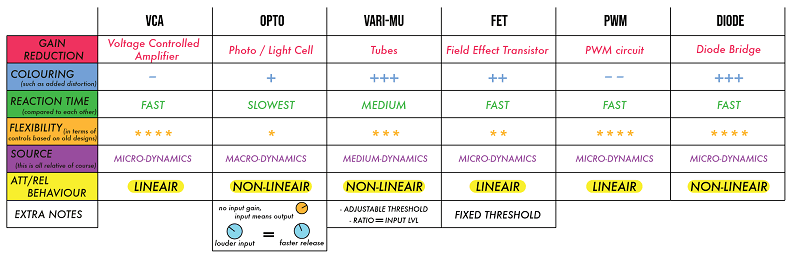
Each has its very own sound traits and might be something to think about further when you’ve acquired the fundamentals of compression down.
Stick a pin on this concept and look into it later down the road, however, the TL;DR description is that their names describe the gain reduction circuit for that exact sort of compressor and the way they react to the input sign.
They impart certain sonic qualities relying on the sort used that may additionally improve the sound past the usual vocal compression settings.
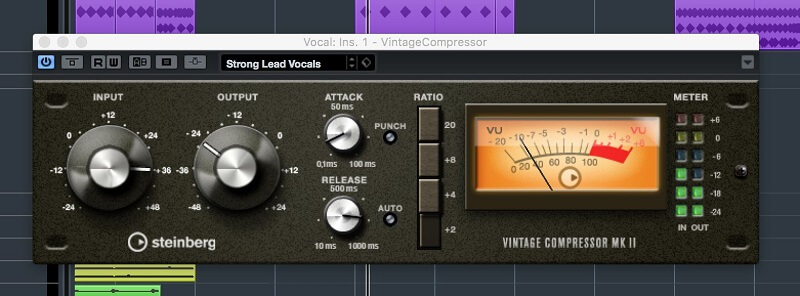
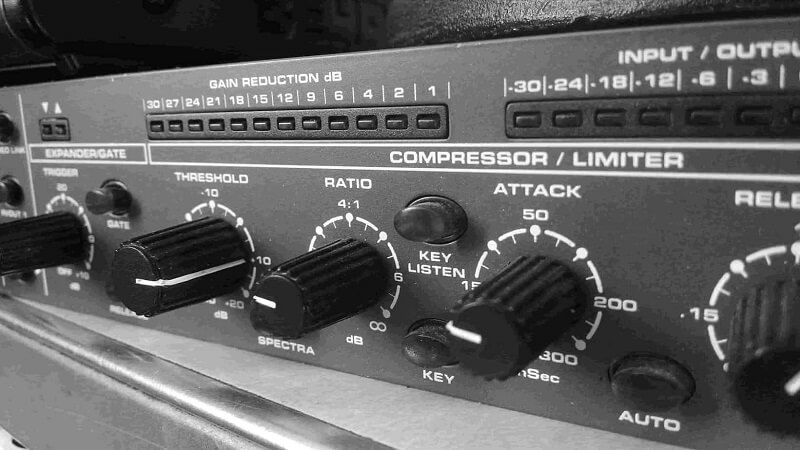
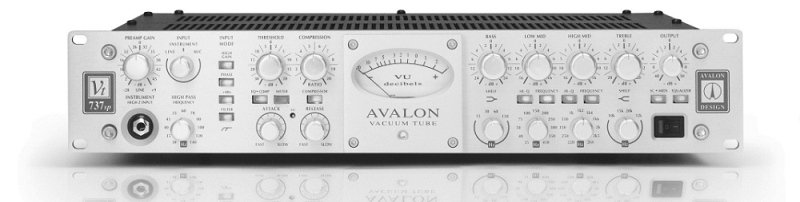
Vocal Compression Settings
These are the most basic features you’ll find in most compressors. Some of them will have more, some less but these are the most basic ones:
Input Gain
This controls the extent of the signal going into the audio compressor.
Threshold
Compression brings down the general stage of the loudest elements of your recording. However, how does the compressor know which part of the signal is ‘loud’ and which part of the signal to compress? By setting the threshold.
The threshold sets the amount at which the compressor kicks in and begins altering the dynamic range of the recording. So for instance, if you happen to set your threshold at -20 dB, all the things under this stage are not going to be affected by the compressor. However, every part louder than this stage (-20 dB) will probably be compressed.
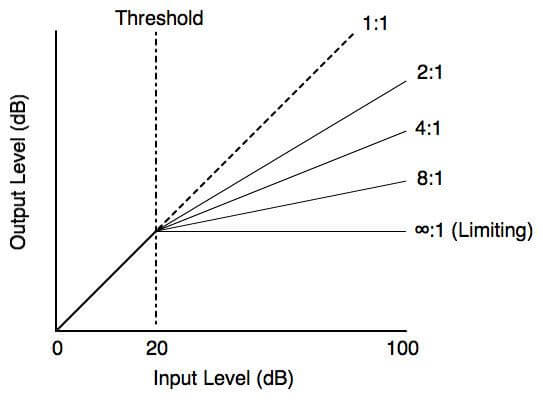
Ratio
How much will the signal be compressed as soon as it’s gone over this threshold stage? That is managed with the ratio. The larger the ratio, the more compression there may be.
The best solution to present you the way the ratio works is by exhibiting you some numbers.
- If the ratio is 1:1, there isn’t any compression at all.
- If the ratio is at 2:1, for each 2 dB of sound that goes over the threshold, you get 1 dB of output above the threshold. So if the signal goes over the edge by 10 dB, the compressor reduces this signal so it’s now 5 dB over the set threshold.
- If the ratio goes as much as 8:1, for each 8 dB of sound over the threshold you’d get 1dB of output above the threshold. So if the signal goes over the edge by 16 dB, the compressor reduces this so solely 2 dB goes over the set threshold.
Attack
That is the time that the compressor takes to start on the input, as soon as the sound stage has gone over the threshold stage. It’s often measured in milliseconds (ms).
Release
That is the time that the compressor takes to let the signal return to regular as soon as it has fallen under the threshold stage. Again, often measured in ms.
Output Gain (Makeup Gain)
If the audio signal has been compressed, the general stage of the signal will probably be decreased. Increasing the output gain raises the level of popping out of the compressor, so the amount might be more simply matched to the levels of the remainder of your tracks in your mix.
Knee
Soft-knee compression is gentler on the sound because it goes via the audio compressor – the change from uncompressed to compressed sound is smoother. Hard-knee compression has an extra fast and apparent impact.
Compressing Vocals While Tracking/Recording
Throughout your tracking periods, don’t be afraid to make use of some compression right from the beginning. You need to take a conservative strategy with vocal compression throughout recording – sufficient to manage your dynamic range and form your sound, however subtle enough to where you’re not considerably impacting the standard of your recording.
Keep in mind: You’ll be able to at all times add extra compression later on however eradicating compression from a printed signal is extremely troublesome to do and infrequently won’t provide the outcomes you’d count on.
When tracking, a lightweight quantity of compression can pull things out of your vocal you wouldn’t in any other case hear. With a very gentle vocal, things like breaths cut by way of much more with vocal compression.
Consonants begin to form a bit extra of a bite. Your vocal becomes nearer and extra intimate, particularly with a close placed vocalist where the microphone’s proximity effect is in full swing.
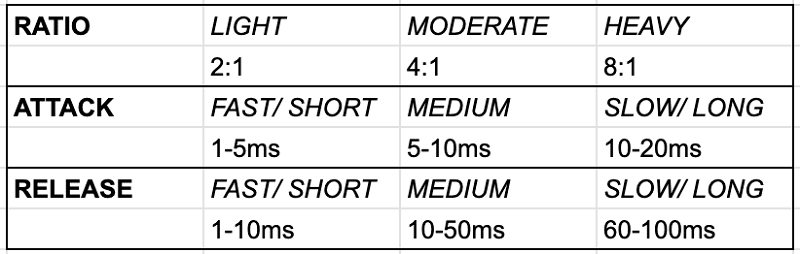
Utilizing a low compression settings ratio (2:1), fast attack time, and gradual release time, you will get a compressor to catch the peaks and maintain onto them, drawing extra life out of your vocals.
Dial-in your input to where you’re getting the needle simply barely shifting on your compressor – only a few dB of gain reduction is all you want for tracking.
Compressing Vocals Starting Point
Some recording engineers suppose compression is a must for vocals. It evens out the often-erratic ranges that a singer can produce and tames transients that may trigger digital distortion. You need to use compression on vocals to only even out the performance and to create an impact.
If you happen to use a compressor to even out a vocal performance, you don’t need to hear the compressor working. As a substitute, you simply need to catch the occasional extraordinarily loud transient that might trigger clipping. The vocal compressor works like a charm for this.
The compression setting has a quick attack time to catch the stray transient, a fast release time in order that the compression doesn’t color the sound of the singer, and a low ratio in order that when the compressor does go on, it smoothes out the vocals without squashing them.
Typical vocal compression settings might appear like this:
- Threshold: –8dB
- Ratio: 1.5:1–2:1
- Attack: <1 ms
- Release: About 40 ms
- Gain: Modify in order that the output level matches the input level. You don’t want a lot of added gain.
If you wish to use a compressor that pumps and breathes — that’s one that you can actually hear working — or if you wish to convey the vocals approach upfront within the mix, strive to utilize the next settings.
These vocal compression settings put the vocals “in your face,” as recording engineers say:
- Threshold: –2dB
- Ratio: 4:1–6:1
- Attack: <1 ms
- Release: About 40 ms
- Gain: Modify in order that the output level matches the input level. You might want to add a good quantity of gain in this setting.
As you may see, the 2 parameters that you simply modify essentially the most are the threshold and ratio. Experiment with these settings and examine the results by toggling between the affected and unaffected sound (use the Bypass switch in your compressor).
Backup vocals
What about compressor settings for backup vocals, you might ask? Attempt a setting that’s halfway between the invisible compressions and the pumping and breathing compressions. Such a setting brings your background vocals ahead barely. Your settings might seem like this:
- Threshold: –4dB
- Ratio: 2:1–3:1
- Attack: <1 ms
- Release Time: About 40 ms
- Gain: Modify in order that the output level matches the input level. You don’t want so as to add an excessive amount of gain.
Compressing Vocal Effects
While many reverb and delays provide some level of tonal management by high-pass and low-pass filters, you’re much less more likely to find any type of built-in compression. It’s reasonable to assume that a compressed vocal going into these effects will come out sounding fairly managed dynamically, however, there’s nothing stopping you from utilizing one other compressor if it doesn’t.
For the ultimate stage of compression, many professionals will use a vocal bus to mix their vocals with their effects – merging all-vocal components right into a single, manageable fader.
Do not hesitate to add a compressor below your vocal effects. Compressing your reverb and/or delay is a common practice that you can do to make them more noticeable. As stated, if your time-based effects are not having an inbuilt compressor in them, use FX/AUX channels for the effects, where next in the chain you can add some compression and much more processing after that.
Keep Your Genre In Thoughts
Each genre has a unique feel and perspective so that you’ll need to mix figuring out what genre you’re most shooting for. Right here’s a breakdown of the genres with some basic guidelines:
- Pop / R&B / EDM: Heavy processing is most well-liked. Exhibit the top-end of the vocals, hold the dynamics consistent, and be at liberty to go crazy with the results.
- Hip Hop: You need lots of presence and fewer effects. Attempt to get much less top-end while boosting the upper-mid frequencies. Dynamics need to be tight for the vocal to be more equal dynamically.
- Rock: Go for a fuller sound with much less top-end and extra high-mids. The vocals don’t have to be so upfront within the combine. Medium balance in the consistency should be okay with this genre.
- Jazz: Think “less is more” when compressing. Use minimal processing – something subtle.
- Heavy Metal: Right here you’ll need to use the compression generously – it will make the vocals sound right up in your face. Additionally, increase the high-mids and reduce the low-end.

De-essing
De-essing is principally chopping down on mouth sounds like “s”, “z”, and “sh.” Even in case you have a pop filter (which you should), you possibly can still run through a few of these sounds.
That’s the place where de-essing can turn out to be useful. Discover a decent de-esser plugin and discover an appropriate preset. Then regulate from there till it’s to your liking. One factor to notice is that when you apply an excessive amount of de-esser, your vocals may sound like the singer has a lisp.
Vocal Compression Mistakes
Utilizing only a compression to repair the vocals
Naturally, the human voice is dynamic and inconsistent, relying upon the whole lot from what vowel is being sung to where a word lies in relation to the singer’s vocal range. Taking a wonderful, pure performance and making a dynamically constant performance while sustaining character and life is our purpose.
Utilizing one compressor to attain this can almost definitely result in over-compression. As a substitute, before inserting a compression plug-in on the channel, manually apply some gain automation. Gain automation is whenever you increase or lower the extent of the raw vocal file (not volume automation – volume automation would apply level adjustments to the general track after the signal has gone via your effects chain).
This creates consistency within the performance before any plug-ins contact the signal.
Only Applying Compression On to the Channel
Now to essentially hold your vocal up the front of the mix on each phrase, you’ll want to use parallel compression. Place a HEAVY compressor on a return track and send your vocal signal via that channel. On the return channel, you need each phrase to be at nearly exactly the identical volume.
When soloed, it won’t sound correct at all, however that is only meant to be a layer in your vocal mix. Inject the return track to 0 dB and increase till your vocal begins becoming louder. Leave the volume there or carry it down, once more that is only meant to be a layer.
Utilizing Super Fast Attack Time
Squashing the transients with a fast attack time will push your vocal farther back into the mix. Usually, an attack time above 2ms ought to permit the transients to cut through, however in the event you discover your vocals sounding squashed, attempt adjusting your compressors’ attack times. The “squashed” effect could be helpful with backup vocals nonetheless and will help to separate them out of your lead vocals.
Vocal Compressor: Parallel Compression
A cool way to add some meat to a vocal is to use a technique called parallel compression. What this allows you to do is keep the organic dynamic functionality of the first vocal. Then, blend in a super-compressed copy of the exact same vocal with the original.
You can either duplicate the track or”Send” a replica of the track to another AUX track. The end result is completely different compared to the root signal only. This is a neat way to boost your vocal.
You can also end by adding cool effects to this super-compressed track which you wouldn’t put on the first. I compress the crap from the second track and also add some distortion, and sometimes other effects. I just play.
Since you may notice the difference, you can make the right decisions after that what is best for your vocal. Still, it’s still looking natural with these configurations.
Using MakeUp Gain to Gain Match
In the event you enhance the ratio, you will enhance the gain reduction and vice versa. That is nice however one thing you have to be conscious of since you’ll add that average quantity of gain back utilizing the makeup gain.
As you scale back the amount of the peaks your track will probably be perceived as being louder typically, however only after you add back the misplaced gain reduction. Loudness is perceived based on the RMS (root mean sq.) value of the vocals, which is a form of average. You are rising this average by compressing, however, you are additionally lowering the general volume.
So loop a representative part of your vocals and take a look at the gain reduction meter. If it is bouncing around -6 dB then add +6 dB back utilizing the makeup gain knob. Gain and volume usually are not identical (find out about gain vs. volume right here), however, you may consider it as including back the amount you are dropping.
You must have the ability to watch an input gain meter and evaluate it to your output gain meter too, as a substitute for merely adding back the typical gain reduction. It does not matter, both approaches, you may simply use your ears. The purpose is to push the amount back up within the mix to acceptable ranges.
Conclusion
A compressor is an important system in your studio. However, before you employ one, it’s essential to know the names of the assorted controls, how they work, and the way they work together with one another.
Upon getting this understanding, utilizing an audio compressor in your studio turns a lot simpler and may result in both technical and creative functions of this essential piece of equipment. It is also easy to overuse your compressor, so thread carefully with this tool. It may easily ruin your recording and leave you confused.
If you are not sure what you are doing, it is best to compare your signal with a compressed one, just to know how hard you can push. Also, try to go for some softer settings, where you cannot ruin your signal. That is the reason we reach out for parallel compression and do it parallelly to the original signal.
Compression is pulling the level of the loudest parts and bringing up the quiet sections of the vocal or any other signal.
Best Mastering Compressors: Top 9 Units For Your Mastering Studio!
What Are Optical Compressors: Top 5 Opto Compressors Listed!
What is FET Compressor: Best 5 Models, Guide, and Plugins!
What Is VariMu Compressor: Key To Achieve Classic Sound!
Top 10 Best 500 Series Compressors: Best Models Shown!