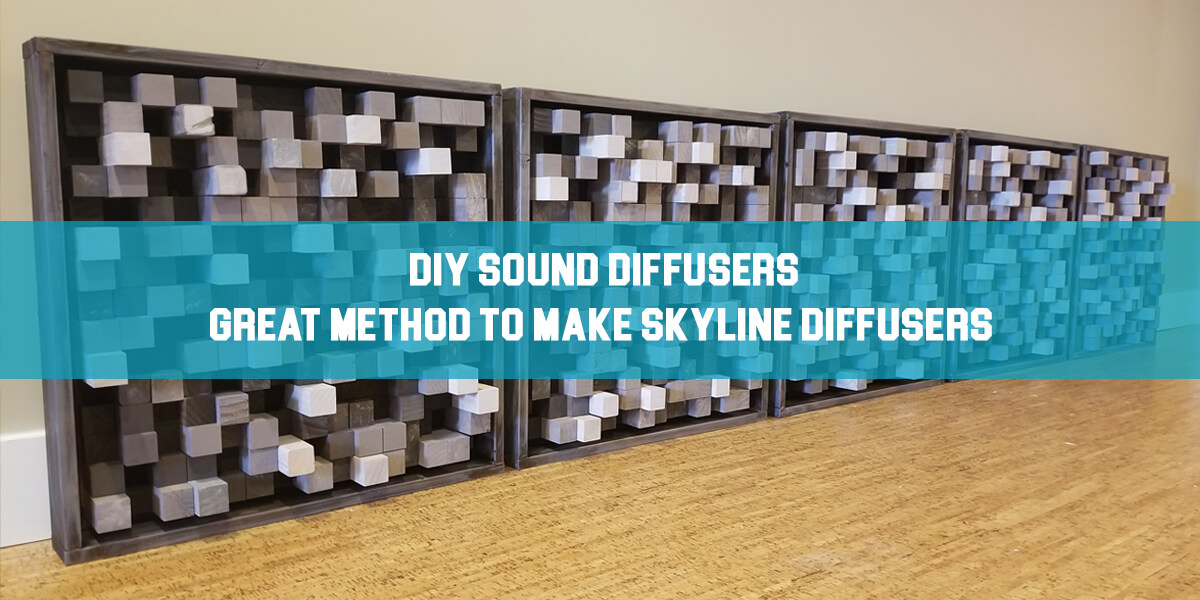
DIY Microphone Pop Filter
Introduction
Almost every picture you see of a voice actor throughout a studio session contains a pop filter. Nevertheless, simply because they’re pictured everywhere, does that imply you really want a pop filter?
Are there methods you possibly can position yourself with the microphone to achieve an identical result? We believe not. The best way to get rid of the sibilants and pop consonants is to use a pop filter. There are methods to lower them, but to eradicate them completely, this is the way to go.
On the subject of home recording, you might discover that it isn’t fairly as simple as your favorite podcast hosts and artists make it look. To save cash on a few of the gear that you just need, you possibly can try some do-it-yourself choices similar to a pop filter. We’ll go over the advantages of utilizing a pop filter and the way to make one on this information. Pop filters come in useful with both vocal recording and podcasting.
To use the pop filter, you are not required to do some specific and hard work. You just need to place it in front of the microphone membrane at least 3 inches and find the best distance for your vocal purpose. Simple as that. With a little bit of DIY work, you will be able to get better vocals and in our opinion, it’s totally worth it. Let’s see what exactly is a pop filter.
If you don’t want to bother to make one by yourself, check out the Top 3 choices from Thomann!
| IMAGE | PRODUCT | DETAILS | |
|---|---|---|---|
 |
|
||
 |
|
||
 |
|
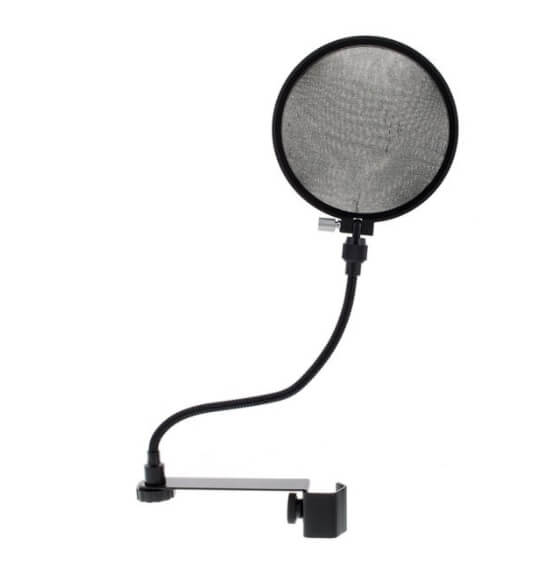
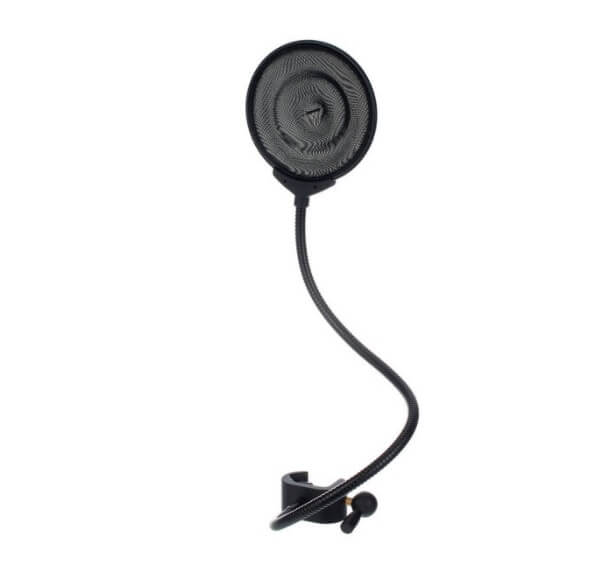
What is Pop Filter?
A pop filter is just a layer positioned between your mouth and the microphone when you are recording. As the title suggests, it filters out the ‘pop’ sounds. These sounds happen if you end up talking or singing, and undesirable air from your mouth hits the microphone.
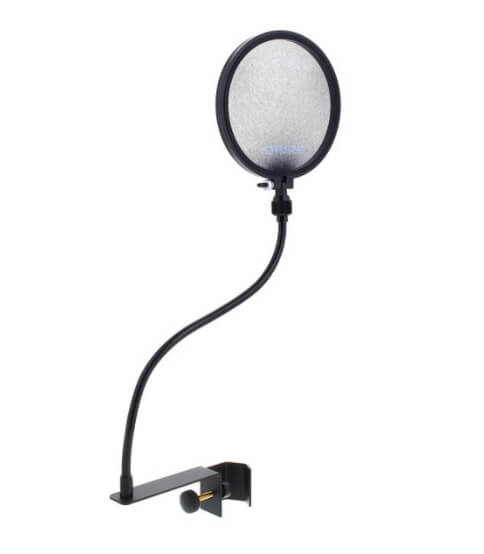
But when there’s a pop filter between your mouth and the microphone, this impact is diminished or eradicated. Physically, a pop filter is a skinny membrane, taut inside a round body. It is available in different shapes as well, however essentially the most prevalent form is circular.
You might have seen it connected to a microphone stand. It’s massive enough to cover the entire microphone and is normally someplace between 6 to 10 inches in diameter.
Pop filters are available in quite a lot of shapes, sizes, and materials, however, all of them have the identical aim: to guard a microphone against disruptive gusts of air known as plosives (or p-pops). By diffusing the air earlier than it strikes the microphone capsule, a pop filter eliminates the distortion and ‘popping’ noise that plosives trigger.
Do You Need One?
As acknowledged above, you want a pop filter to get rid of the ‘popping’ sounds within the microphone. When you’re talking (or singing) in a microphone, the exhaled air could cause undesirable sounds.
This phenomenon is particularly obvious if you end up utilizing words that begin with the letter ‘P,’ ‘B’ and sometimes, ‘F.’ If you utter such a phrase, the sharp air burst leaving your mouth hits the microphone and produces a popping sound. A pop filter protects against that.
Whether or not you’re singing or recording crossovers, you want crystal-clear sound quality. The majority of this falls to the microphone itself, however, ‘popping’ is a phenomenon that even high-end microphones will not be resistant to.
Larger high-quality microphones are generally much more inclined to this because they’re delicate and pick up even the slightest variations within the air. Thus, a pop filter is crucial because it absorbs the mechanical influence of the air that you’re exhaling, and your microphone catches solely the sound you need it to.
One other good thing about a pop filter is that it additionally traps any saliva that could be leaving your mouth, prolonging the life of your microphone.

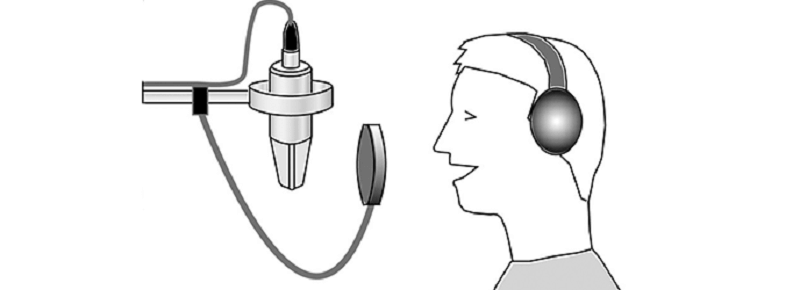
How far should the Pop Filter be?
How far you place your pop filter actually relies on the quantity of energy you or your artist goes to express when recording. The further the pop filter from the microphone, the lesser the pops shall be.
Nonetheless, distance means that you will want to extend your microphone gain. Extra gain means extra room noise.
So, take it like, a louder tougher sort of singing, the pop filter ought to be a couple of palms distance from the microphone. In case you’re recording softer intimate singing, you possibly can place the pop filter about 2 to 3 fingers away from the pop filter.
That is simply the rule of thumb that we take advantage of once we record for our needs and for different folks.
The part for you is to experiment and discover the correct distances that go well with the room ambiance and when the vocals are in your mix. Familiarize yourself with the type and style of what you or your singer shall be recording. That will help you bring the right decision about the distance of the pop filter from the mic and from the mouth of the artist.
3 DIY Ways to Make a Pop Filter
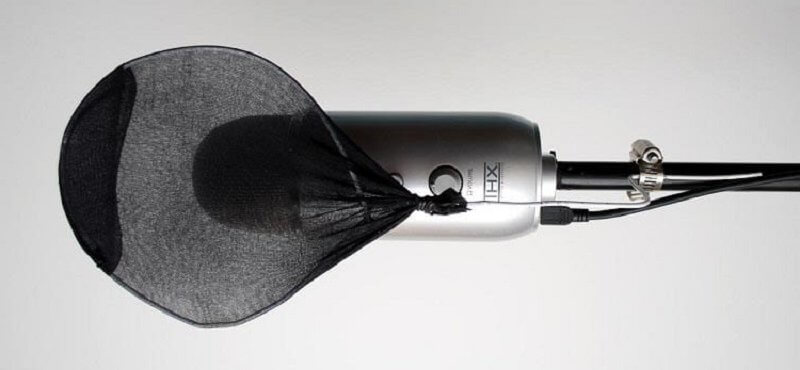
1# Coat Hanger Wire Pop Filter
- Take a wire coat hanger and bend it to a circle. Then pull the circle aside in order that it forms more of a square form.
- Pull the flat sides of the form to make it extra of a circular form.
- Find a pair of outdated pantyhose and stretch them over the coat hanger circle. The additional slack must be gathered across the hook of the hanger. Pull the pantyhose as tight as doable.
- You’ve got now created a pop filter. Place it directly at the entrance of your microphone. Ensure that the filter doesn’t really contact the microphone.
Find out how to secure the pop filter in place:
- Straighten out the hook of the wire hanger and bend it into a large curve. Secure the tip of the wire to the microphone stand with tape.
- Connect the tip of the wire to the mic stand with a clamp holder
- Get a second microphone stand and connect the pop filter to it. Then place this filter as wanted.
- Regulate the filter place to go well with the kind of mic. A few of them take the sound from the top whereas others accomplish that from the side.
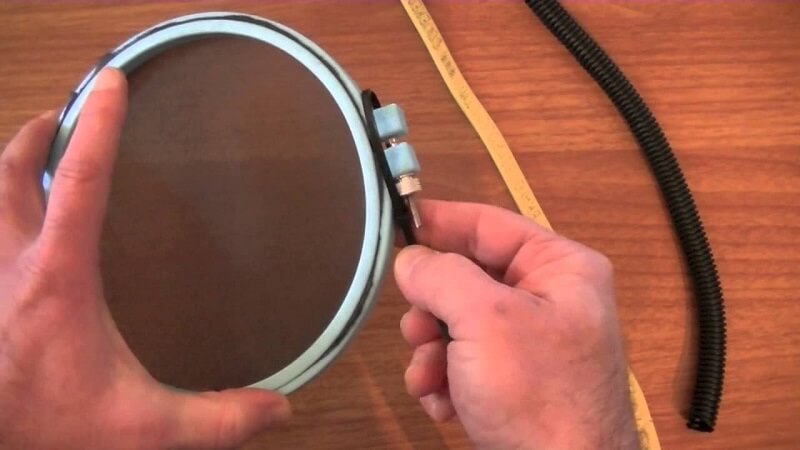
2# Embroidery Hoop Pop Filter
- Take nylon pantyhose and reduce off one leg on the base. Subsequent, cut straight throughout on the tip of the foot, leaving as much material as possible, leaving an extended nylon tube.
- Run your hand inside the stocking and start to stretch the fabric after which cut the stocking lengthwise, operating your scissors inside the stocking and slicing an extended straight line from one finish of the stocking to the other.
- Fold the nylon sheet in half in order that it makes a square, two layers thick. Stretch out nylon to cover the embroidery ring.
- Unscrew the embroidery ring and stretch nylon material throughout it till it’s taut (it may be useful to ask a helper to hold the ring to take care of tightness)
- Place the outer embroidery ring on the inside embroidery ring and screw it together.
- Reduce extra nylon alongside the edge of the pop filter
- Place the filter on a desk with the tough side up. Firmly attach a wire to the clamp of the embroidery ring with 1-2 zip ties.
The right way to fix it in the front of your microphone:
- Connect the hose clamp to the microphone stand or boom arm, ensuring it’s close enough to the mic to totally cover it.
- Run the underside of the wire between the clamp and microphone stand and tighten the clamp with a screwdriver till comfortable
- Optional: for an extra completed look, take a length of the colored split loom conduit tube and slip it over the wire, working from one finish to the other. Trim to suit.
- Place pop filter arm by bending the versatile wire extension.
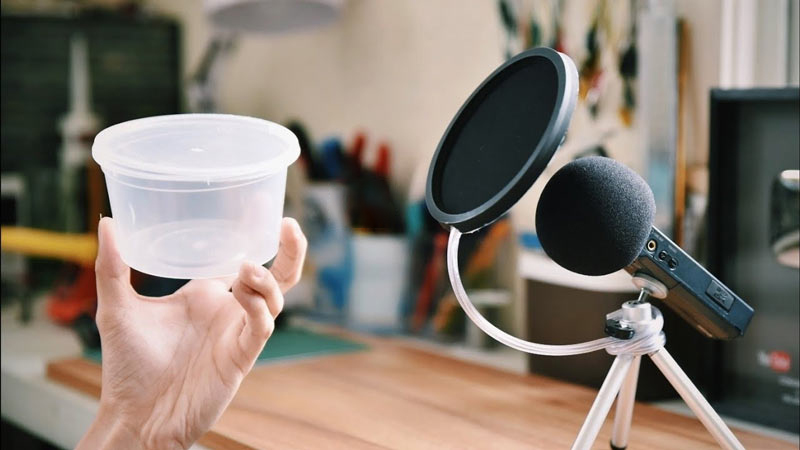
#3 Plastic Cap Pop Filter
- Take a cup from a plastic container, possibly a circular shape or big enough to cover the front of the microphone.
- Cut out the inside of the plastic cup and leave in only the outer thicker plastic that clamps over the container.
- Use pantyhose to cover the plastic circle. If one layer is thin, twist it at the end and make another coverage onto it. Now you will have two layers of material which should be better for this purpose.
- Use a bendy wire to tie the materials in order to stay like that and not disassemble when manipulating with it. Try with some hard clamps to fix it together and you will be good.
Fixing the pop filter to the microphone stand:
- Use a wire to attach the created pop filter to the microphone stand.
- You can connect it with a tape to it since it is a light pop filter.
- You can also connect it on two spots for higher stability and the best option do to it is with a clamp. After that, you will have the security to move the wire and readjust the pop filter to your needs without any issues.
Conclusion
Pop filters are a helpful piece of the podcasting package, as they remove distracting distortion brought on by plosives. Whereas there are many ready-made pop filter choices, there are additionally a number of low-cost and simple choices to make a pop filter yourself.
Eliminating the sounds that come from speaking into your microphone is straightforward with the correct kind of pop filter. You’ll discover dozens of choices that you should utilize in addition to microphones that have built-in options.
There are additionally some straightforward DIY strategies that are appropriate for novices. Our guide goes over a few of these strategies and reveals to you how you can make a customized pop filter.
If you have any other suggestions of DIY methods for Pop Filter please let us know and we will update our guide. Thanks for being with us in this article as well!