How To Build A DIY Vocal Booth
Introduction
A DIY vocal booth is a perfect answer for recording nice-sounding vocals at home. To have this booth at home, you will eliminate the room sound and recording vocals will become a much simpler process.
Vocals are one of the essential elements of music. Getting them proper in a home recording studio could be tough. If you are having flat walls with no acoustic panels, even acoustic foam will do better than a bare wall.
There are no fancy mixing strategies that may save you if you happen to record your vocals poorly on the source.
A booth additionally retains out exterior noises. That is vital when recording, particularly at home, where you’ll have a variety of extraneous sounds like people if you happen to live on a busy street or other family members.
You definitively need a vocal isolation booth if you are having many external noises. That will also improve the vocal sound and when recording vocals.
It won’t be a soundproofed area in case you’re doing it yourself, however, it can soak up an awesome deal and this is applicable to each incoming noise and your own sound.
If you do not have enough time and skills on your hand to make your own vocal booth, here is an option for you:
| IMAGE | PRODUCT | DETAILS | For EU Customers |
|---|---|---|---|
 |
|
But if you do not have one, and you want to build one – there are certainly many ways to do it.
Whereas you could have a gorgeous voice, your neighbors won’t wish to hear 200 takes of the identical tune. Your vocal booth supplies somewhat extra safety for the music escaping.
It’s not nearly discovering a confined, quiet area to record in. Not each small room will improve your sound. You’ll want so as to add some materials and features to make it be just right for you.
A wardrobe or cabinet could also be okay for the spoken word, however, sung vocals want a special type of atmosphere to sound their best.
Nevertheless, it’s not hopeless. With just a little information on the fundamentals and a few common supplies, you’ll be able to create a surprisingly efficient vocal monitoring surrounding at home.
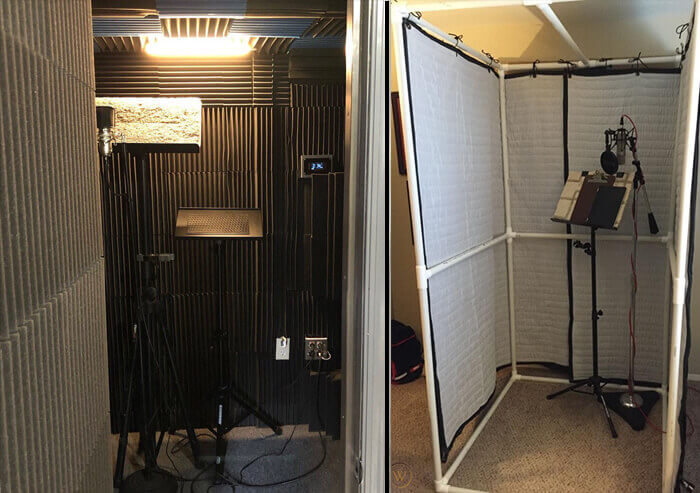
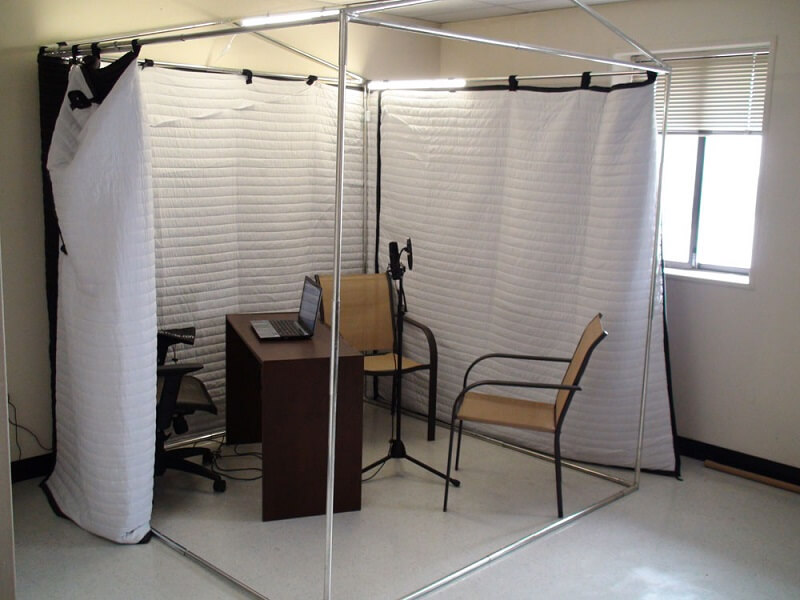
Right here are all the things you might want to construct a DIY vocal booth to get studio high-quality vocals. In case you want to have a portable vocal booth, you can create one with a PVC pipe structure and just throw some heavy fabric on and around it.
That will act as an isolation booth and your room sound will improve in no time. Actually, the room sound should be the priority when creating the vocal booth design.
Make precise calculations for your vocal booth 3 times over to be sure you have it right.
Why build a DIY Vocal Booth?
You can’t simply record your vocals in any room if you need them to sound polished and professional.
Any seasoned professional engineer will inform you that the surroundings where you record is simply as essential as your gear—if not more!
Since vocals are sometimes the loudest, most outstanding component of a track any unfavorable results of a foul-sounding room can be front and center in your mix.
Engineers record vocal tracks as dry and direct as doable to make them huge and authoritative in a mix.
This means decreasing the surroundings’ impact on the recording as much as possible. The vocal booth options out these surrounding noises and building a vocal booth will surely help that out.
A number of uncontrolled room reflections competing with the dry signal can scale back the punchiness and upfront feel of a vocal track—and make it sound farther away.
And that’s not all. These unhealthy reflections contribute to an unfavorable impact known as comb filtering that’s impossible to take away after recording.
Highly comb-filtered vocal takes will turn your mix process right into a nightmare. That’s the place the vocal booth comes in.
No matter if you have moving blankets, building a curtain, or fabric one on PVC pipe construction, whatever you do to stop these reflections is better than nothing.
Every professional recording studio invests thousands in constructing vocal booths with good acoustic treatment, however, you will get many of the advantages simply with DIY strategies.
It doesn’t matter what style you’re working in, in case your music has vocals a DIY vocal recording booth setup could make them sound better.
If you are tight with cash, there are lots of options to have a booth on a budget, where you will need to use some acoustic foam or acoustic panels. But there are ways to have a DIY recording booth at home at merely no cost.
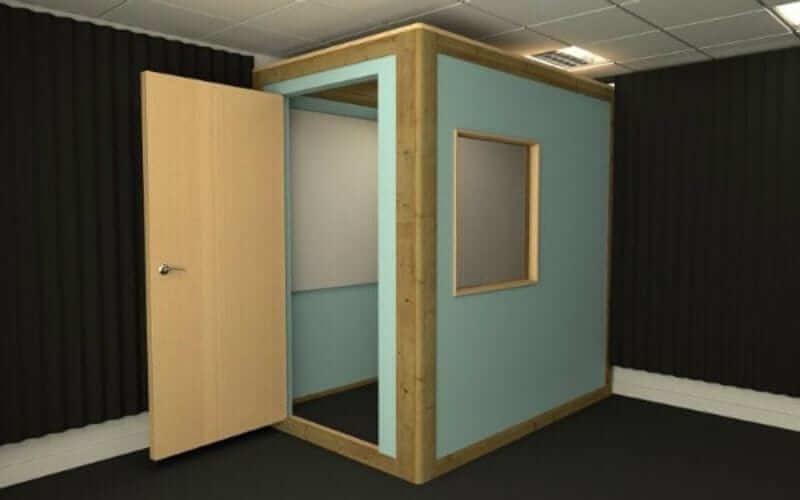
Figuring out the dimensions of the room
Vocal booths are usually created in a tiny room designed to accommodate one or two folks, whereas isolation rooms have to be giant enough to accommodate drums, guitar amp, and so forth.
Most vocal booths are likely to vary from 3′ x 4′ to 4′ x 6′ in measurement. (92cm x 122cm to 122cm x 155.5cm).
Different Points to Think About
Upon getting decided on the dimensions of the room and wall development, it’s best to think about a few of the points that you’ll face as you develop the design.
- Door placement
Smaller rooms are best accessed through a door that swings outward from the room. This will appear obvious to some, however, there have been many vocal booths that have had the doorways swing inward making it tough to get out and in particular when folks, mic stands, and music stands are in the best way.
Sliding glass doorways might be efficient, however, these require more room and naturally introduce a lot bigger reflective surface. Make sure the seal across the door is heavy-duty to cease air.
- Window placement
The window is principally used as a way to see the producer. You’ll want to place the viewing angle in order that the person inside the isolation room can see the others in order that visible cues are readily captured.
- Lighting
Small rooms are likely to get warm in a short time. Due to this fact, low-energy lighting is finest. Additionally, the user of dimmers must be prevented as they typically generate electromagnetic fields that may introduce hum and buzz into the vocal recording.
- Electrical
Be sure to have easy-to-access electrical outlets which are positioned high sufficient to make connecting amps and effects efficient. Wall-mounted power bars are an awesome answer. The very last thing you wish to do is open the door to bring a power wire in! Make sure that all outlets are sealed to cease air passages.
- Airflow
One of the crucial difficult elements of constructing an isolation room is airflow. Small rooms are likely to get heat in a short time and conserving recent air within the room will maintain the talent happy and alert.
The easiest way to introduce airflow is to construct air intake and outflow mazes whereby recent air would enter down low at the flooring stage and exit high up on the ceiling utilizing pure convection to assist the system.
Two or three low-speed fans with a bigger out-flow port sometimes work better than one highly effective fan that should whirl at a higher pace.
4 Fast & Easy Strategies
First up…
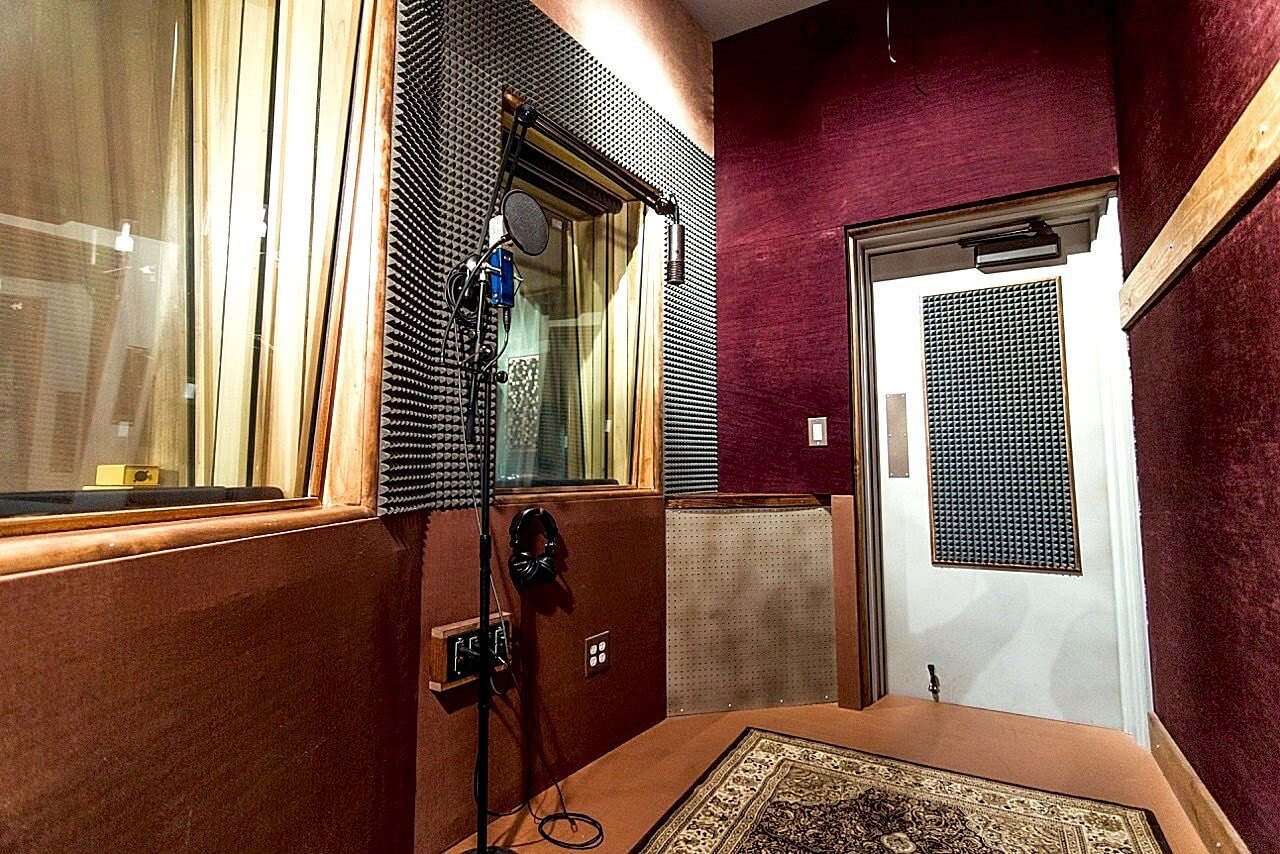
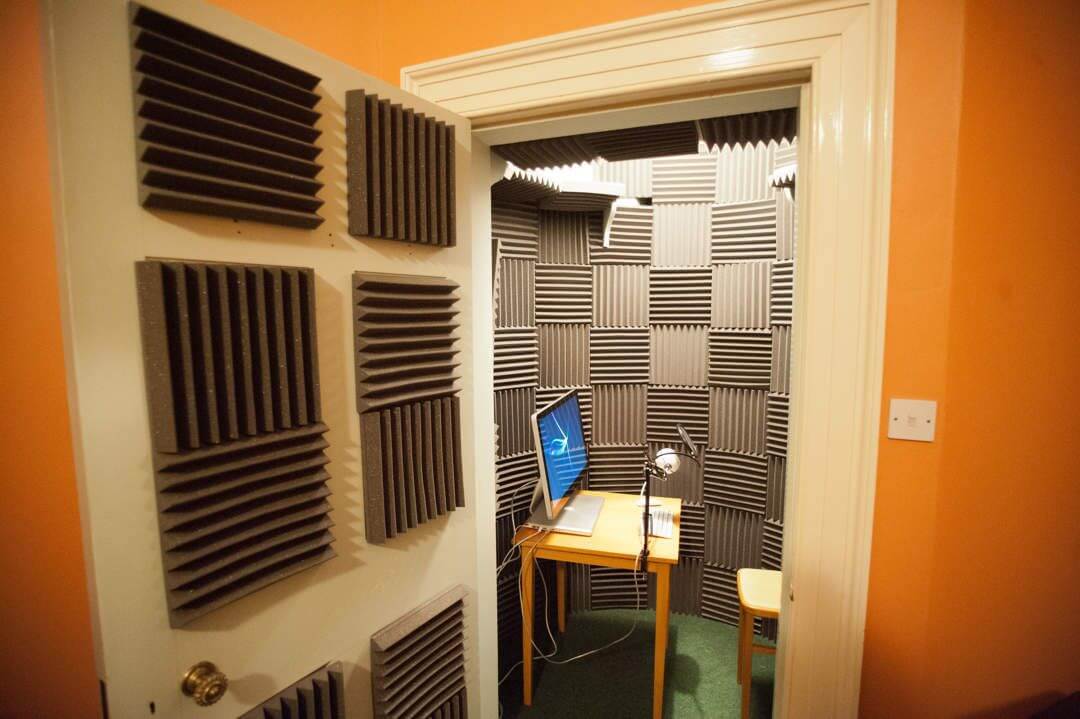
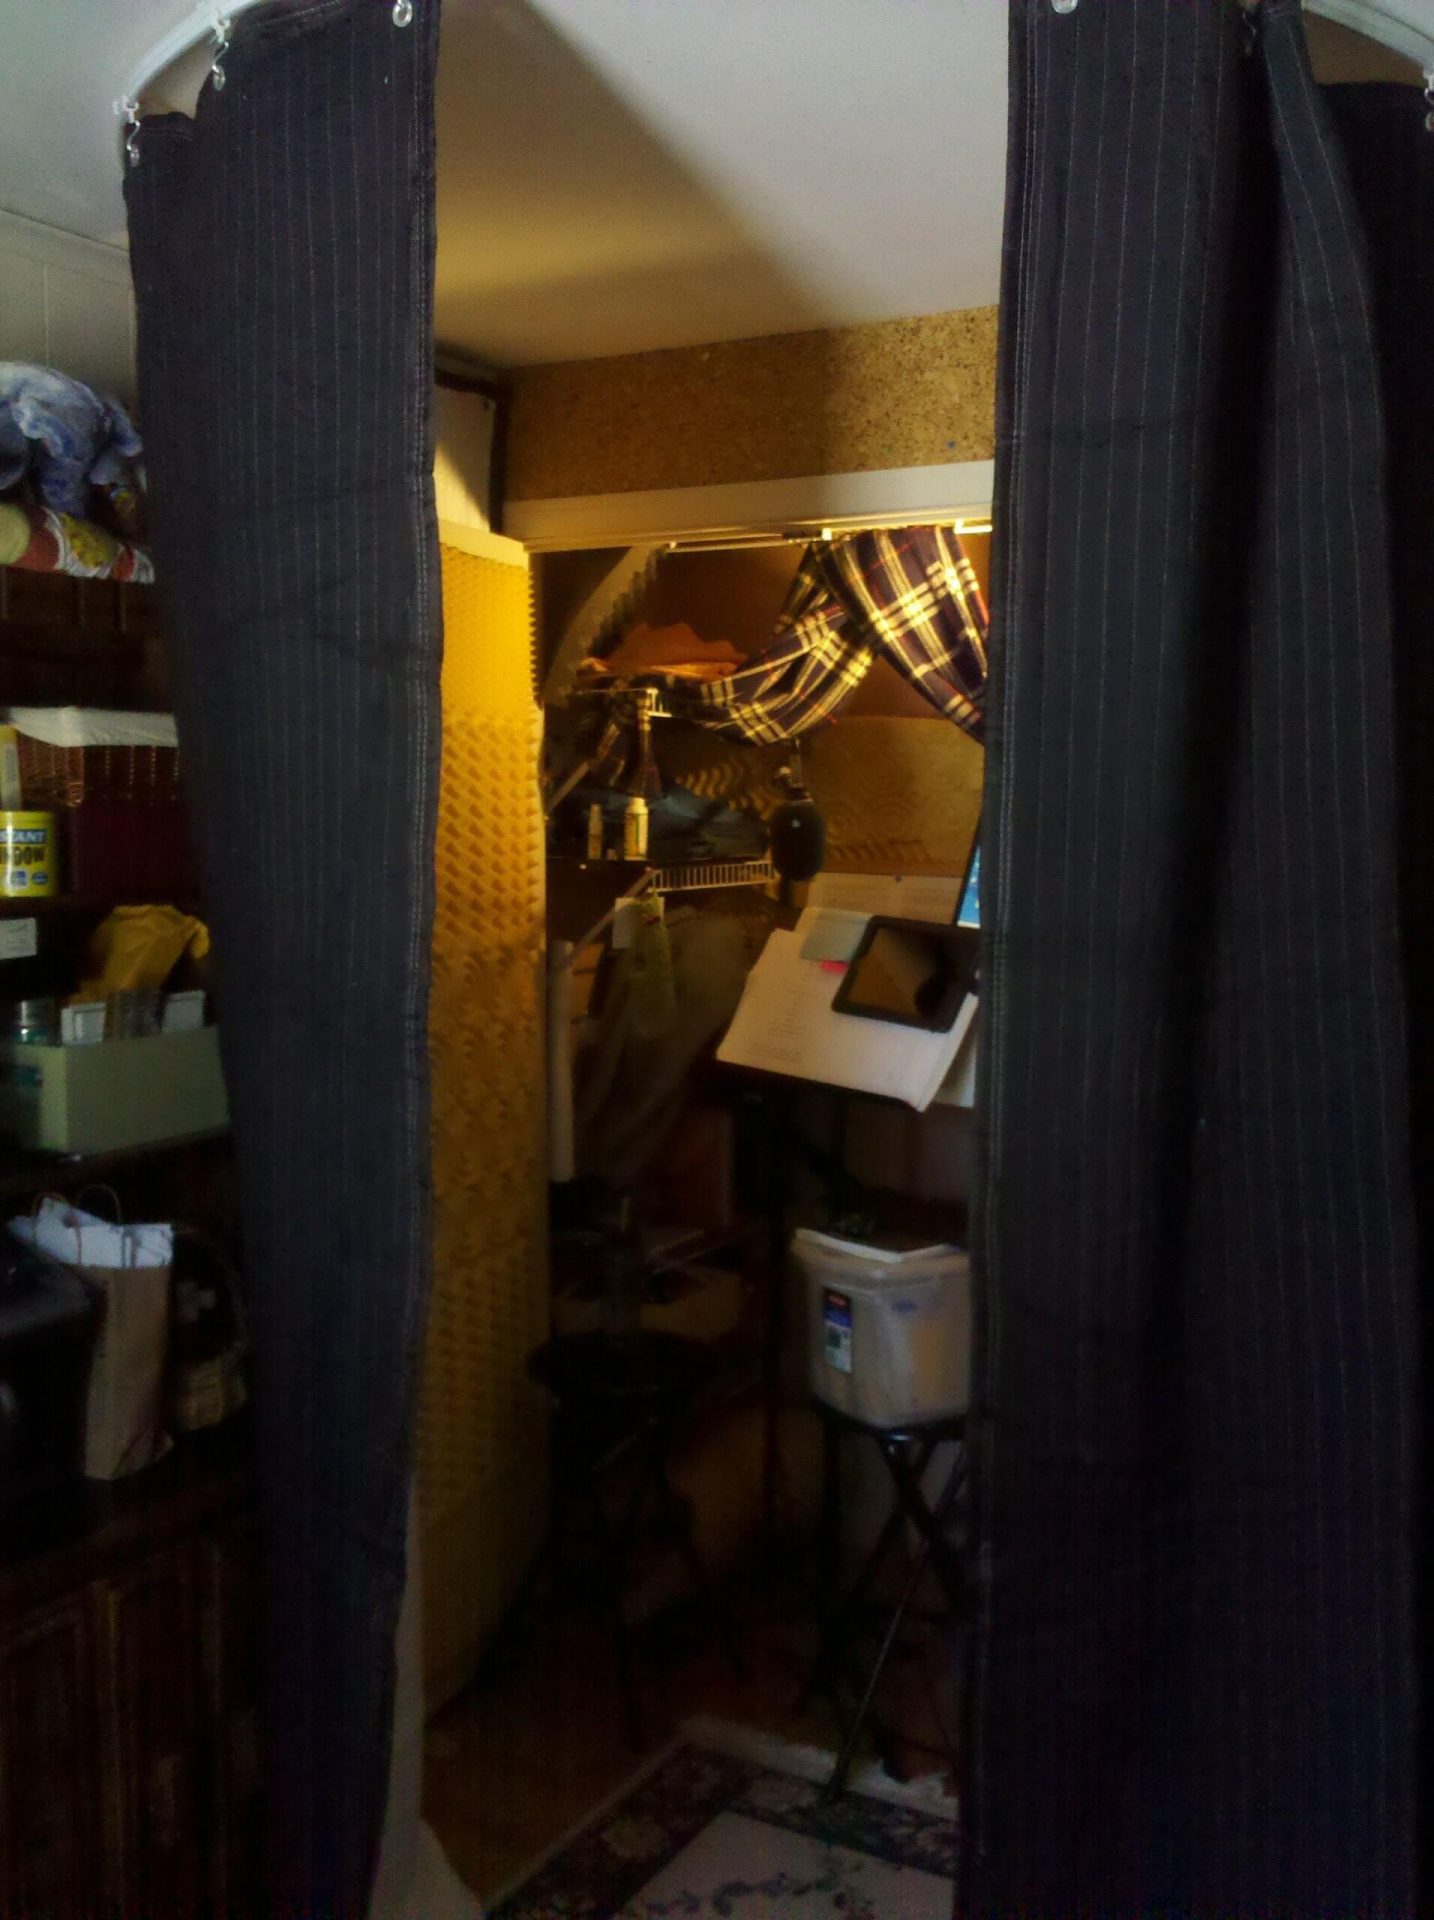
Technique #1: The “Closet” Vocal Booth
The excellent news is that a closet has plenty of options that a person could be on the lookout for with a soundproof booth. It is rather small, so the changes that must be made won’t cost a lot of cash or take a lot of time.
Such a tiny room will be good to have a great booth design and will require minimum acoustic treatment.
It’s additionally pretty isolated already and normally tucked away in a space that’s pretty quiet. Many individuals can do it themselves, so long as they do a little bit of analysis and have some persistence.
Step one is to find out what kind of closet works best. Most houses have at the least a couple of closets, and other people typically want them for actual uses. Discovering one thing that’s small enough and never in use is one of the best ways to go about it.
Most individuals favor going along with both a closet discovered beneath the stairs or one that’s on the top floor. There are benefits to each of the setups. Stair closets are normally very small, and they’re tucked inside a house.
Meaning there are minimal sounds for essentially the most part, however, what some folks run into is the truth that the steps themselves will be noisy if somebody goes up or down.
A closet that’s upstairs is not going to have as a lot of sound as a typical closet downstairs. Take into consideration living in a condo or a shared space of any kind. It’s fairly easy to listen to folks moving around upstairs, however very tough to listen to what’s going on downstairs.
The identical guidelines apply for this, which means that a person may not have to invest a lot of cash into soundproofing materials by constructing on the top floor.
Begin by gathering any additional pillows, acoustic blankets, and clothes from your home, to make use of as a free acoustic treatment. Ideally, the room you select ought to have a lot of shelves for stacking…but when it doesn’t, you’ll be able to simply construct some.
As a normal rule of thumb, thicker absorption is better. Keep away from using the carpet, because it only absorbs higher frequencies. To discover a good sound, merely experiment with extra or much less absorption, until you like what you hear.
Up next
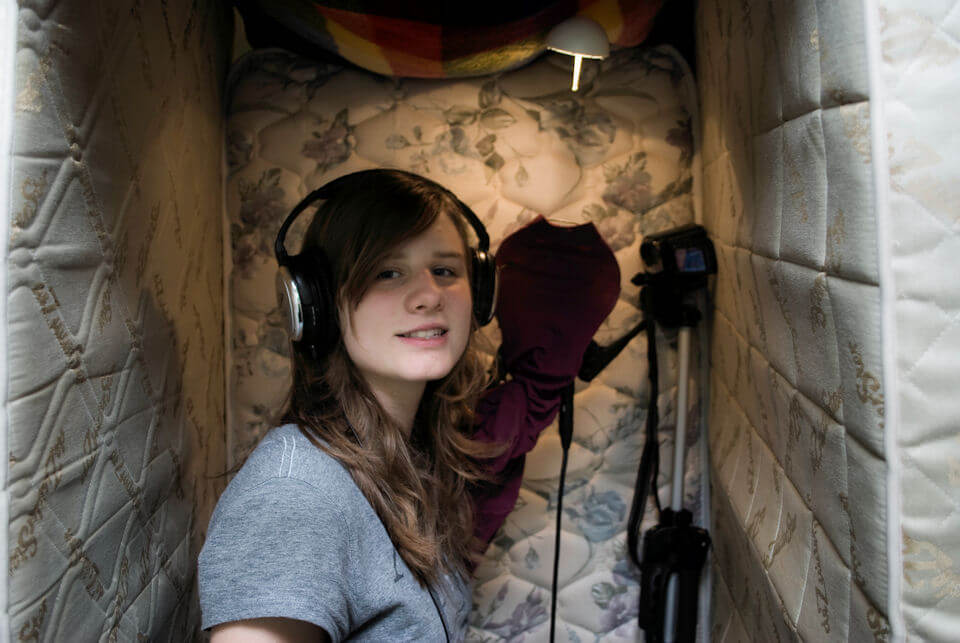
Technique #2: The “Mattress” Vocal Booth
You are able to do it with one mattress, to be honest. The logic was that the voice would bounce off the wall behind the mic, reflect once more behind the vocalist, bounce off a wall, after which bounce back into the sensitive end of the mic.
So if the mattress is behind the vocalist, the reflection of the front wall will likely be trapped by the mattress and never be able to bounce off the back wall to enter the delicate side of the mic. OK, maybe. However for those who put the mattress in front of the vocalist, behind the mic, the voice will not reach the entrance wall, so there will likely be nothing to bounce off the again wall.
The actual reality is that it’s going to depend on your vocalist, your room, and what sort of mattress. So for those who decide to attempt the mattress methodology. Remember to attempt each method. If in case you have a number of mattresses, you could possibly construct your personal mattress vocal booth.
The mattress fort is the best DIY vocal recording booth. You surround yourself with mattresses to soak up sound reflections and room sounds. The downside is mattresses are an ache to stack and store.
This low-cost sound booth alternative additionally offers higher isolation and absorption than the closet technique. The extra-thick materials of a mattress will dampen and take up extra frequencies within the mids and low-mids. Because of this, your vocal recordings will sound extra balanced.
Nevertheless, the effectiveness of a mattress sound booth depends upon the design and the mattresses. For instance, thicker supplies like memory foam work better than a box mattress.
What you want:
One to 4 mattresses. Memory foam mattresses work better than mattresses with strings.
Dense materials to soak up and dampen sound waves. For instance, acoustic blankets, rugs, carpets, and so on.
At some point or another, all of us strive to construct the mattress vocal booth and while most don’t end up as awesome, they actually don’t need to be. As a result of depending on what number of mattresses you will have.
Any of the following easy configurations can work completely:
You probably have 1 – place it behind the singer’s head.
You probably have 2 – organize them in a “V” behind the singer’s head
You probably have 3 – organize them in a “C” behind the singer’s head.
When you want additional mattresses, we suggest trying your local thrift retailer. When you’re buying though, keep in mind that for this function, some mattresses work far better than others…
The WORST type to make use of is the hollow “innerspring” mattresses which supply minimal absorption.
The BEST type to make use of is the dense “memory foam” mattresses which supply tons of absorption.
However as a normal rule of thumb: the heavier…the better.
Up next
Technique #3: The “Curtain” DIY Vocal Booth
Chances are high you’ve by no means heard of it before because the curtain vocal booth works on an acoustic treatment principle that few studios ever explore.
Usually, with absorption, people say that:
Thick is better than thin.
Extra mass is better than much less mass.
However, a third issue that additionally makes an enormous distinction is rigidity. In line with Auralex College’s Acoustics 101 Guide:
“Limp mass is most frequently better than rigid mass.”
And it makes sense when you consider it. In the identical approach that energy from a soccer ball is absorbed by the net, the sound waves of the singer’s voice get absorbed by the curtain.
To construct one, all you need is the next 2 objects:
A round curtain rod – which mounts to the ceiling, and needs to be strong enough to carry a lot of weight.
A big blanket – which hangs instead of the shower curtain, and must be as heavy as the rod can support.
An important part about this design is if you aren’t using it, simply retract the curtain and it takes up nearly no space within the room. Further on we will share some more complicated ways to use a curtain for doing a sound booth or acoustically treat an area.
The acoustic curtain materials have to be thick and extremely porous. The thicker the absorption materials, the simpler it is going to be towards an extended wavelength (lower frequency) of sound.
To be able to be efficient towards “bass” frequencies, sound-absorbing acoustical panels sometimes have to be no less than one to 2 inches thick.
Since it might not be sensible to have a 2” thick material, you could choose the thickest, heaviest cloth your budget will allow. We like to recommend a 32 oz. cloth weight (or better).
The fabric must even be extremely porous. These pores act as hundreds of tiny sound traps, capturing the vitality and turning it into warmth.
A non-porous vinyl, leather-based, or acrylic-faced cloth will mirror a lot of the sound energy, lowering the effectiveness of your acoustic treatment material. Select a cloth that would take in and absorb water, or has a plush, velour floor.
The material may also grow to be more effective at absorbing longer sound wavelengths (lower pitches) whether it is spaced a number of inches from the wall or window.
Up to some extent, the deeper the spacing, the extra enhancement to low-frequency absorption you will notice. Take into account spacing the drape 6 to 12 inches from the surface behind.
To be able to enhance the low and mid-frequency sound absorption efficiency of your acoustical curtain, the fabric has to be pleated. This can trigger the material to be “gathered,” such that it loops out and in (i.e. doesn’t lay flat).
The pleating needs to be as deep as attainable with a view to exposing extra sound-absorbing surface, thus increasing efficient thickness and enhancing low-frequency sound attenuation.
And now for the final option
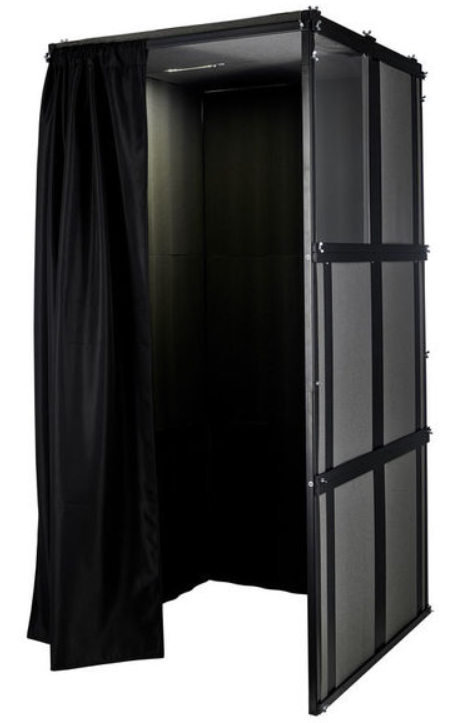
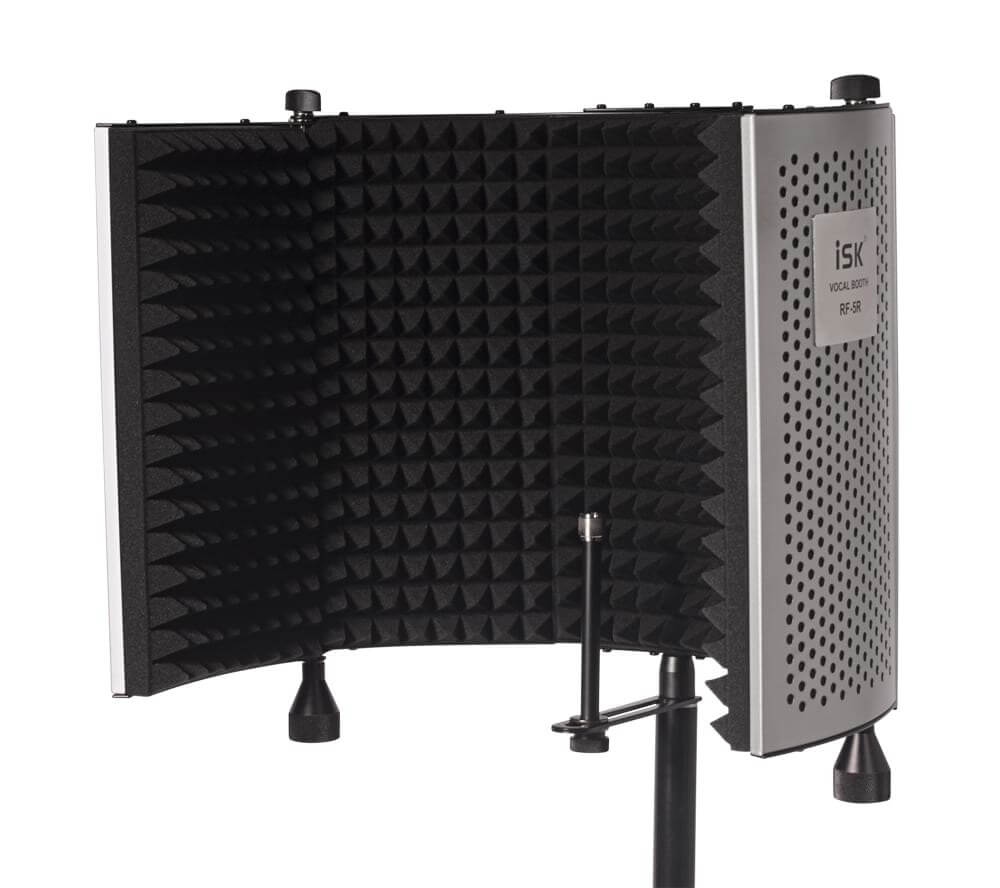
Technique #4: The “Mini” Vocal Booth
So right here’s the one final resolution that requires ZERO work in your part: Often called a reflection filter, this device is basically a “mini sound booth” that mounts to your mic stand, and wraps across the microphone.
Not only does it look cool…
It’s surprisingly inexpensive…
And it’s sufficiently small to take with you on the road.
Perhaps after you ran all of the numbers, you discovered it simpler to purchase an already-made skilled microphone isolation box. We did some analysis and browse a bunch of critiques, and the one we noticed that might be excellent for somebody on funds is the “Portable Microphone Studio Voice Booth Isolation Box” from Amazon.
You may sometimes purchase certainly a mini microphone sound booth for around fifty bucks. All these containers are excellent for Podcasting and Youtube voice-over recordings.
Please let us know if you happen to efficiently construct one of these microphone vocal booths. Tell us if you happen to did something totally different or if you happen to discovered better offers on the supplies.
Frequently Asked Questions
How can I record my voice at home without a mic?
Your telephone, tablet, or laptop computer could have an inbuilt mic. This won’t be one of the best, but it surely’s sufficient for some fundamental recording. If you wish to launch your recording for download or demo, it’s best to spend money on a mic, even when it’s a budget or second-hand one.
How do you record clear vocals?
Utilizing a good vocal booth will reduce out undesirable noises. However, an awesome mic will even help you out right here. Moreover, get your voice itself sounding clear by chopping out dairy products and ingesting loads of water. The editing and mastering process may also clear up your voice.
What if there are not any usable closets to work with?
For these individuals who don’t have any closet area however do have areas where some voice recording is possible, there are pre-built sound booths if you desire to try them out. They don’t take up that a lot area, and might go anyplace in a house.
The good news is, they aren’t that costly anymore, as more corporations are placing them collectively as options. There are definitely ones that may price hundreds and hundreds of dollars, however, cheaper options can be found that most individuals will find themselves going with. Even when it does cost a decent sum of money, it pays for itself right away.
What’s a vocal booth to go?
This merely refers to a portable vocal booth. A vocal booth to go is helpful if you wish to record in different places, as well as at home. You should purchase a standalone vocal booth to go or make your personal using acoustic blankets and PVC. This will then be collapsed and rebuilt in one other location.
Conclusion
If you’re not planning on renting some time at a professional recording studio, you should use any of the strategies we described above to purchase or construct a vocal booth. No matter if you decide to go for acoustic blankets, mattresses, or closet one – having a DIY recording booth will fit nicely in your home studio.
The most important thing is to have good sound absorption and stop the sound waves to hit the microphone directly. With this, you will improve your vocal recordings and you will be one step ahead in getting better recordings.
After you clear up the problem of getting a spot to record your vocals, you might be additionally going to need some voice-over gear to use to make the recordings.
Then, add a high-quality microphone that has a design for recording vocals in a home recording studio setting. After that, you should be all set and able to record.
Conduct a number of test recordings in your new room after which add more sound-absorbing materials if needed. Make changes till you get a recorded sound that has a really high degree of presence for the voice.
You wish to seize a powerful, clear sound with no reflective sound from the walls of pure reverb from the room where you make the recording. To achieve that, a DIY booth on a budget will be a great addition to your home studio.
Here is a video on how to make your own DIY vocal booth:
Check our eBook on Mixing Tips! If you want to get a more in-depth breakdown of those tips we share, follow our link and get the “Ultimate Mixing Tips Booklet” and up your game quickly!
Royer R-10 Ribbon Microphone Review: Amazing Ribbon Mic by Trusted Developer!
Tonor Orca 001 USB Microphone Review: Great Budget-Friendly Gaming USB Mic!
JZ Microphones Vintage 67 Review: Amazing Mic and Great Sound!
Austrian Audio OC818 Review: Great Large Diaphragm Mic to Have!