How to Record Vocals
Introduction
Every musician wishes of recording in an enormous, fancy studio with a world-renowned producer, nonetheless, the honest truth is that the majority of us are getting by on pretty tight funds.
Fortunately, with a couple of easy hacks, some production information, and just a little bit of endurance, you could get your own home recordings sounding terribly close to what an expert studio could deliver. In this article, we’re going to attempt to present to you how to record vocals and a number of other different easy steps to boost your quality.
Certainly, one of many best telltale indicators, that the track wasn’t recorded professionally is how the vocals sound, so we’re going to let you in on a variety of professional methods to nail your vocal tracks with the gear you already have at home.
Select the best microphone
There’s an entire world of various microphones on the market, from USB mics, condensers, dynamics & ribbons all starting from the very low cost to the ridiculously expensive.
So, which one must you use? Well, that relies upon you. Totally different mics work better in different conditions and on totally different voices.
With vocals, you may discover that a $200 mic fits the voice your recording better than a $3,000 one, so strive to not get too carried away with costly gear. Simply since you’re utilizing a costlier mic doesn’t essentially imply you’ll get a better end outcome.
When recording a lead vocal, we all the time go for a large-diaphragm condenser microphone as they are typically clearer and extra delicate compared to dynamic mics. They’re excellent for capturing the element and nuances that make a vocal distinctive, and that’s what makes a vocal recording nice.
To not say dynamic mics can’t work with vocals, however, usually, they’re utilized in live conditions because they’re usually just a little more robust.
There are so many in the marketplace inside the $200 to $500 range that are of wonderful quality so that you don’t essentially have to break the bank. We’ve discovered that a Rode NT2000, which is around $500 sounds finest for our purpose. Before that, we used the Behringer B2Pro which was lower than $200.
Microphone Placement
That is a simple one. You need the microphone as near your mouth as possible, right? Well no!
It’s all too frequent seeing folks record once they’re far too near a microphone. In case your lips are touching the mic, then you’re going to undergo a complete host of issues, such as the proximity effect. You really, actually need to keep away from this.
Ideally, the microphone must be one hand away from your mouth.
We imply one hand width out of your mouth. It’s additionally good to note that it must be the singers’ hands. That is actually necessary. If you should record again on one other day, you then need the setup to be exactly the same; in any other case, the recordings might be noticeably different.
This distance offers a variety of clarity whereas additionally avoiding the dreaded boomy proximity effect.
Think about these microphone position ideas:
- Be certain that the singer is standing straight and facing the mic. Correct posture gives you greater efficiency.
- Begin with the mic horizontal and 6 inches away from the singer’s mouth. That is the perfect default place.
- Lowering and tilting the mic upward towards the singer will intensify the high-end.
- Aiming the mic downward toward the singer will intensify the low end.
- Singing nearer to the mic sounds warm and extra intimate. However, you threaten to clip if too close.
- Singing further away from the mic sounds airier and extra spacious. However, you threaten to lose sheen and detail.
- Attempt shifting the mic 20 degrees to the left or right of the singer. Tilting the mic off-axis a small amount reduces sibilance and plosives.
Correct microphone technique is essential for a very good recording. The gap, peak, and angle of your microphone placement can change the tone of the vocal recording.
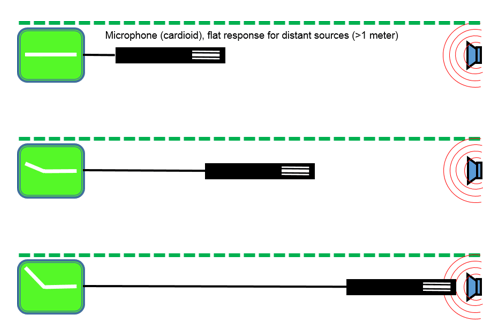
Proximity Effect
One other necessary consideration is the space from the mic. Altering the space between the source and the mic changes the feel of the vocal recording. The larger the space, the lighter and less “rounded” the vocal recording is.
This is named the “Proximity effect”. This states that the nearer the source to the microphone, the better the level of the lower frequencies recorded.
The proximity effect can be utilized as a technique. For example, in case you want to create a warm, intimate vocal sound. Beware although, too close and it will possibly sound too “boomy” or “boxy”. Additionally, the sensitivity of the microphone does no favors in this respect.
It’s because in case you are recording a singer near the microphone, you run the risk of recording undesirable popping sounds created when the vocalist pronounces Ps or Ts. These are often called “plosives” though we frequently refer to them as “popping”. Inserting a pop filter just a few inches in front of the microphone will help to cut back this. Nevertheless, it’s best to not solely depend on it.
Mic gain and front processing
Lots of people still prefer to record at very high ranges (-3 to 0 DB) however you don’t want to do that anymore as even a reasonably low input degree (-15 or -20DB) will come through with little noise now that every part is digital. We prefer to go between –15 to –7 DB because it’s a pleasant middle ground.
In case your singing volumes don’t differ too much, then when you’ve set it to a level where the loudest part isn’t distorting, then all must be positive. Unless you’re singing an extremely gentle, delicate verse after which a loud shouty refrain you shouldn’t need to alter your gain level for various sections.
A number of engineers use Pre-amps, compression, and EQ when recording into their DAW (Digital Audio Workstation). These may be hardware or software programs, although don’t go excessive with any compression on the way in, as you won’t be capable to undo it afterward when mixing.
We often have not more than a gain reduction of 3 – 4 dB and with a reasonably slow attack and release which can give a pleasant smooth clear sound to it. With the EQ, We would suggest you simply take out the very low end to clear any muddiness up and have a play with making small tweaks to enhance your tone. Once more, don’t go excessive as you won’t be capable of undoing it as soon as it’s been recorded.
Use double-tracking and backing vocals
Double, triple, or quadruple tracking your vocal elements is a technique of thickening and widening them up and helps them stand out in your mix.
You ought to be picky about where you do that though. In the event you do it the whole way by your tune, then it will be much less effective than when you do it in only explicit parts of the tune.
Typically, chorus sections are a superb place to make use of this method, and by panning the additional tracks left and right you possibly can create a pleasant large vocal effect.
Additionally, strive to double-tracking your backing vocals as it’s going to give them a ‘chorus/modulation’ sort of effect. Reducing away a number of the high frequencies will assist them to sit additional back from the primary vocal and create a way of depth to your mix.
Ensure the timing of the singing is consistent when double-tracking because in any other case it’s going to sound very messy. When making a stripped-back arrangement, double-tracking won’t work well, so be cautious of what kind of vocal sound you’re making an attempt to accomplish.
Gear for Recording Vocals
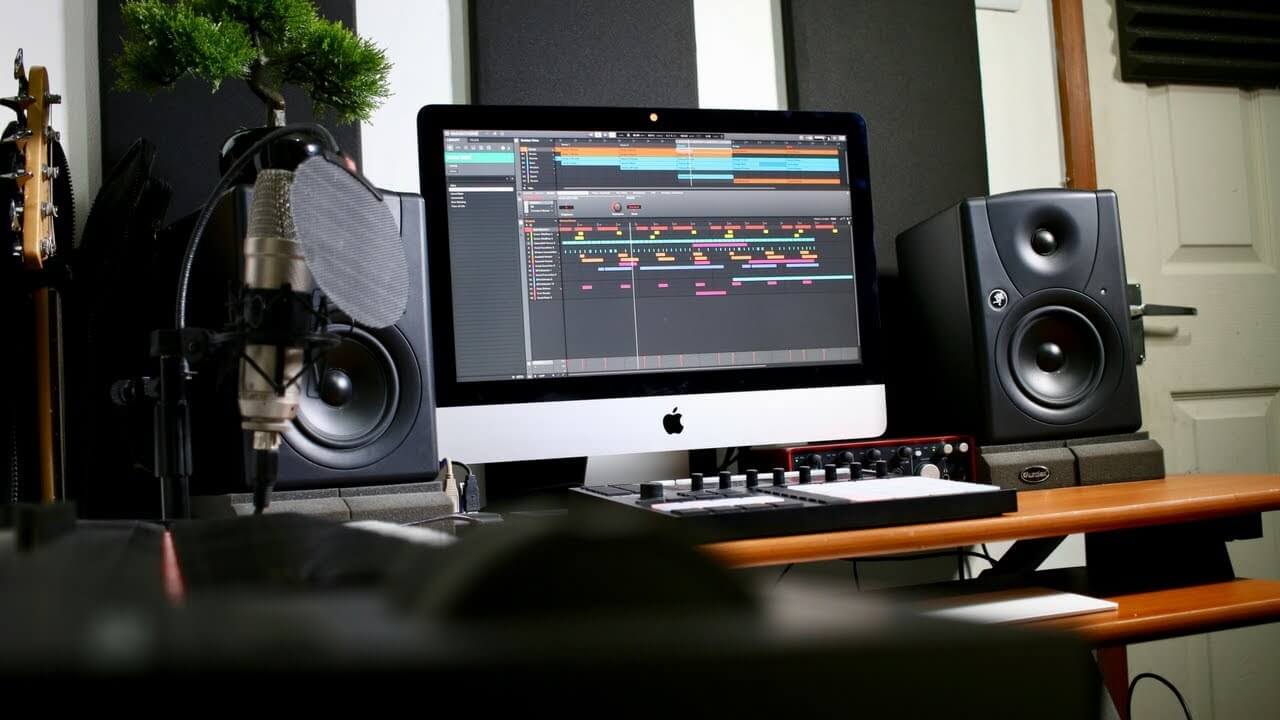
1. Computer
If you happen to purchase your computer within the last 3 or 4 years then it can in all probability be more than enough for recording and mixing your audio tracks. You could discover over time that it’s not enough for recording. If that’s the case then you possibly can improve when it’s needed.
If you happen to determine whether to improve the computer we might advocate the traditional Mac Book or a Windows one with great components needed for music production and mixing.
2. Microphones
Microphone selection will make a huge impact on your end outcomes so be sure to have matched your microphone with the vocalist. You actually need to make a couple of brief check recordings and discover the fitting sound for the vocalist primarily based on their style and the tone you/the vocalist are going for.
There are mainly three varieties of microphones which you could select from:
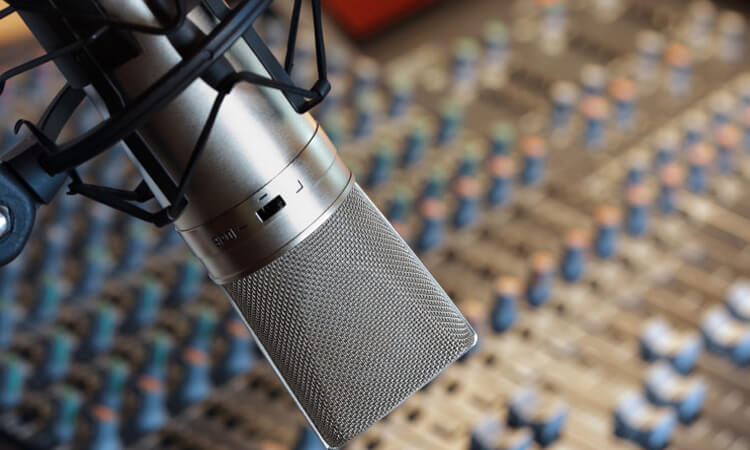
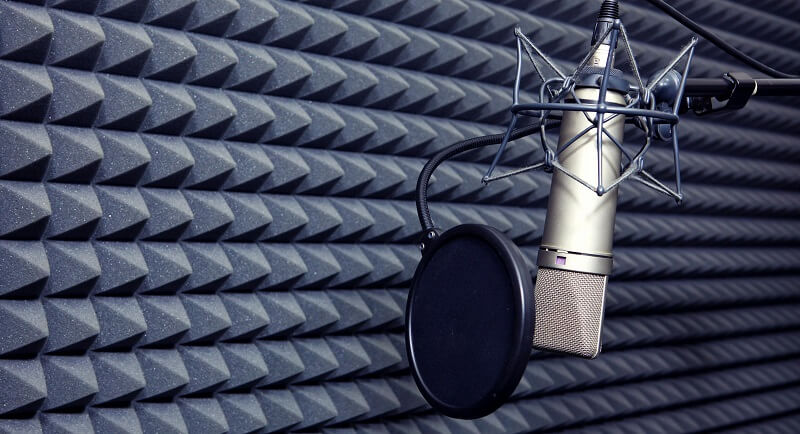
Condenser Microphone
In easy terms, a condenser microphone is your typical studio mic since they’re very delicate and might pick up even the quietest sounds. A big-diaphragm condenser microphone would be our primary suggestion in relation to recording vocals.
Dynamic Microphone
Dynamic microphones are good for recording in a room with a number of background noises or with a number of reflective surfaces that aren’t acoustically handled. Dynamic microphones are much less delicate than condenser microphones and due to this fact excellent for recording in rooms with lower-than-ideal acoustic treatment or background noise.
Don’t hesitate to try a high-quality dynamic microphone because the outcomes could be surprisingly good within the studio and lack the tough top-end frequencies that an affordable condenser microphone could exhibit.
USB Microphone
If you want a very easy setup then a USB microphone could also be the best choice for you. USB microphones connect to your computer through a USB (not like the other two varieties of microphones that use XLR cables). Due to this fact, you won’t need an audio interface when utilizing a USB Microphone.

Mic stands
Microphone stands are easy to overlook in relation to recording vocals however they’re totally important.
In case you’re recording your personal vocals/singing then you could possibly use a desktop mic stand. Some USB Microphones actually have a desktop stand included.
If you’re recording another person’s vocals then you might want a ground boom mic stand.
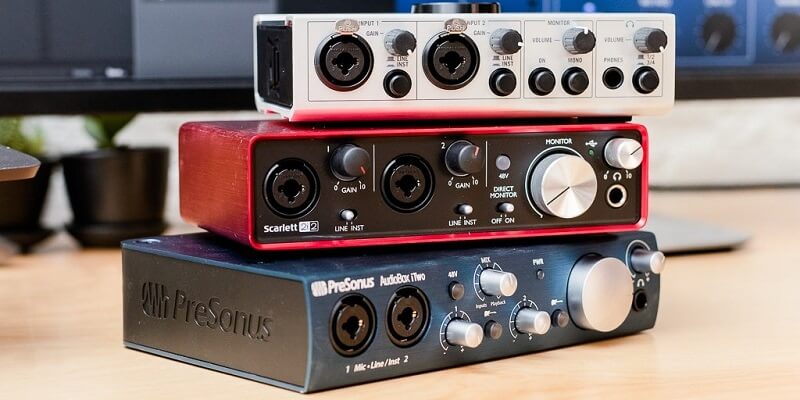
3. Audio Interface
An audio interface is hardware that connects your computer to your microphone and different gear through both USB or Thunderbolt cables. Audio interfaces additionally power your microphone via one thing known as phantom power.
Ensure you select an audio interface that has 48-volt phantom power otherwise, you won’t be capable of using a condenser microphone with it.
4. Recording Software – DAW (Digital Audio Workstation)
The fourth factor you will have is some recording software program aka a DAW. DAW software is what really records your vocals and stores them on the pc. Utilizing this program you possibly can edit and add effects to your vocals.
A few of the most popular DAW Software included:
- Pro Tools Mac & PC Pro Tools | First (The free model of Pro Tools)
- Logic Pro X Mac
- GarageBand (free) Mac
- Ableton Live Mac & PC
- Reaper (free for the primary 60 days) Mac & PC
- Cubase Mac & PC
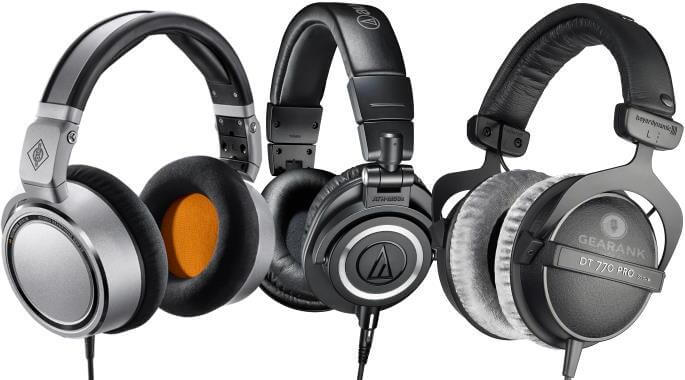
5. Headphones
Headphones are used with the intention to hear your voice and music when you’re recording.
If you’re recording your vocal you will have to turn your audio system/studio monitors off so that you simply don’t get feedback brought on by the microphone and in addition so you don’t record the sound coming out of your audio system.
Tips and Tricks for Studio-Quality Vocals
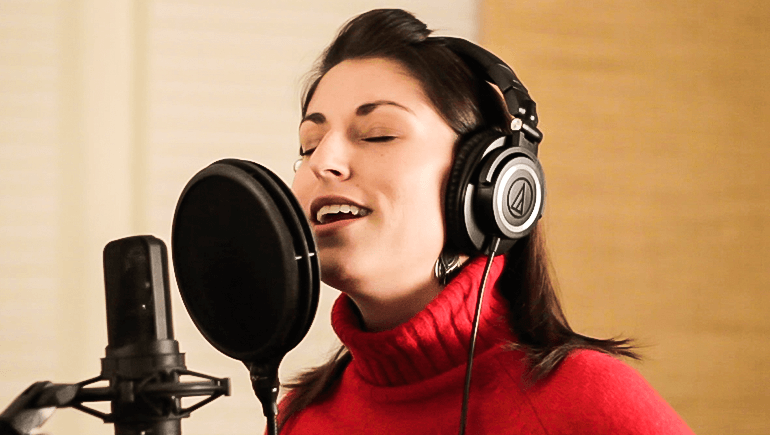
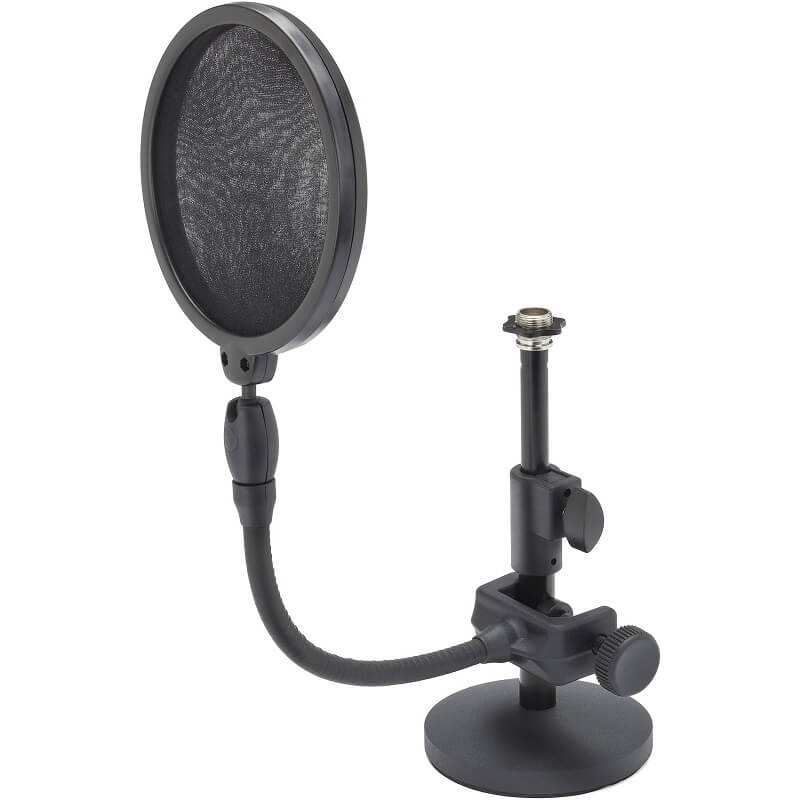
Attempt utilizing a pop filter
Pop filters assist scale back the plosives (bass popping or thumping sounds) whenever you say phrases that start with the letters p or b. Plosives could be tough to edit out of your recordings so it’s best not to record in the first place.
Some microphones are extra delicate to pops than others and a few vocalists have extra plosives than others, so pay attention to pops at the very beginning of the vocal session. We counsel the best pop shields are nylon mesh (not steel mesh) and they need to be positioned around three inches from the front of the mic for the finest outcomes.
Help the vocalist feel comfy
Nice vocal recordings begin with a terrific voice so think about helping the vocalist feel as relaxed and comfy as possible. Everybody will get nervous before a recording and the comfier the performer the better.
Make sure that the vocalist has water out there, and a stand for notes and music. Additionally make sure the temperature within the recording room is excellent, not too hot or chilly. Try to hold the mood relaxed and calm as this may hold any nerves to a minimum.
Rest and Vocal Health
You need to be well-rested before a vocal recording session in a studio. Ensure you have a night’s sleep for not less than two nights before your session. Sustaining good vocal health can also be important.
We might suggest that you refrain from speaking too much or practicing extensively two days before the session. Avoiding alcohol, coffee, and dairy products may be useful to your voice as they’ll trigger dehydration, reflux, or extra mucus. And don’t overlook drinking loads of water!
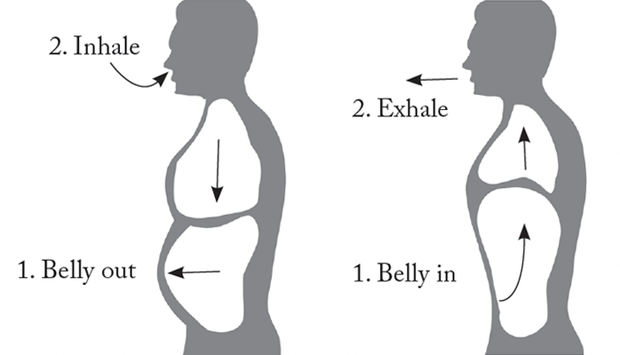
Vocal Warm-Up
It’s important the singer warms up their vocal cords before recording.
Vocal warm-ups are workouts that put together the voice for singing. Whether or not recording within the studio or performing live, vocal warm-up workouts are important for attaining the perfect performance.
Vocal workouts are additionally an integral part of enhancing, creating, and protecting the singer’s voice. An expert singer will use a number of efficient vocal warm-ups.
Additionally, studio sessions may be costly, and time is valuable. Guaranteeing the singer’s voice is able to go will save time, make the recording session run easily, and enhance the standard of performance.
Watch out for your vocal editing
Today’s software gives unbelievable control over recorded tracks for modification. If in case you have some expertise with plugins and modifying tools, that’s nice, however, don’t overuse them or develop too dependent.
Once you’re doing vocal comping, attempt to use huge parts of a given take so that you just don’t smash the vibe and authentic nature of the performance. Fill in only the less strong elements from different vocal takes. Be sure to give attention to the performance, not the pitch modulations of the vocalist. Use elements that aren’t simply sung “well,” but that even have personality.
Autotune and Melodyne are nice tools however do not overdo them (except if you’re deliberately going for that mainstream pop/artificial effects sound within the production). Only repair the defective phrases or sections – do not put the tuning plugin on the entire track.
Basic Vocal Mixing Chain
Corrective EQ
As you’ll have guessed by the title, corrective EQ is used to take away dangerous/resonant frequencies. It’s vital that you simply use corrective EQ before any compression, in any other case, you may be boosting the bad frequencies which can make your vocal sound unnatural and poor.
The simplest method to do that is with a parametric EQ. With a very narrow boosted band, sweep the entire frequency range till you hear a nasty resonance. As quickly as you hear it, attenuate it and reduce it out of the mix, maintaining the narrow band. The purpose of corrective EQ is to surgically take away these resonant frequencies to save you from a headache later down the chain.
Compression
Compression is the important thing to making your vocals smoother – not louder. By controlling the vocal dynamic range, you will discover mixing the entire track is so much easier.
Though compressors usually appear to be one thing from the space shuttle, they’re really very simple to make use of. You can find that starting with a 4:1 ratio, medium-fast attack, alongside a medium release is an effective place, to begin with, your vocal. From right here, you’ll be able to experiment with totally different settings to seek out your good sound.
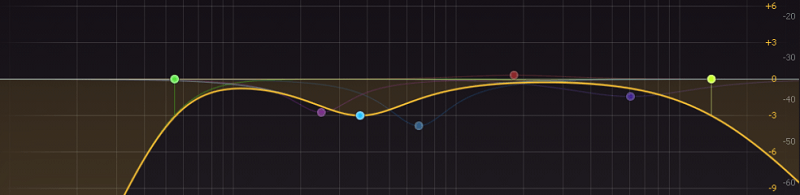
Creative EQ
As the title states, that is where you get to turn out to be a bit creative. You’ve eliminated any resonant frequencies, formed the tone to your liking by way of compression, and should now add some sparkle to your track.
We advocate utilizing a vocal EQ preset as a great place to begin. From right here, you’ll be able to then fine-tune the bands to completely match your vocals.
Typically, you’ll need to add a small enhancement across the 5-6 kHz range. This mild enhancement will brighten your vocal line and assist it to naturally stand out. Next, you’ll almost definitely need to take away some mid-range – across the 1 to 2 kHz space. By eradicating this muddy range, it’ll tighten all the things up and clean out the tone.
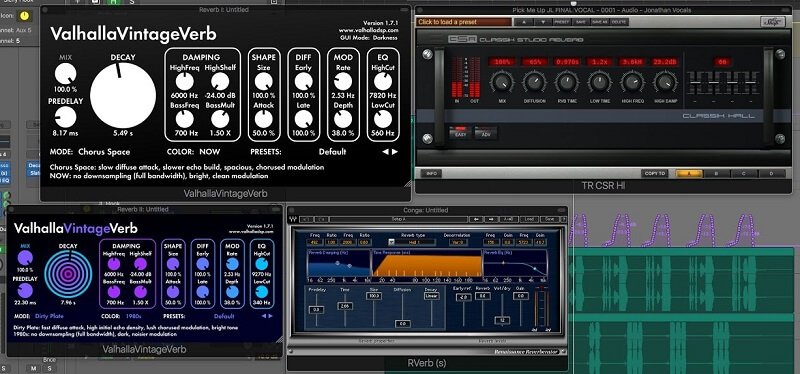
Reverb/Delay
The principal objective of reverb and delay is to add an environment to your vocal. The addition of reverb will add a pure acoustic to your track and can help your singer sound extra natural. However, don’t go too far. An excessive amount of reverb is a quick approach to wreck your vocals, and probably even your total mix! Through the use of an applicable amount, reverb will help you in mixing and can assist your track “glue” together.
Disclaimer: These are the necessary effects in the chain that you will need to use to improve your vocal. There are many other plugins and effects that you will be able to use to make the vocal even better, but this will be enough to get you started and guide you in the right way.
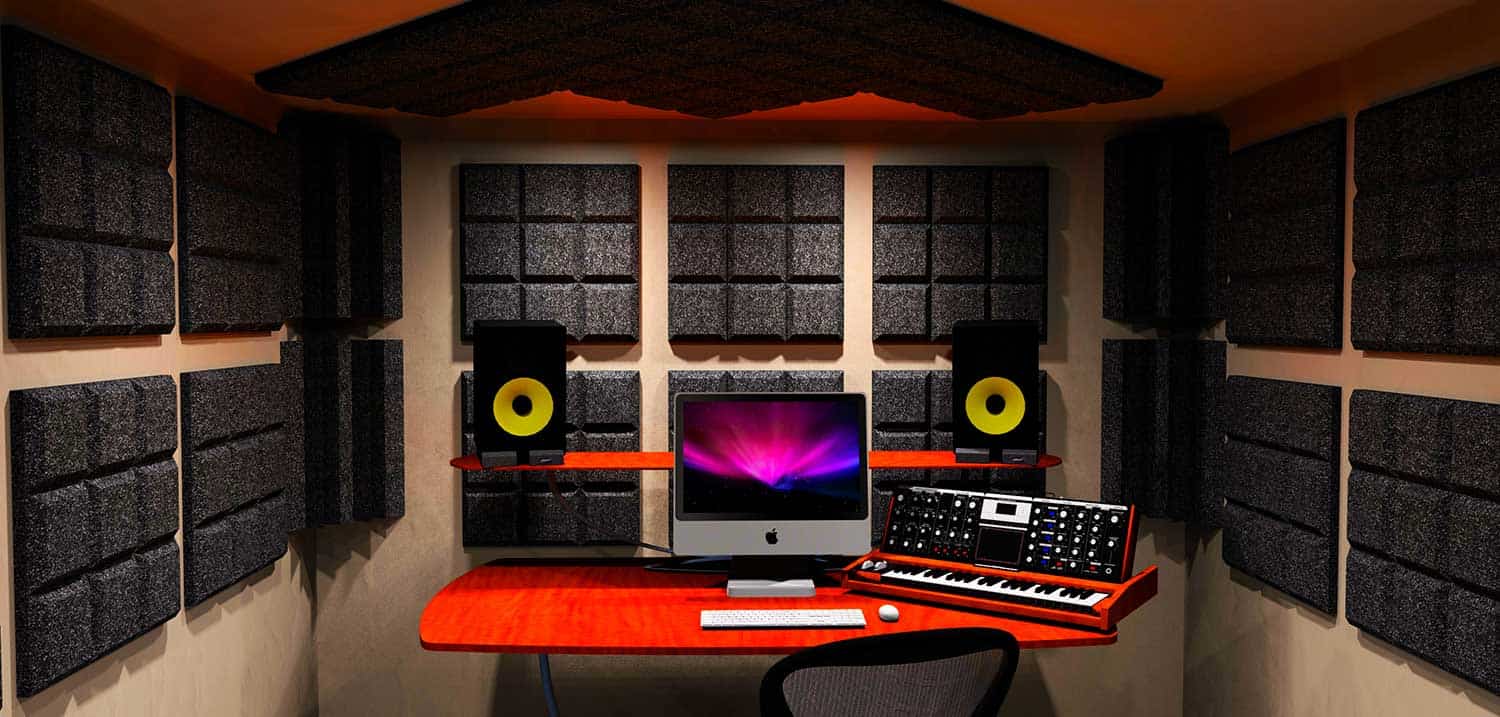
Treating the Room
Once you’ve chosen an acceptable room, stand in the center and clap your hands loudly. Are you able to hear any echo or reverberation of the clap? The extent of this reverberant noise will decide how much work you must do to dampen the room. Ideally, the walls in your room can be good stable brickwork. Typically, the denser the fabric within the wall, the extra acoustic vitality the wall will take up.
Temporary, or stud, walls will present you with the most important problem when making an attempt to deaden a room, so attempt to keep away from a room that has too many. Hanging duvets and blankets can go an extended way to deadening your room, the heavier they’re, the better. Keep in mind, acoustic tiles are available in numerous types however their key activity is to dissipate sound so that it’s transformed into one other energy (warmth) and so doesn’t get back to the microphone. So, when you’ve got exterior noise, acoustic tiles will do little to help.
Corners
Additionally, keep away from putting your microphone near the corners of the room. When you have a budget for acoustic foam treatment, it’s worth investing a proportion of it in some bass traps – triangular prism-shaped heavy foam blocks that cut back the build-up of low frequencies in room corners. Inevitably, you’ll find yourself compromising on many of those components, nevertheless, it’s worth spending some time working through this to keep away from sudden problems further on in your vocal recording.
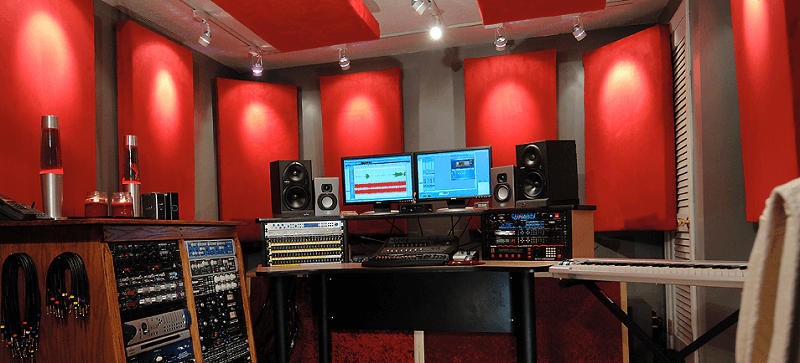
Budget Bedroom Recording Room
In an effort to accomplish a fantastic lead vocal sound in a non-professional setting, it’s a good suggestion to record in an impartial, dry room. You’ll need to keep away from cavernous rooms with reflections and reverberated sound as a result it is going to have an effect on the quality and the control later in the mixing process. Remember that there’s no manner to return to “dry” from a “wet” sound, so make certain the room has a controlled sound, leaning in direction of dry (not “lifeless” although).
A bedroom works nicely because your mattress, blankets, cabinet, and even curtains are all good sound absorbers. In any case, you’ll be able to construct an easy vocal booth utilizing old blankets, curtains, mattresses, and pillows. You possibly can even add a couple of tough wooden panels to create a more pure sound. Keep in mind, an important factor to keep away from is these reflections and echoes typical of hard flooring, empty rooms, and huge rooms.
Nonetheless, you can choose not to spend a fortune on proper acoustic treatment or an expert vocal booth. Many DIY options can enhance your home studio acoustics. The following pointers will improve the acoustics of your recording area:
- Record in a smaller room to cut back reverberance and standing waves.
- Use thick carpet or rugs to adsorb or cut back flooring reflections.
- Place furnishings within the room to soak up sound waves.
- Hang dense materials on the walls like rugs, blankets, and foam to soak up sound waves.
- Cover home windows with curtains to forestall reflections.
- Hang sound-absorbing materials from the ceiling to soak up sound waves.
- Place foam wedges or sound-absorbing objects in corners to cut back frequency buildup.
- Hang or place objects without easy surfaces to diffuse or scatter frequencies.
- Create a temporary vocal booth with mattresses.
Conclusion
At the finish of the day, what you are attempting to seize is emotion. You need the vocal to maneuver and encourage the listener, and to evoke emotions. Within the quest to achieve the right take, there’s a danger of losing all of the little imperfections that would make a vocal track so compelling and memorable.
After all, you need to all the time attempt to get the very best vocal track you’ll be able to and capture it perfectly. But when the selection is between getting a clinically good take and a living, breathing vocal dripping with honesty, emotion, and fervor, the latter will win out each time.
Recording nice vocal tracks are a commonly equal component of artwork and science. Whereas utilizing the proper tools and correct methods are important, it’s simply vital to be guided by creativity and aesthetic concerns. By combining correct recording methods with a way of artistry and creativity, you too might have highly effective and compelling vocal performances in your own productions.
Check our eBook on Mixing Tips! If you want to get a more in-depth breakdown of those tips we share, follow our link and get the “Ultimate Mixing Tips Booklet” and up your game quickly!