
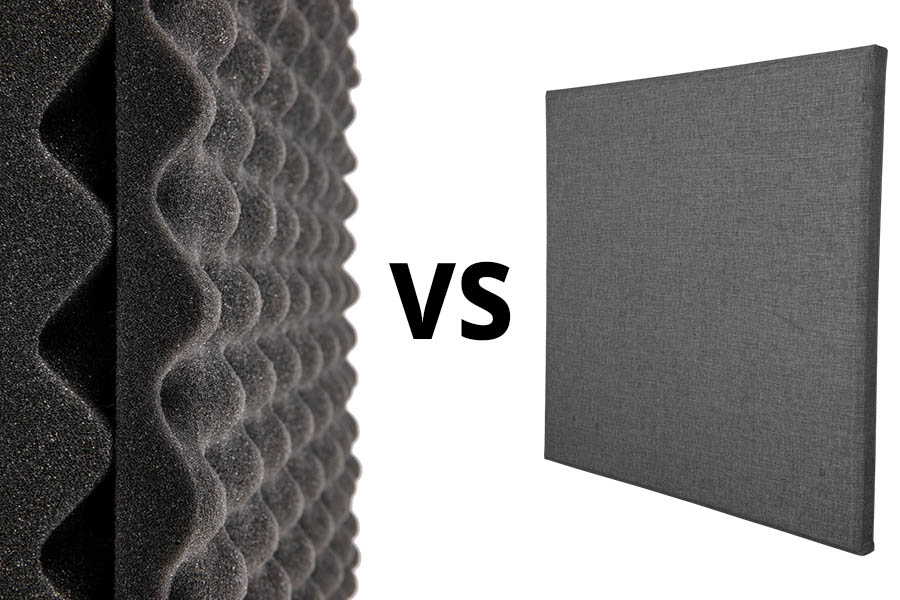
Do Acoustic Panels Work?
Introduction
Some type of soundproofing is the norm for many industrial and home buildings. Whether or not you’re in a restaurant, faculty, or open-plan workplace, trendy buildings are usually designed to regulate the acoustics architecturally.
Both that or they are going to have soundproofing panels put in to scale back background noise. Noise reduction is a must when you are working in an environment that has lots of outside noises. But also it is good to do some soundproofing and sound isolation from the inside if you are having much stuff happening on the inside.
Do the acoustic panel work? Well, this is often a question that draws a lot of misinformation. That’s why we’ve reduced all of the details to inform you everything it’s essential to find out about acoustic panel sound absorption and the way it works in a manner that’s simple to digest. We will try to explain why the wall panels work and how you can adjust them to the best in your studio. Again, these are totally different from the ones that block noise, so we will separate them here.
If you are not in the mood to build another DIY project and you simply want to purchase an acoustic panel, below we have three options that you can go for!
| IMAGE | PRODUCT | DETAILS | For EU Customers |
|---|---|---|---|
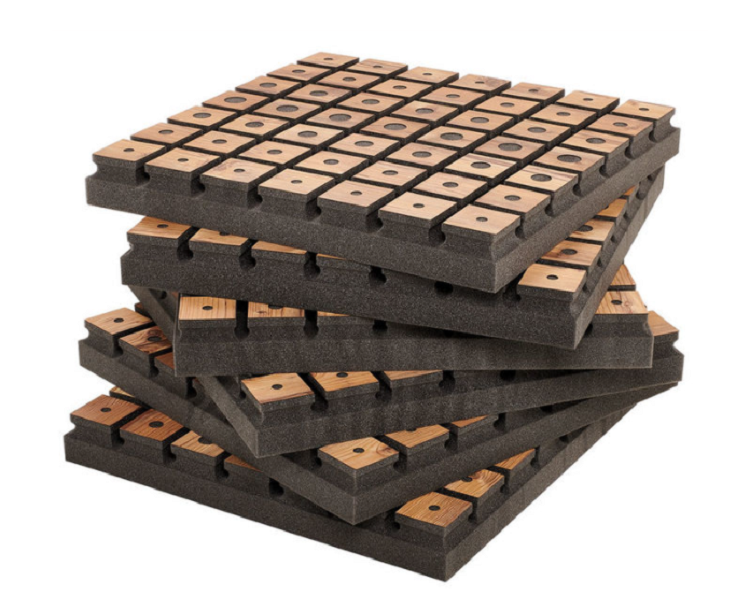 |
|
||
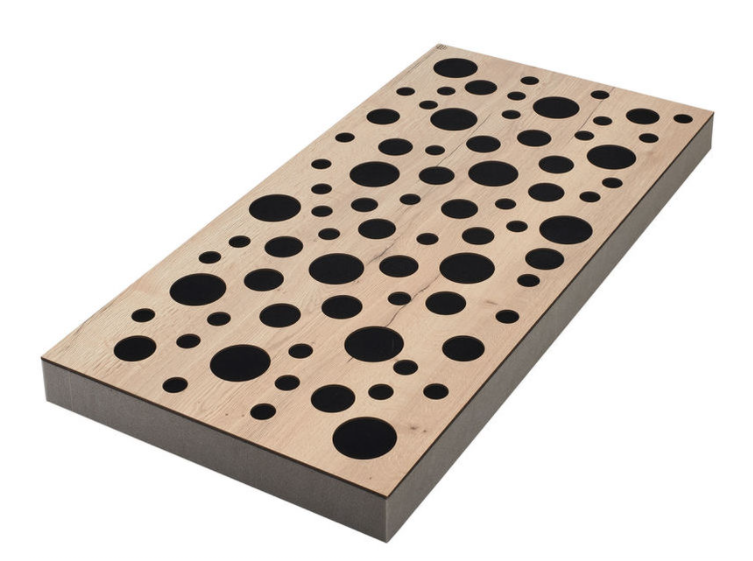 |
t.akustik HMF-D 120A Halifax oak |
|
|
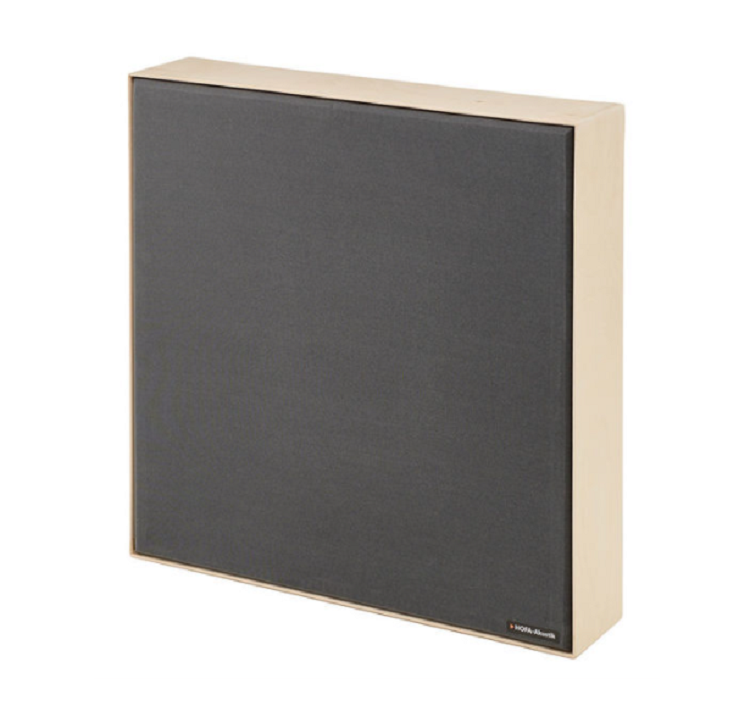 |
Hofa Absorber Anthrazit |
|
Do Acoustic Panels Work?
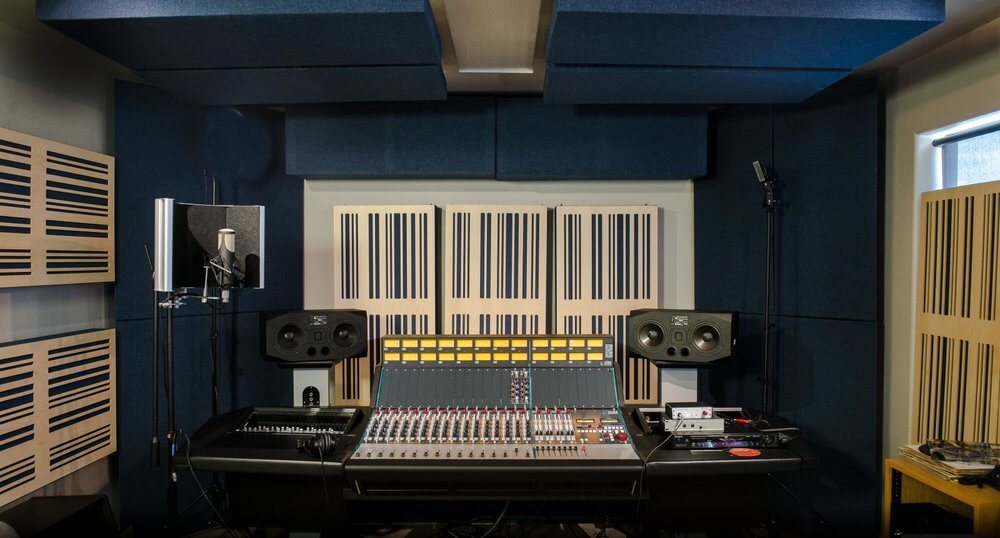
They most definitively work. There is no doubt that acoustic panels work. If they didn’t, they wouldn’t be part of any recording or mixing/mastering studio. So you should take into consideration placing some acoustic panels in your studio as well. They’re designed to catch sound waves and take control over reverberations in enclosed areas.
In most big indoor areas, sound waves will bounce off any strong surfaces, and those are the walls and the ceiling/floor. These are the ones that are placed within the room, and are helping the sound absorb when reflected from hard surfaces. This will help the room acoustics as well and your mixing sweet spot will be clear from unwanted reflections.
That will result in creating echoes and rising the general volume. Nevertheless, when sound waves hit purpose-built acoustic panels, the outer layer will absorb the sound and penetrate the core materials, which absorb the noise by changing the waves into vibrations, producing a small quantity of warmth.
This heat disperses shortly in order that the sound waves dissipate and not bounce off the floor, thereby lowering background noise. This is one of the reasons that wall panels work properly within the room.
Do Acoustic Panels Reduce Noise?
There are many factors to reducing noises in your studio. Most of the time, the noise is coming from outside your studio and it interferes with your inside acoustics. The acoustic panels we are talking about are just for acoustic reasons and do not have the qualities to reduce noise. Not that they do not reduce it, but it is insignificant when it is compared to the real noise isolation treatment for such rooms or studios.
Many newcomers confuse soundproofing with sound absorption. Quite the opposite, the two are totally different. Soundproofing is mainly something to do with noise isolation or in different words, minimizing sound from getting into or leaving an enclosed space. Sound absorption, however, is to do with acoustics or quite minimizing reflections inside space for higher sound quality.
So, by an acoustic panel, what is supposed is that the panel is designed for sound absorption thereby enhancing the acoustics in a room. Does this imply that good sound-absorbing materials would be a great soundproofing material? Not essentially. Such panels are made to absorb the sound and improve the room acoustics.
Advanced Acoustic Options
In some circumstances, soundproofing and acoustic panel sound absorption strategies are needed. For instance, if you’re designing your personal musical practice area, you could very effectively have two distinct but equally vital priorities:
- Maintain noise inside the room with the intention to keep away from bothering family, neighbors, and anybody else within the neighborhood.
- Optimize sound quality inside your practice area by decreasing echo, reverb, and extreme noise with acoustic panels.
Comparable situations typically come up for commercial theaters, dance studios, people living in condominiums, and different similar conditions. As a result of soundproofing and sound absorption actually work in opposition to one another to a certain degree, such initiatives require a higher deal of element and customization.
Extreme bass sounds also can pose a tougher acoustical room treatment scenario, and a particular kind of acoustic wall panel often known as a bass trap could also be needed. These panels are exceptionally thick in comparison with traditional wall and acoustical ceiling panels and are optimally positioned close to floor level and in corners.
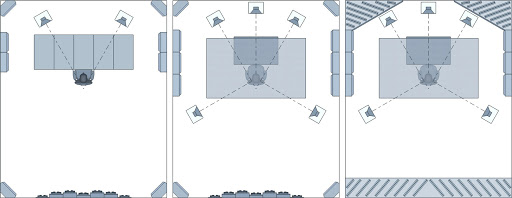
Guide Where To Place The Acoustic Panels
- Begin by treating the first reflection spots on the horizontal axis. If you’re undecided where that is, sit in your listening place and picture where sound from your audio system hits your sidewalls and bounces again to you. It is rather necessary to put an acoustic panel right here as it can enhance your stereo width and make clear your imaging
- It is best to think about putting some acoustic treatment between the speakers and the wall in between. Adding acoustic treatment right here helps cut back reflections emanating from the backside of your speaker. This can be a difficult area as boundary interactions could cause a major dip in your low-mid frequencies; nevertheless, for many home studios, it’s probably best to put your audio system near the wall as recommended by the developers. If there’s any area left between the wall and your audio system, place acoustic foam there.
- If doable, mount a few of your acoustic panels throughout the corners of your room. This may be added between two horizontal walls and even the ceiling and side-wall. It will inherently create a big air hole behind the panel. This may be your start to absorbing these low-frequency resonances. As your studio grows, you will want so as to add bigger and thicker absorbers in your corners to additionally deal with bass resonances.
- Here is another suggestion. You can create an acoustic “cloud” that hangs a couple of inches out of your ceiling over your listening place or musical devices. This is also a primary reflection point that you need to treat, so do not overlook this spot as well. The well-placed panel above your head will ensure you avoid these ugly reflections. Believe us, it works!
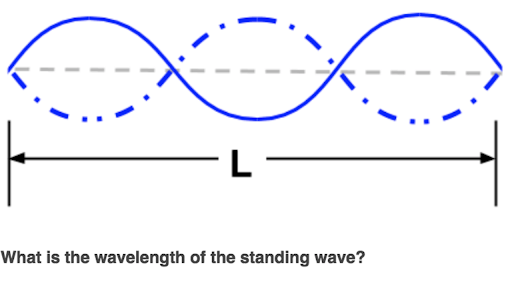
What are Standing Waves?
A standing wave is the result of a sound wave that bounces between two and even more surfaces and emphasizes one particular frequency that you just hear because the waves reinforce one another.
When the wave bounces off the floor, it changes phase. In the case of waves that create a standing wave, the mirrored wave is a mirror picture of the unique. The waves then mix. If the amplitudes of the 2 waves have an identical signal (both positive / both negative), they may add collectively to form a wave with a bigger amplitude. This adding collectively known as constructive interference. This added wave does not seem to move, thus it is referred to as a standing wave.
What Causes Standing Waves?
Standing waves are created when the gap between the walls is a number of a sound’s wavelength.
Walls that might be 20 feet apart, with a wavelength that’s 19 feet lengthy, will not produce the situations for wave reinforcement. However, if the walls are 20 feet aside and the wavelength is 10 feet or 20 feet, then a standing wave can be produced due to the reinforcement.
Standing waves might be triggered when waves bounce between;
- Opposite walls
- 4 sides of the room
- All six sides of the room (given most rooms have 4 walls, a ground, and a ceiling)
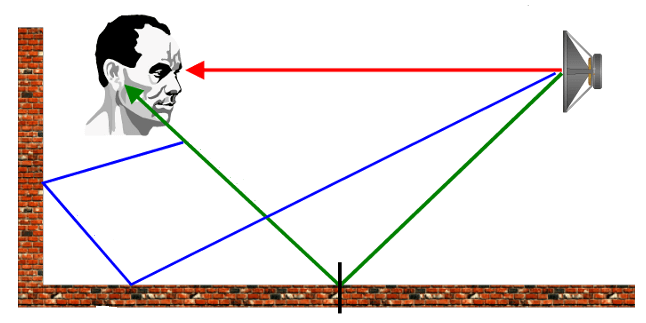
How to minimize standing waves?
The answer to stopping a standing wave is slicing the offending frequency of the related instrument. In the case of a digital mixing board which allows for surgical precision, minimize a really narrow quantity of the offending frequency.
The second and more approachable way of doing this is to install correct acoustic isolation and panels/diffusers to disperse the waves. It is annoying when you listen to one frequency more than you need to. In the case of music, mixing can make your problems with the final decision on your project.
Reverb Time in a Room
One of many fundamental reasons foam, or any acoustically absorbent materials (baffles, banners, cloth-wrapped wall panels, and many others.), are used, is to cut back the common reverberation time in a room. A great instance of an area that may profit from including acoustical absorption is a big gymnasium. For your purposes, if you are treating a studio or simply a living room, we have few suggestions on how to approach excessive reverb in the room:
Cover the Flooring
Carpets and rugs do more than present tender padding to your floor. In addition, they deaden sound reflection in a room by absorbing echoes and muffling noise. In rooms that have hardwood, tile, or different forms of hard-surface flooring, place area rugs that additionally complement your décor.
Moreover, you can too add wall-to-wall carpeting. It’s more “everlasting” and costly in comparison with rugs, however, it would positively cut back echo while offering full-room comfort.
Cover the Walls and Windows
Wall and window coverings cut back the quantity of sound reflecting off window glass and hard wall surfaces. Heavy, lined window curtains and draperies that stretch to the ground help muffle sound, decreasing echo and ambient noise from inside the home and out.
Canvas work, tapestries, and ornamental wall hangings can also soak up the sound to cut back echo. Remember that framed photos and paintings enclosed behind glass will replicate sound very like windowpanes.
Fill Rooms with Furnishings
Rooms stuffed with plush furnishings and equipment assist reduce down on echo. Couches and plump recliners, for instance, soak up sound reflection. Material upholstery sometimes absorbs sound more successfully than vinyl or leather.
Even objects like bookshelves stuffed with books and ornamental gadgets can cut back echo. Basically, the extra objects there are in a room, the much less sound will bounce around it.
DIY Acoustic Panels
Quite truthfully, the best way through which we constructed one of these will not be that completely different from all the things you will be able to see on YouTube. My thought is that that is simple to do and shouldn’t be a tedious process. For a double acoustic panel, it took us 2 to 3 hours and around $20.
Here’s what you’ll need for a single acoustic panel:
- Wood boards – enough to create a frame around the Rockwool.
- Fabric – to place over the Rockwool and protect your eyes and respiratory system
- 2 1000mm/39inch to 620mm/24inch Rockwool panels. You can find correct replacements for the expensive ones online
- Wood glue
- Around 30 wood screws
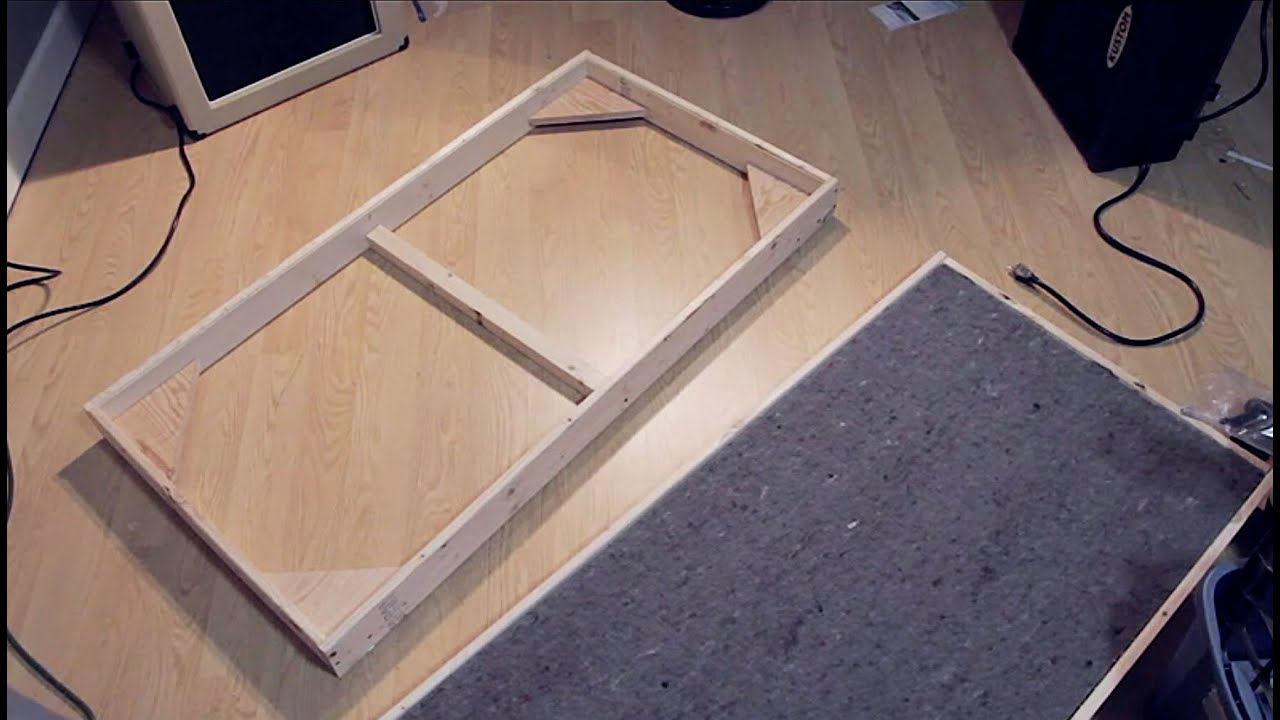
Place the wood next to the inside wool so the entire size of every panel can be across the already cut Rockwool. This simply makes trimming the mineral-Rockwool easier. Make the right cuts and trim the frame around the wool. Apply some wood glue to the joints and screw them together. Don’t forget to reinforce the frames with one or two extra wooden pieces in between the longer sides. Add corner items so the insulation sits flush within the corners giving further power to the body without adding a great deal of weight to the panel.
Add the Rockwool inside your frame and make sure it fits inside properly. Then use the fabric to wrap the acoustic panel. At this stage again you will be able to use wood glue to glue the material to the wood and the wool itself. Try to make the folds neat and use extra woodscrews to tighten it and make sure that is securely set.
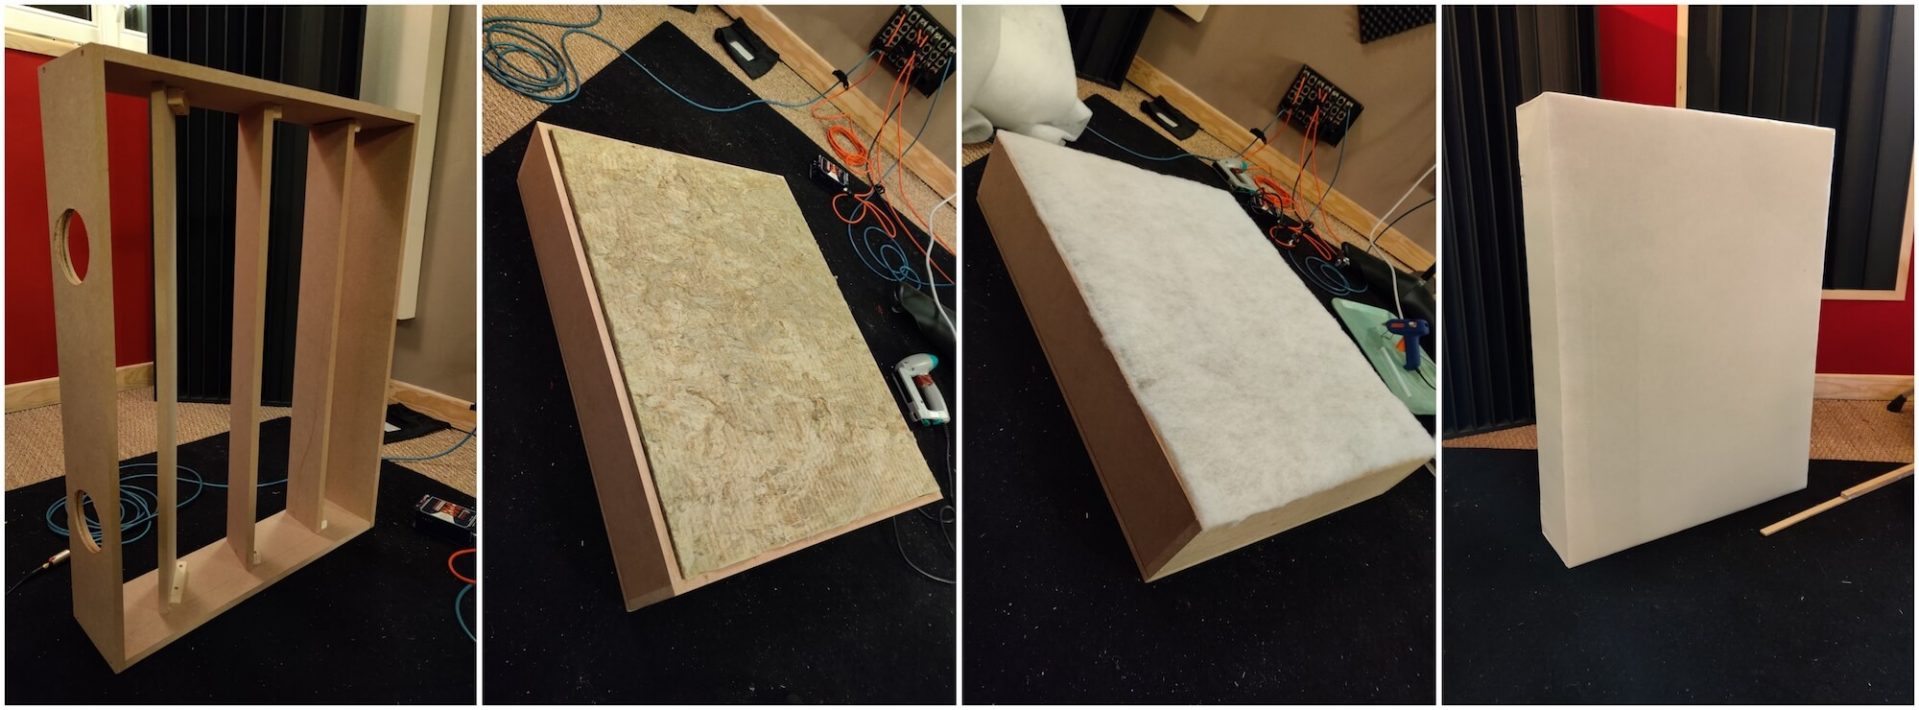
To hold these panels you may add Z-clip or different hanging choices like hook and eyes. Usually standing them barely off the wall will assist with bass trapping so think about using Z-clips which will provide you with about an inch off the wall and a strong mount.
Conclusion
We hope that we answered some of your questions about the acoustic panels. Again, do acoustic panels work? Most definitively yes! So take some extra cash, buy yourself the items, grab some beers on the way and engage in some woodworking and acoustic treatment. It will be worth your while!
Here is a video of making an acoustic panel.
Check our eBook on Mixing Tips! If you want to get a more in-depth breakdown of those tips we share, follow our link and get the “Ultimate Mixing Tips Booklet” and up your game quickly!
DIY Sound Diffusers: Great Method to Make Skyline Diffusers!
DIY Microphone Isolation Shield – 3 Steps To Create Your Shield!
How to Make Bass Traps: 5 Easy Steps for DIY Acoustics!
How To Build A DIY Vocal Booth: 4 Quick & Easy Methods!


[…] see acoustic panels everywhere in studios. It’s because they do a lot of things. Primarily, they are used to […]