How to Make Bass Traps
Introduction
What does it take to achieve success in recording and mixing? Expertise, in the first place, and as finest gear, as there could be, one would say.
Don’t neglect an acoustically good room! However, is there such a thing? The reply to this question for sure is just not an easy one. Have you ever heard of bass traps? It’s a form of secret ingredient relating to reaching the abovementioned perfection.
My mission right here is to help you be taught more about bass traps. Furthermore, I’ll present you with an amazingly cost-effective resolution.
You do not have enough time to make them on your own and you need to buy them as soon as possible? Here are a few great suggestions by us!
| IMAGE | PRODUCT | DETAILS | For EU Customers |
|---|---|---|---|
 |
|
||
 |
|
||
 |
|
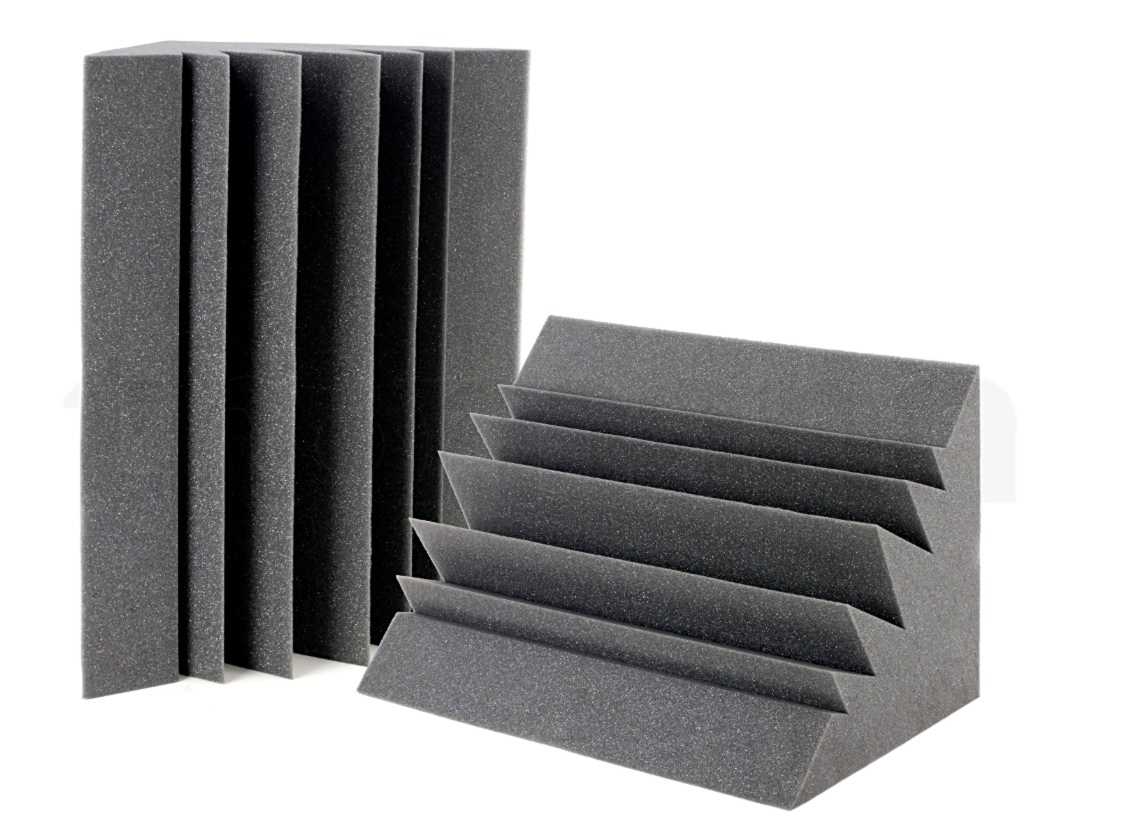
What’s a Bass Trap?
If you wish to get technical about it, the reality is you can’t actually “trap” bass.
So what are bass traps? They’re units designed to decelerate or take in the power of vibrating air molecules.
That sound power is transformed to heat, with much of it reflected back at a special time and angle than the unique vibration, thereby scattering the return.
The three hottest materials that present excellent outcomes for bass traps—actually “acoustic absorption” within the lower mid and upper bass ranges are fiberglass, rock wool, and foam, just as with acoustic panels.
All three are fully safe when used correctly, although foam is just not practically as efficient as the other two.
All three material types supply by several sellers under a variety of model names. Among the best-functioning and best-known is the fiberglass Owens Corning 700 series
Bass Trap Design and Planning
The default measurement for DIY audio panels is 24 x 48, as a result of these are the manufacturing unit dimensions for Roxul Rockboard. You possibly can construct them to size as needed.
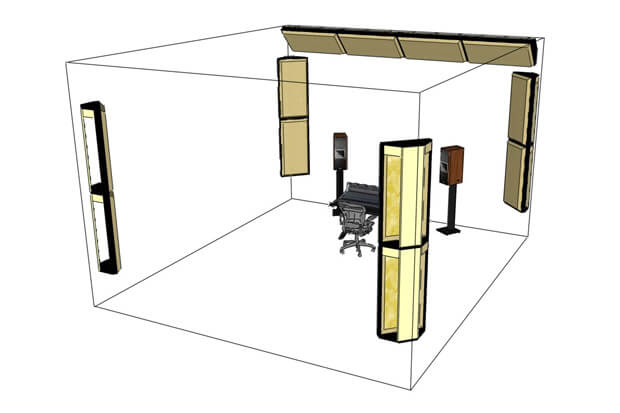
In a typical bedroom, I might suggest having either four or eight bass traps, relying on your room and finances. If you have four, mount one in every corner, oriented diagonally throughout the corner, about midway up the wall.
If you have eight, stack two in every corner (they will in all probability reach floor to ceiling.) Mounting them diagonally throughout the corner takes up more room than having them flat towards the wall, of course.
However, this air hole behind the panel truly makes broadband absorption more effective.
DIY Microphone Isolation Shield – 3 Steps To Create Your Shield!
Do Acoustic Panels Work? Great Way To Do It + DIY Method
DIY Sound Diffusers: Great Method to Make Skyline Diffusers!
DIY Microphone Pop Filter – What is Pop Filter + Great 3 Methods To Do It!
Best Sound Acoustic Panels: Top 8 Premade Panels + Buyers Guide!
How to Make Bass Traps – Construction
DIY Bass Trap Supplies
- Roxul Rockboard – Every pack contains six panels, and every bass trap requires two, so one pack makes three panels.
- Duct Tape – I estimate one roll of Duct Tape per 4 panels you might be constructing.
- Staple Gun
- 1×4 Lumber, by the foot. You will have 12’4” total per panel.
- Nails, screws, and even wood glue. Decide your favorite method to make wood stick together.
- Electric drill/screwdriver – For those who plan on stepping into DIY tasks, this is among the handiest tools to have round.
- Tape Measure
- Fabric Scissors
- Fabric (by the yard) – Right here you may get artistic. That is the “pores and skin” of your panel, and nearly any material works. So feel free to get no matter color or pattern fits your area! It’s an effective way to kill two birds with one stone by livening up your decor. Mine have cool classic floral patterns. You will have about 5’x3’ of material for each panel.
Step 1: Assemble a Wooden Frame
In my view, it’s easiest to get your wood from a hardware store. You should purchase 1×4 lumber by the foot, and sometimes have it cut to the precise right measurement by an employee within the store. Particularly in case you are new to DIY, this saves lots of trouble.
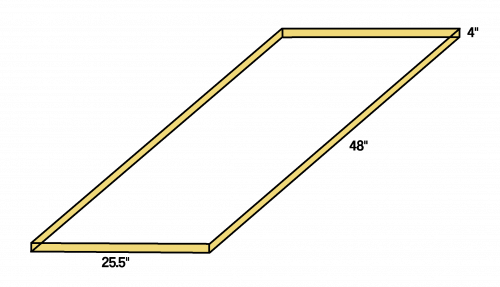
Assemble a wooden body in order that the inside area is 24” wide, 48” tall, and 4” deep. This would be the body supporting your insulation panels, which might in any other case get crushed up quickly.
Assuming you might be constructing 2’x4’ panels, these dimensions ought to get you 24”x48” internal dimensions. The width is 25.5” to account for the fact that 1×4 planks are literally about 0.75” thick, not 1” as their name suggests.
You should use nails, screws, or wood glue to place the body together. In case you are using screws, I recommend making guide holes with an electrical drill first and then screwing the planks together.
Don’t be afraid to do some fast googling in case you are undecided about what you’re doing!
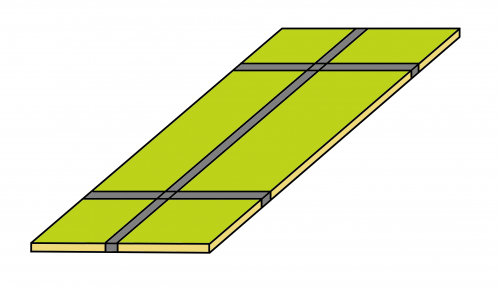
Step 2: Place Two Insulation Panels Inside the Frame
Stacked on top of each other. Like so:

Step 3: Use Duct Tape to Mount Panels to Frames
This may appear kind of lo-fi, but it surely’s surprisingly strong. Wrap the duct tape round the back and front of the panel, fairly tightly to the wooden, and ensure the duct tape is taped firmly to itself on the end.
My audio panels are constructed this way! They’ve survived a few moves already, they usually clearly nonetheless have years of life in them.
Step 4: Wrap the Panel with Material
Place the panel on a sheet of material that’s about 6-8” wider in every dimension than the panel itself. Wrap the sides of the material up across the wooden body, and use the staple gun to connect the material to the wooden frame.
Do your finest to wrap the material tight- it helps maintain the panel together, and looks clear and professional.
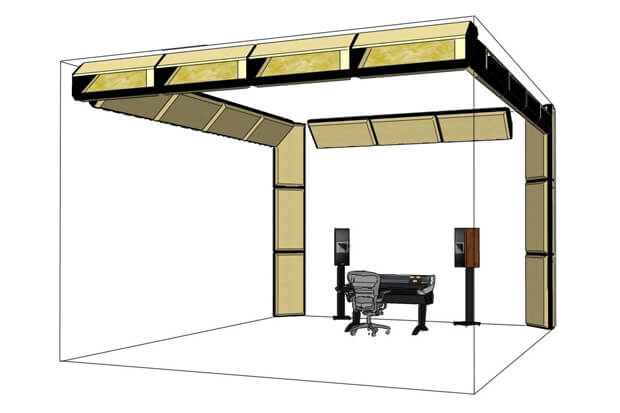
Step 5: Mount the Panels (Bass Trap Placement)
There are various methods to mount the panels. You can actually simply lean them towards the walls, or place them on a stack of outdated books to get them to the appropriate height.
You should buy shelf brackets to mount them to the wall. Needless to say the panels will be fairly heavy, so go for heavy-duty brackets and make sure to mount them in studs, not simply in anchors instantly in the drywall. (A stud is your pal right here!)
What should I count on to hear?
With correct bass administration, your room can have a more even-sounding response throughout the audible spectrum. Overall your soundstage will sound extra unified and naturally balanced with tighter definition between tones.
You’ll hear the frequency stability and transients in your music with greater readability. You’ll hear details that have been previously masked by your boomy low end.
It is possible for you to make better mixes, trust your ears when mastering or crucial listening, and hear nuances you by no means knew existed.
A good low-end will dramatically improve your listening experience. You may even shed tears of ecstasy (you probably have an unhealthy passion for high-constancy audio) while you uncover what you’ve been lacking.
Here is a video on how to make bass traps on your own. Great way to DIY bass traps!
Check our eBook on Mixing Tips! If you want to get a more in-depth breakdown of those tips we share, follow our link and get the “Ultimate Mixing Tips Booklet” and up your game quickly!