Microphone Specifications
Introduction
The specifications of microphones are generated so that users can learn more about them. It is possible to find out about the basic features of a microphone and how it will work with your equipment from its specs. It is important to understand how microphone specifications are interpreted.
Although there is some common ground, there are many ways to measure or calculate specifications. Additionally, technical terms can be interpreted differently by brands when comparing specifications.
You can achieve different things with different microphones depending on their specs. The purpose of this article is to provide an overview of what each microphone specification means. So let’s start with the most important ones that you will need to look into when selecting your microphone.
1. Frequency Response Curve
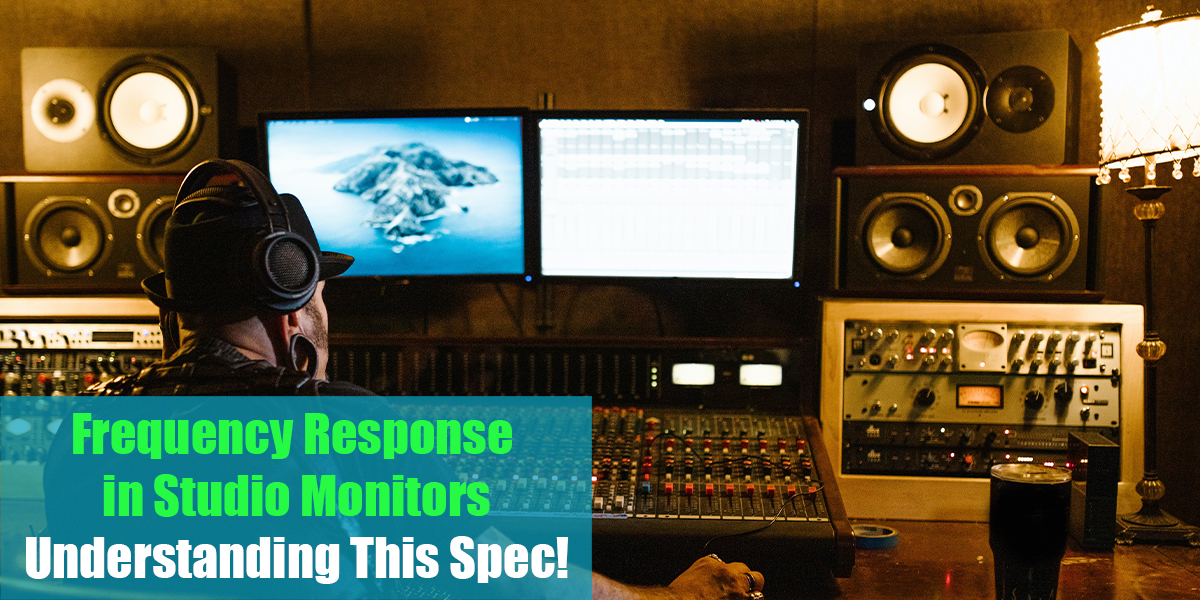
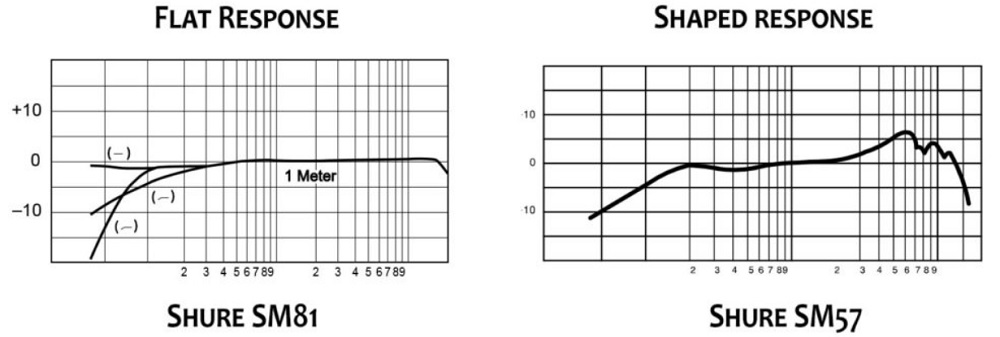
A microphone’s frequency response graph shows how well it reproduces the signals it is receiving. It would be ideal if the reproduction was one-to-one. Microphones “hear” sounds and perfectly convert them into electronic signals that are perfectly transferred to recorders. Realistically, some vibrations are lost during the recording process and some information is never recorded.
Frequency response graphs can be used to visualize how well a microphone reproduces acoustic signals. A slight dip in the frequency range graph can be observed if a particular tone emerges from the microphone slightly weaker than it entered. As a result, it is visualized as a slight hump if it has come out stronger than it went in.
When you have an understanding of which products you prefer or dislike, and you have access to their frequency response charts to compare them with other products, frequency response charts provide a wealth of information. You will develop skills for choosing which microphones are best suited to a sound source, as well as how to edit the sound once you have decided on what mic to use.
2. Microphone Polar Patterns
Polar patterns describe the areas around microphones that pick up sound or are most sensitive to sound. It is possible to visualize these patterns in three dimensions. The polar patterns of different microphones play a significant role in determining the best uses for each microphone.
To ensure that your recordings are as effective as possible, it is important to understand the basic principles of polar patterns. Depending on the polar pattern of a microphone, you will experience different levels of sensitivity.
When you select the right pattern, you may be able to reduce unwanted sound bleeding into your signal, adjust the mix between dry and room sound, change the frequency response, or adjust the proximity effect, all of which can be achieved by choosing the right pattern.
Think of the microphone as being surrounded by a 360° field. A microphone’s maximum sensitivity is determined by the angle at which it is placed at 0°. Circles with smaller diameters represent a 5 dB reduction in sensitivity, as illustrated in the scale of the circle in the graphs.
In most cases, you will encounter cardioid microphones. Generally, cardioid microphones are suitable for most situations. These devices are ideal for recording monologues or solo podcasts, or for conducting online interviews. Also, the best option for lead singers as well.

3. Microphone Sensitivity
By referring to sensitivity, it is meant to describe how much output will be generated by a given amount of input. The sensitivity of a microphone is only important in a limited sense when choosing one. In general, a microphone with a higher sensitivity will provide you with a higher volume.
As a matter of fact, the sensitivity of most microphones does not matter much, since you are going to be using a preamp anyway, or if the microphone is a USB device, it is already equipped with a preamp. This means that regardless of the degree of sensitivity of your microphone, you can adjust the output (audio volume) using a pre-amplifier. The same output can therefore be achieved even with microphones that are less sensitive.
There is only one time when sensitivity is relevant, and that is when your preamp is not capable of providing sufficient gain for your microphone. As a result, your audio will be quiet and will require amplification in the post-production phase. As a result, there is still a way to overcome the problem.
Condenser microphones are also highly sensitive, so sensitivity will never be a concern. Condenser microphones will have more than enough gain even with low-budget interfaces that include built-in preamplifiers. The gain required by dynamic microphones is much higher than that required by condensers, and some preamplifiers are incapable of providing sufficient clean gain to support them.
4. Self Noise
Condenser microphones are the only ones that are affected by self-noise. Self-noise is not generated by dynamic microphones. Accordingly, self-noise is a measure of the amount of inherent noise that is generated by a condenser microphone.
The volume of a microphone is measured by its own volume. Due to the nature of the microphone, which is a relatively complex electrical device, it is bound to emit sound in the particular environment in which it is used. It is, however, preferable if the device produces as little sound as possible.
A noise level of less than 20 dB-A is considered excellent, and anything below 15 dB-A is considered stellar and is likely to indicate that the microphone is of premium quality. The signal-to-noise ratio can also be used to describe the level of noise (or quietness) emanating from the microphone. You can obtain an accurate understanding of the loudness of the signal by comparing it with self-noise, which is depicted as a level of dB.
The self-noise of condenser microphones is higher than that of dynamic and ribbon microphones; however, the self-noise of the latter is so low that the specification does not usually mention it.
In contrast to dynamic or ribbon microphones, a condenser mic’s output is much larger than its own noise (thermal). For quiet sources, the SNR performance of condenser microphones is still favorable.
5. Decibel Scale
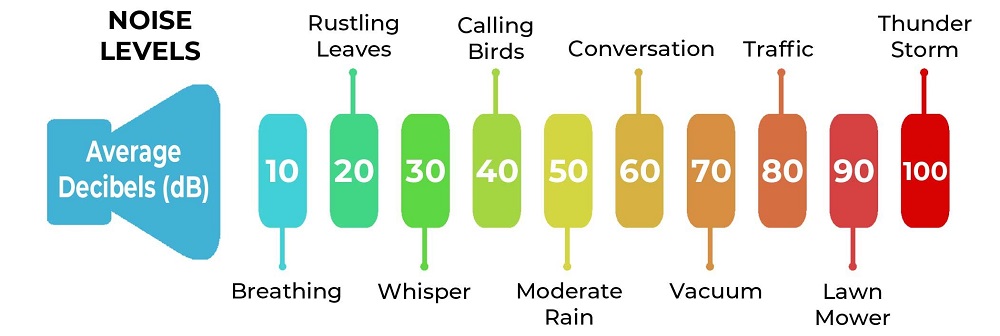
Human hearing is related to the decibel scale. This presents the perception of equal-sized increments since the scale is logarithmic. The decibel scale serves as the basis for most microphone specifications.
Logarithmic scales are used because most human senses – including hearing – approach logarithmic behavior. It is important to note that when using a logarithmic scale, there is always a fixed ratio between the units.
Using this scale, you are able to detect a change in the level of about 1 dB at the smallest possible level. It is clearly audible when the level changes by 3 decibels. In terms of subjective perception, ten decibels is equivalent to a doubling or halving.
The steps on the scale are perceived to be equal in size by and large. In real life, the maximum dB number you will encounter is 200 dB, which means that the first digit is always 1.
A relative scale is used in the dB scale. As a result, it is possible to express any change in dB. Changes of 0 dB are not considered to be changes at all. There is always a positive dB number when the value has changed (it is now higher than it was previously). Whenever the dB number is negative, it indicates a negative change (the value has decreased).
The sound pressure level, for example, can be used as a reference to make dB an absolute scale by applying a reference parameter – for example, 20 Pa. As a result, 0 dB implies that there is sound pressure present, and it is approximately 20 Pa (the threshold of hearing at mid-frequency).
6. SPL
In general, a microphone’s SPL (maximum sound pressure level) specification specifies the loudest audio signal that it is capable of handling without distorting it. As long as you are not attempting to record the explosion at close range, anything above 120 dB should be sufficient.
During the inspection of a particular microphone, it is important to determine the SPL at which a phenomenon known as Total Harmonic Distortion (THD) occurs. As the name implies, it refers to a slight change in audio recorded from a sound source when compared to the record. Usually, the THD is expressed (if at all) in terms of 1% or less (less is better) and indicates that at this particular SPL, very small THDs are present.
7. Impedance
The output impedance of a microphone is one of its most important characteristics. As seen from the microphone, this measurement indicates the AC resistance. Generally speaking, microphone impedance can be divided into three categories: low (50 ohms to 1,000 ohms), medium (5,000 ohms to 15,000 ohms), and high (20,000 ohms and above).
The microphone line matching transformer is designed to match the input impedance of a low-impedance microphone with a high-impedance input (50,000 ohms). In order to ensure a low impedance and balanced connection, the microphone cable should be positioned as close to the electronic input as possible.
An input microphone with a high impedance should not be connected to a high-impedance microphone with a large amount of cable. It is important to note that any distance beyond approximately 20 feet will result in a loss of highs and a loss of output level. It is however possible to use low-impedance microphones and cables to allow the length of microphone cables to be as long as is feasible without suffering any serious losses.
Low-impedance microphones are commonly used in professional settings. In general, professional mics have output impedances ranging between 50 and 500, although some professional microphones have impedances that fall outside of this range. In general, it is considered good as long as the output impedance is much lower than the load impedance (1/10th or less).
Conclusion
It is truly important to know the specifications of any microphone you buy, to know if it will suit your needs or not. Mostly, condenser mics, dynamic mics, ribbon mics, and all others have a specification sheet or a manual where you will be able to find these specs neatly sorted out.
So all these specs show a different point that the microphone performs from which you will be able to get the most details about that particular microphone and make the correct purchase.
If you have any other questions about the topic of microphone specifications we covered here, please let us know in the comments and we will be here to elaborate with you!


