Tips for Reducing Sibilance
Introduction
A passionate vocalist can produce harsh and unpleasant tones when belting into a microphone. You will be able to achieve a smoother-sounding performance if you know how to eliminate vocal sibilance during recording and mixing.
The “sss” sound they make when singing can be very frustrating to hear. You can help them out in a number of different ways if you wish to eliminate this problem. As a first step, we can eliminate the source of their sibilance, and as a second step, we can reduce it through post-processing.
It is important to be aware of sibilance in a track as too much sibilance can be extremely distracting to a listener. Sibilance occurs to some degree on every vocal track that you record, and you should be on the lookout for it. In this article, we will examine what sibilance is as well as some methods for eliminating it. Let’s get started!
What is Sibilance
In audio recordings, sibilance refers to a painfully hissing sound that can be heard. Sibilance occurs when a singer pronounces a word with consonants such as s, z, or t. This sound occurs at a frequency between 5kHz and 8kHz, although some piercing sounds may occur at higher frequencies (cymbal crashes).
As the first step in correcting sibilants, it is crucial to control them at the source. By fixing this problem during recording, rather than fighting sibilants during mixing, we risk making the vocals sound unnatural. Test different microphones when recording vocals. Do not make the mistake of using the same microphone throughout the recording process.
It is usually caused by the format of the vocal chord, but it can also be exaggerated by the placement and manner in which the microphone is used. In this article, we will discuss some methods of controlling vocal sibilance, which will enable us to avoid making the problem a distraction from our performance.

Listed below are 8 Tips for Reducing Sibilance in Recordings
1. Microphone Techniques To Reduce Sibilance
An important factor that influences the amount of sibilance on a vocal track is the microphone you choose. The sibilance of vocal tracks occurs in the upper-frequency range, so microphones that focus on this range are likely to produce a greater amount of sibilance than those that do not.
High-frequency microphones produce a bright, clear sound that is good until you realize it sounds like you have recruited a chorus of snakes to sing backing vocals. Condenser microphones with large diameters, which tend to emphasize lower frequencies, may also be suitable.
Condenser microphones with a small diameter can also produce airy tones that can accentuate sibilance, so you may wish to avoid them. Sibilant sounds travel differently than other sounds, and microphones detect sounds differently as well.
There is a big difference between a sibilance that is most noticeable near the mouth and a sibilance that is direct along the path of your breath when you sing.

2. Distance Yourself From The Microphone
It is very important to maintain some distance between the singer and the microphone in order to reduce the likelihood of sibilance overload occurring. According to general guidelines, a vocalist should be placed two fist lengths away from the microphone at all times.
A first should be placed between the microphone and the pop filter, and a second should be placed between the pop filter and the vocalist. There is a problem known as sibilance overload when excessive levels of upper-mid sibilant frequencies are present in the sound.
Usually, if the microphone is placed further away from the singer, this will allow the high frequencies in the overall sound wave to dissipate so as to reduce the overpowering presence of those frequencies in the overall sound wave.
Typically, microphones are more sensitive to sibilances (including plosives) at closer distances, making them more likely to be overloaded by vocalists.
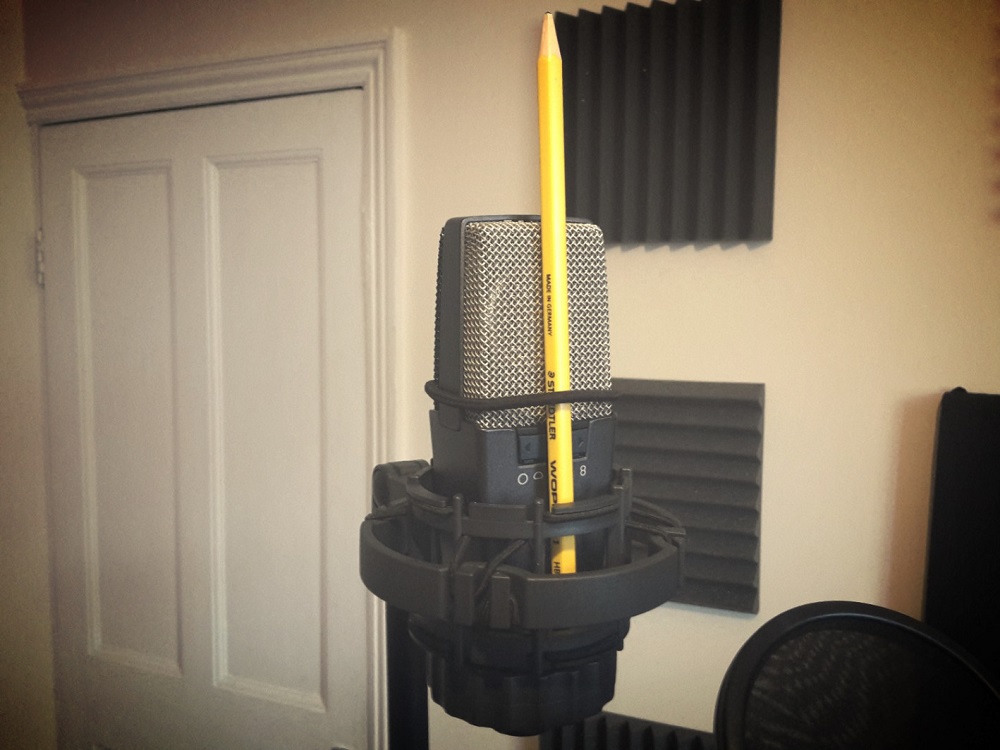
3. Use The Pencil Trick To Reduce Sibilance
It is possible, at least somewhat, to reduce sibilance using a trick that is often used in studios to reduce plosives. When singing, you will hold a pencil, pen, straw, or any other round object up to your lips. You can dissipate sibilant energy by holding a pencil/pen up to your mouth.
This allows it to travel in many different directions with less energy as opposed to more directly with more energy. The cause of sibilance is the disturbance in airflow that occurs when certain sounds are produced, so interrupting this airflow can reduce the effects of these sounds.
There can be some difficulties with this, and it can definitely be distracting. If you suggest using this trick for the first time, do not expect to get the best vocal take on the first try. Should you have the time, you may wish to suggest that the vocalist practice that technique in order to become familiar with it.
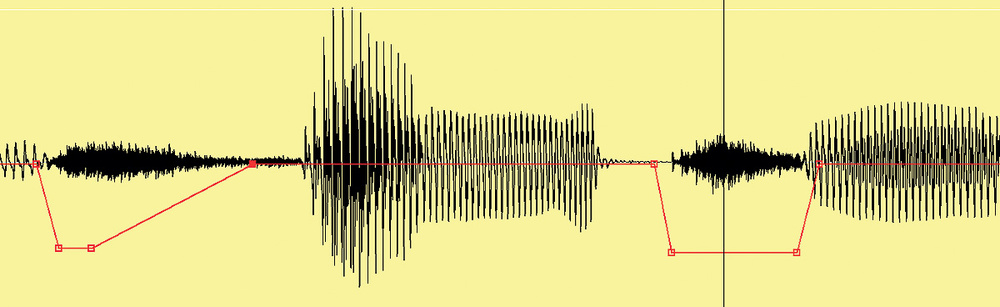
4. Chop and Change
We prefer to use the editing tools of our DAW in order to manually remove and attenuate problem esses during the ‘mix prep stages‘. The process may sound tedious, but it has numerous advantages, including the ability to spot esses and breaths with ease in waveforms – even easier if you have a DAW with spectrogram capabilities.
It is not a great leap to cut out the esses and place them on another DAW track if you have already gone through and prepared the various audio files before you begin mixing. In this way, sibilance channel faders can be controlled/automated or low-pass filters can be applied to soften esses.
Then you will have a ready-made solution to another problem that we sometimes encounter: a stray ess with a whistly or lispy sound that catches the attention of listeners. A good one can be substituted for the bad one by muting/chopping out the bad one.
5. Fix With A De-Esser
Exactly as they sound, De-Essers are exactly what they are. By removing the “S” sound (hiss), the “S” sound is no longer present. As a result, it essentially functions as a compressor that has an equalizer side-chained to it, in order to generate sound.
Thus, it works similarly to a compressor, but only for the specific range of frequencies you specify. More information about sidechain compression can be found here. It will have a default frequency range of 6 kHz to 8 kHz that you can change if you want to match your singer’s voice.
Set the threshold somewhere below what is considered “just right.” This is a frequency-specific compressor. Whenever possible, it is best to apply a de-esser before any other equalization, compression, or spatial effects. Before applying effects to what you wish to keep, it is always advisable to remove the unwanted first.

6. Effects and Processing
As you may know, a typical mix includes a variety of processing, most of which comes after de-essing, which is usually done early in the signal chain. De-essing settings may need to be tweaked due to channel EQ, compression, distortion, saturation, or harmonic enhancement processing.
In these cases, we recommend using filtering or a de-esser just before the effects plug-in to prevent unwanted attention from being drawn to esses. Sending effects such as reverb and delay can draw unnecessary attention to esses.
By doing this, you will not have to change the sound of your ‘dry’ vocal, but only the sound entering the effect. As a final note, you should also be aware of the effects of any bus processing.
On the master bus, we typically apply fairly assertive HF boosts using a ‘top-down’ approach to EQ. Sibilance is naturally accentuated by these, so rather than EQ the sibilance away, it is often more convenient to route the vocals around that master bus EQ.
7. Choose A Darker Microphone
There is a tendency for sibilance to occur in the frequency range of 5 kHz – 8 kHz (although it can occasionally cause a disproportionate boost outside of these ranges). It is therefore recommended that you choose a microphone that has a darker color or character in order to reduce sibilance.
It is important to note that these microphones will not be affected by sibilance as much as brighter microphones since their sensitivity dips in the upper-mid and high-frequency ranges. As a result, the microphone audio signal is brighter, but at the expense of clarity.
Whenever you find that the vocals of a new vocalist are too bright and their sibilance is too harsh, we recommend that you try this tip. Due to their gentle high-end roll-off, ribbon dynamic microphones provide an accurate but dark frequency response.
FET condenser microphones, on the other hand, sound overly accurate and sterile (especially when used to record digital audio).
8. Vocal Techniques for Reducing Sibilances
It is important, to begin with, realistic expectations in this area. Depending on the singer’s experience and ability, basic vocal technique changes will have a significant effect. However, regardless of how much or how little experience your vocalist has, there are some things you can do to ensure that the performance begins without sibilance.
To demonstrate where the singer should stand, have them hold up their fists and use them as spacers. The microphone should be separated from the pop filter by one fist, and the singer’s mouth should be separated from the pop filter by another fist.
There is no doubt that an experienced singer will be able to put the techniques discussed in the videos into practice more quickly than someone who is less experienced, but singers of all levels will benefit greatly from them. Nevertheless, do not expect the vocal technique to resolve the problem alone, especially if the singer is less experienced or untrained.
Conclusion
We have already discussed why it might be important to reduce sibilance during recording rather than having to fix it during mixing. As you can see, using automated de-essers is extremely time-consuming due to the need to make small adjustments in order to maintain a balance between removing sibilance and making the vocal track sound unnatural.
It goes without saying that reducing sibilance during the recording process will certainly save you time, but it is also possible that you will have to make some adjustments to the mix as well as reduce sibilance during the recording process. As a result, you will be able to make smaller changes and you will end up with a track that is more effective in the long run.