Tips for Better Home Recordings
Introduction
It is likely that you are already making recordings at home if you have a microphone and a computer. Producing tracks that are competitive with studio releases is possible, but unlikely. There are some instances, however, when home recordings are not comparable to those recorded in a recording studio.
The challenge lies in recording with limited equipment, imperfect acoustics, and a limited amount of experience, which all work together in the final mix. Fortunately, it can be done, and sometimes it is difficult to distinguish between the two.
In order to achieve the best of both worlds, many musicians now split their recording time between the home studio and the recording studio.
Follow these 10 basic guidelines to form good habits in the name of professional-sounding vocals.
1. Reduce Background Noise
Professional recordings are distinguished from amateur recordings by the presence or absence of background noise. It is sometimes difficult to minimize background noise when recording at home, especially if you live in an apartment, next to a busy street, or share a living space with another person.
Listen to your environment carefully before you begin your recording session. In order to avoid frustration later, it is advisable that you power down all noise makers before you begin recording. You may also wish to create a noise reduction checklist for yourself to ensure that you do not miss anything.
There are a lot of unpredictable noises that can creep into your recordings when recording in your bedroom studio. As much as possible, background noise should be minimized when recording a professional recording.
2. Select The Right Microphone For The Job
When recording at home, you will likely use either a dynamic or a condenser microphone. A dynamic microphone is designed to capture sounds close up and personal. It is possible for them to withstand loud sounds; however, their pickup pattern does not perform well when it comes to picking up distant sources of sound.
In contrast, condenser microphones provide a more accurate reproduction of sound from a distance. In addition to capturing delicate and detailed audio, they also work well for capturing video. Remember tip number one – if your room sounds bad, use dynamic microphones. When your recording room is not treated for reverberation, condenser microphones will pick up more of that reverberation.
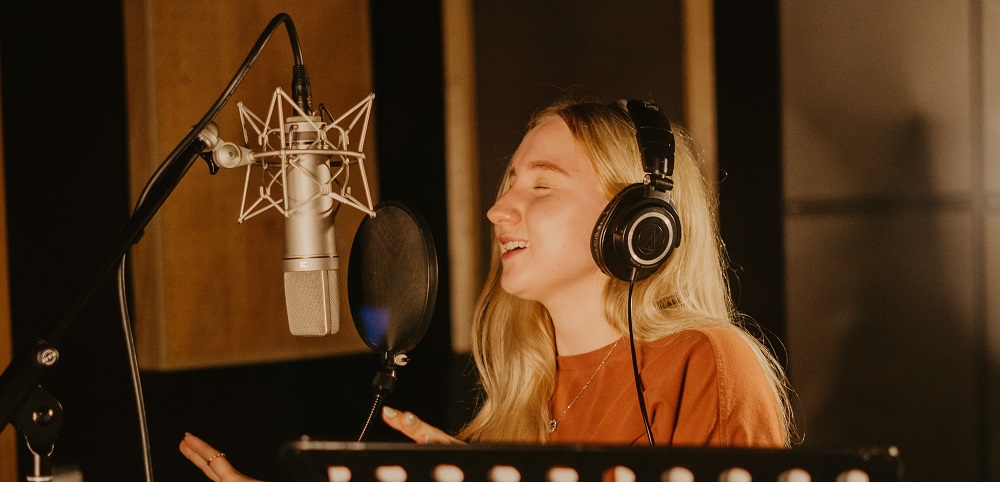
3. Distance Between You And The Mic
The tonality of the recorded voice can be greatly affected by the distance between the singer’s mouth and the condenser microphone capsule. Closer to the microphone, the microphone begins to emphasize low frequencies more strongly.
Ideally, the vocalist should be positioned approximately six inches away from the microphone in order to avoid this problem. To capture a more natural sound, podcasters can be even farther away from the microphone. Try experimenting with placement and distance in order to achieve the sound you desire.
Also, your microphone should be placed between 2 and 12 inches from your face. Depending on the distance you select, you should also use a pop screen filter approximately one to two inches from the microphone, as well as additional measures in your recording space and mix.
4. Always Leave Headroom During Tracking
In terms of tracking, what we strive for is a good signal-to-noise ratio, as well as a strong, solid signal. Thanks to modern 24 and 32-bit recording technologies, our DAWS can easily capture recordings with a high signal-to-noise ratio and a wide dynamic range.
There is no need to turn up the preamp on your interface to the point where it is close to clipping levels. When a signal clips the preamp, and the recording is then distorted, there is no way to go back once the signal clips the preamp.
In order to keep your preamp in good shape, it is a good idea to keep it a bit lower than the maximum recording volume. Alternatively, leave some headroom for volume and dynamic fluctuations.
5. Edit to Improve the Recording
The ideal situation would be to record the best possible performance. Hopefully, there will be no need to edit or modify that recording in any way. It is not necessary to be afraid of editing post-recording to improve the quality of the recording in the real world.
You should not be afraid to move notes within your DAW if you have a great take, but there is a slight timing error on a couple of notes. Also, autotuning can be used to correct out-of-tune notes on a vocal track when necessary.
It is not my intention to become one of those people who insists that such tools should never be used. It is certainly a good idea to get the original take as good as possible.
6. Create a More Interesting Digital Space
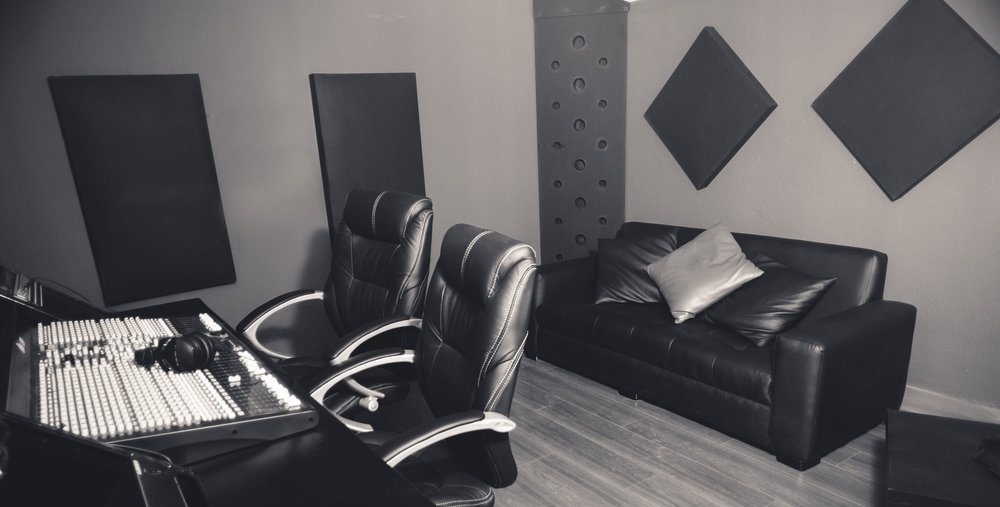
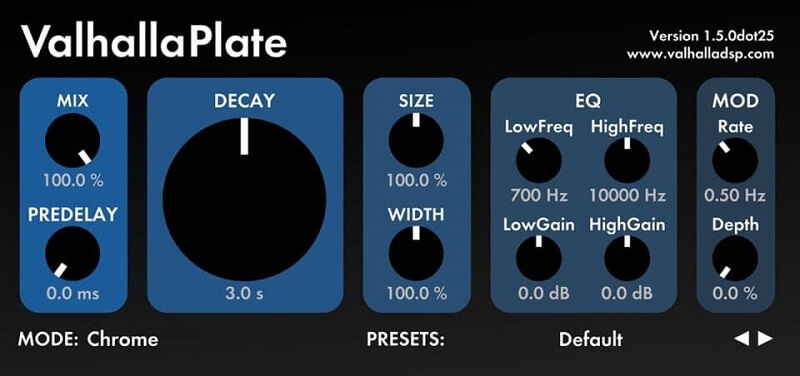
A great deal of reverb has been used in bedroom productions in order to “cover up” poorly recorded or poorly performed parts. Nevertheless, there is no doubt that a high-quality living room makes the difference between a commercial space and a private residence. In order to achieve that living room feels on a budget, it is best to use reverb plugins to create the desired effect.
The idea is to avoid the use of obvious, long-tail reverbs (for example, hall, plate, spring, etc.). We are trying to recreate the air and depth of a high-quality tracking environment by avoiding obvious, long-tail reverbs. This application is best served by short room and chamber reverbs, and some of my favorites are the ones that mimic specific places.
7. Don’t Overuse Correction Tools
We have a tendency to become hypercritical of our own performances when recording our own music and to rely heavily on timing and pitch correction in order to achieve the desired result.
In the event that vocal takes are over-corrected or performances are quantized too heavily, the result may be a robotic, soulless recording. It is usually more engaging to leave some of the human element in the performance. To solve this problem, you must stop mixing with your eyes.
Listen to the track with your eyes closed; if you hear something that bothers you, by all means, correct it; however, using these tools in standard practice can sometimes deplete your composition of its liveliness. When these sounds are used for effect, some of these concerns are thrown out the window. Make sure you trust your ears rather than your eyes.
8. Record Yourself to Practice
Having a basic home studio has become very easy and cost-effective due to technological advancements. In our opinion, singers should practice recording regularly. You may not have heard subtle qualities of your voice before because recording microphones pick up subtle characteristics of your voice.
In addition, we are all aware that the sound of our voice from the outside is quite different from that heard internally. Prior to recording in a professional studio, it is extremely important to become familiar with the sound of your recorded voice and to practice recording techniques.
The only equipment you will need is a laptop, an audio interface, a microphone, headphones, and basic recording software.
9. Take Time to Test
There is a tendency to fall into the habit of using the same gear over and over again. When you have the option and the time to test different mics, pre-amps, and other toys on your instruments or vocals, you should do it if you have the time.
You should also experiment with different combinations of recording equipment in your recording chain. If you want to use the right gear for your music, you should choose it based on how it sounds, not what you are “supposed” to use.
Alternatively, you can try out a few different combinations and then choose the one that’s best for you based on what you have. The best thing to do when you have a choice is not just stick something up without thinking about it.
10. Love Your Sound
Professional singers have frequently stated, “I hate recording my voice because I hate the sound.” If singing is your profession, you should start loving your voice right now! If you are not happy with your sound, investigate ways in which you can improve it.
Do you think it is your technique? Would it be possible for you to experiment with your tone? Is your voice unfamiliar to you or are you simply not used to listening to it? If that is the case, then tip number eight is the answer to your problem.
That may have always been the sound of your voice and maybe it’s time for you to become accustomed to it, so you can concentrate on emotion and delivery instead of judging what you sound like.
Conclusion
When it comes to making music at home, there are a lot of things that need to be considered. A recording’s sound quality is greatly influenced by the equipment used, the recording settings, the room in which it is being made, and the order in which the instruments are recorded.
These factors must be kept in mind if you intend to produce a professional sound. Home recordists can emulate iconic gear from different eras at a fraction of the cost and with greater flexibility. The quality of your recordings will not suffer if you work in a lavish studio with perfect acoustics and vintage equipment.
To get you started and possibly inspire you to learn more, here are a few of the most important tips. Here are just a few of the most important ones to get you started on the subject.