How to EQ Reverb 101
Intro: How to EQ reverb bus?
Most of the time reverb is not added as an insert in a tool track. It’s rather on an aux channel so you’re able to send the desired amount of information to any track.
It’s the obvious benefit of having the ability to decide the amount of reverb for each track. You can also process the reverb, from the dry paths in almost any way you would like. Your reverbs deserve the same attention to detail as your own instruments and vocals. More details on how to EQ reverb in your song, are in the article below!
Clearing Low End in a Reverb Bus
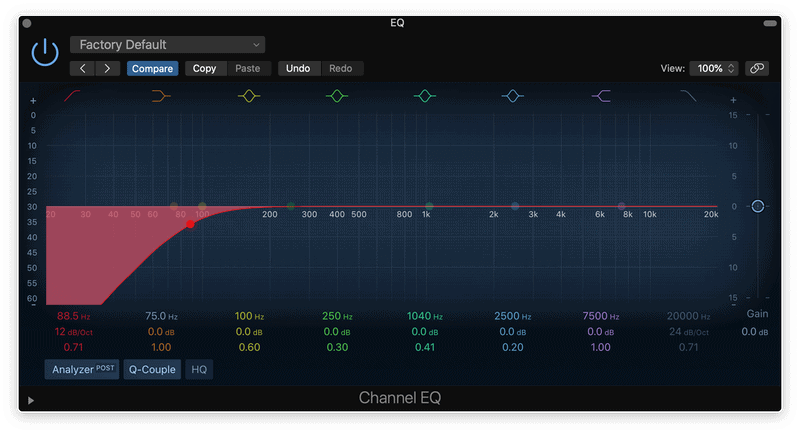
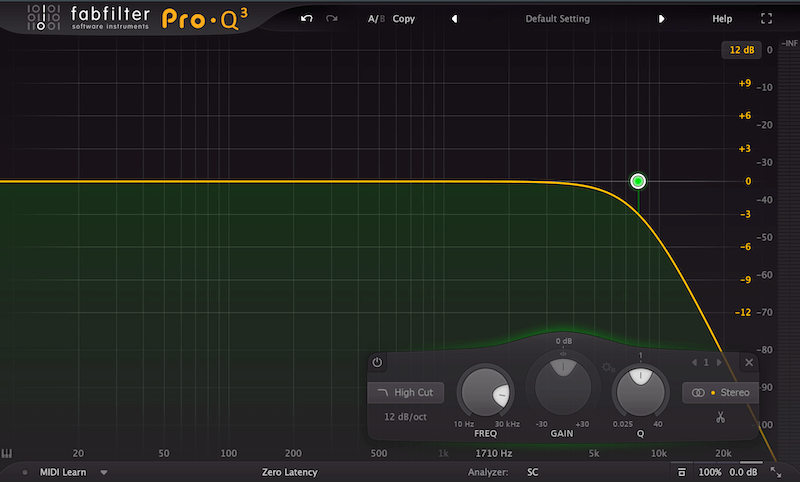
Hopefully, you’re conscious of the benefits of low and high-pass filters. You have been using these techniques in your mix already. To keep low-end and other bad frequencies tamed. Another identical function on reverb is high passing it with an EQ, i.e. rolling off its low end will keep the space open. Leaving the minimal effect in means you eliminated bad spots as you add more reverb to more channels.
EQ can be really beneficial for converting your reverb to fit the tune. Too much low end on reverb returns may increase the reduced mid-muddiness of a mix. In most cases, you will not lose much by
EQing out a considerable number of low ends in the reverb itself. You can also experiment with putting on some high-end also. To allow it to seem a little warmer, and less harsh or sibilant.
You do not need those low frequencies rumbling around. Keep it light and airy, but remember it’s a nice line. You don’t want sibilant high frequencies to put off spikes in your reverb either. The low-cut filters guarantee that only the sweet area of the source signal strikes the reverb.
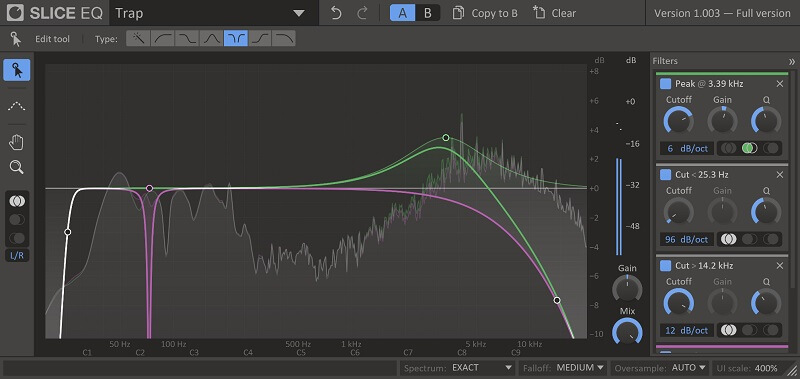
For the EQing vocal reverb bus, I’m likely to drop the 1 kHz point by 2 dB using a wide bell. This helps to maintain the character of the vocal present and upfront. This is the point where you are EQing the reverb to create some more space for the vocal.
Almost every reverb plugin has a section for the EQ where you can tame the frequencies you do not need. To add a reverb is easy, but controlling it is another thing.
Go ahead and chop out each of the frequencies on your reverb out of 450 Hz and under, rolling upward at about 500 Hz give or take. Utilizing send stations can be helpful not only in the sound style but also mixing, as we could see from this article.
Clearing High End in a Reverb Bus
Same as the low ends, high frequencies can cause some issues with the reverb. If you have stacked reverbs on many elements that have high frequencies in them, then you might face this problem. Now suddenly, your track will sound too wet and bright and this is the only reason for that.
Our suggestion here is to go ahead and use the high-cut knob on your reverb EQ and trim down the upper frequencies from the reverb itself. This will create a more intimate reverb effect and it will take back the sound in the mix. Also, by doing this you are controlling the frequencies of the reverb and you are taking care of the brightness we mentioned earlier.
A save threshold that you can cut above is above 7kHz, but most of the time it depends on the signal. Our advice here is to use your best judgment where you should draw a line with the EQ, but what you should be after is a reverb that is controlled and present, but not noticeable – but also to miss it when you mute it.
This means that it fills empty spots of the signal and it’s not interfering with the signal, just complimenting it.
Boosting Reverb Frequencies
Well, until now we talked about clearing the reverb frequencies that we didn’t need. Now we are going to talk about frequencies that we can boost to make the reverb more noticeable if needed.
Usually, these frequencies are found in the middle area. But here is our approach. We try to boost reverb frequencies that are harmonic from the root frequency of the signal itself. By doing this, you are not going to create more presence in the already busy area, but you are going to boost the ones that are going to make the reverb fuller and more complete.
This brings us to the next important topic that you should know when you are mixing such effects.
Using FX/AUX Tracks for Reverb
What an amazing feature. We simply love this and whoever invented this approach should be praised highly. In other words, this is parallel processing of the reverb, which opens up whole new horizons when you are at the stage of mixing those effects.
When you are using FX or AUX track, you are getting a dedicated channel or fader for the effect itself. This means that now this effect has its own inserts and sends where you can add additional processing. Most of the time, when the reverb plugin you picked doesn’t have an EQ section, this is the best way to add more processing to it.
Another very useful purpose of having a dedicated fader for the reverb is that you will have complete control over the volume of the reverb. Everything will be done on this FX track and will not affect the signal directly.
With the fader, you will be able to insert this parallel processed signal back to the original and add it up to taste. This will not affect the initial quality or status of the original signal but will go parallelly with it.
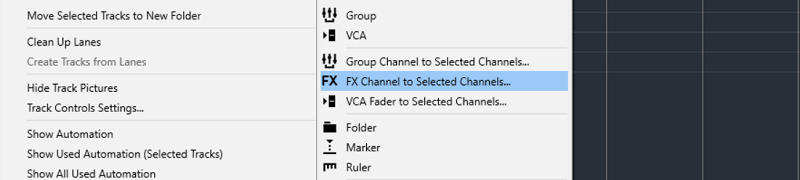
How to Add FX Channel in Cubase
By adding an EQ after the reverb in the chain, you will be addressing the frequency of the reverb only. But this is only the start. There are lots of other things that you can do to the reverb, but for this case, we are going to stick only to the stage of cutting or adding frequencies.
Creative EQ
This is something that you will use to introduce some characters to the reverb. By using analog emulated EQ plugins or hardware gear, probably this is what you will be after. The reverb can also benefit from this process, not only the original tracks and elements that you have in your song.
Boosting the sweet spot or some other area that you think is lacking in the reverb is a crucial step of shaping your reverb sound, so do not sleep on it. Instead, address it and fix it.
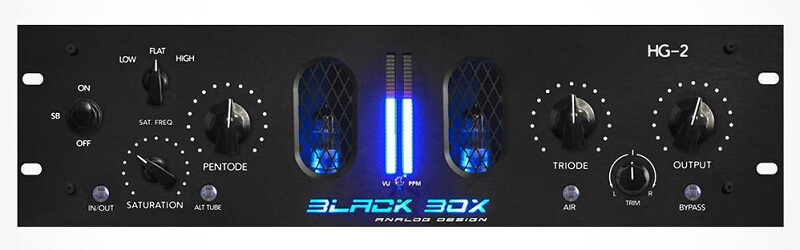
Saturation
With saturation, you will be adding some beefiness to the reverb and you will make it more stand out. Similar to the additive analog EQing, the saturation will address only the harmonics of the signal itself, meaning that will create a pleasant sound and not ruin what you already have.
It is very important to know how much you should add to this effect to your effect, but most of the time you will not be able to overdo it if you go after a smooth and subtle approach.
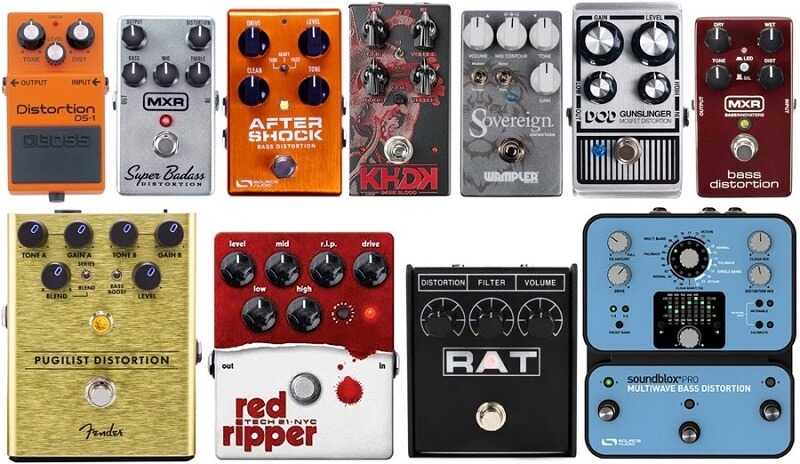
Distortion
Well with the distortion, you will be getting a bit more aggressive into the reverb processing. It is not an unknown or weird method. If you think that your reverb needs some distortion to it, feel free to do it!
With the distortion, besides adding some hardcore saturation, you will add some upper frequencies as well. Some fuzz or overdrive distortion will have the power to add some grit to the reverb. This will make the reverb stand out and be more noticeable, but if that is your purpose, then this is the way to go.
De-esser
Similar to the reductive or subtractive EQ, the de-esser is having the same purpose – to cut unneeded frequencies. But instead of static EQ cuts, the de-esser will react only when the selected frequencies will go over the set threshold 0r be hurtful to the sound.
Let’s say you have some spikes in the area of 6.5k from time to time, meaning that are not there all the time. De-esser will be able to sort them out every time when they will come into play. Dynamic EQ is another tool that you can use at this stage, but the de-esser is not a bad option as well.

Other processing
Just for the sake of parallel processing, we are going to mention some stuff that you can use on your reverb. You can compress the reverb, both serial and multiband compression will work.
Also, you will be able to work with the space of the reverb width as well. Using stereo spreader plugins might make the effect to be more noticeable on the sides.
Adding a tremolo, chorus, phaser, or flanger to the reverb FX channel is a whole bunch of plugins and effects that you can use. The tremolo will add interesting movement to the reverb, the chorus and phaser will add some width and noticeability to it and the flanger will only make it more “trippy”.
Experimenting with these effects can often time result in interesting outcomes, so if you have some spare time, just practice processing your reverb!
Another thing that you can use is mid/side processing, where you will address the mid and the stereo area separately. You can add some rider plugins to control the dynamics as well and you can use even more time-based effects on top of that for additional creative mixing. The options are limitless if you know what you are after!
Sidechaining the Reverb
Typically, a reverb appears to muddy the mix but nonetheless doesn’t really feel loud enough throughout pauses in the action. Before altering the reverb sound or stepping into detailed automation, strive to utilize a ducker on the reverb signal.
Put a compressor (or gate with adverse attenuation capability) after the reverb, and set the compressor in order that it reacts to its exterior side‑chain, relatively than to the reverb channel’s signal. Send the dry signal, for example, a lead vocal, to the compressor’s side‑chain input.
Now, the reverb sound ought to drop when the vocal is playing again and swell up throughout the gaps in between. Use the compressor’s attack and release controls to regulate the velocity at which the reverb swells up between phrases and the way it’s quickly introduced under control again when the vocal will get louder once more. Set these timings by ear.
With a multiband compressor, you will be able to select an area that you want to be ducked once the vocal plays. For example, if the vocal meaty area is around 750Hz, then you can create a band in the multiband compressor that will be in the range from 700Hz to 800Hz. Sidechain this band only to the vocals and every time the vocals play, only this area will be ducked.
This will create an even more controlled and blended reverb to the vocals and the frequency balance will be very smooth and not even noticeable. The naturality of this process is what we are after because it will sound like the reverb is part of the vocal recording, even if we know that this is not the case.
Mixing the Reverb
There’s nothing more important to your song than the instruments themselves. This usually means the reverb shouldn’t get in the way of anything. It must sit in the background, filling spaces in the frequency spectrum that are opened by the instruments.
Also being quieter in the places where the elements need to remain clear and focused. You’ll be able to pull this off however you desire. A great start that will blow your brain is to use a high pass filter or add a steep low-end roll-off on your parametric EQ.
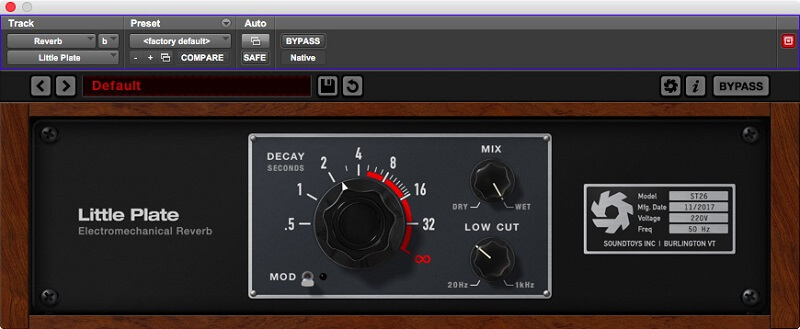
You don’t always have to add another EQ, you can do your clipping in the reverb‘s personal EQ controls. As an instance, H-Reverb includes a full EQ module constructed in. It also has a dynamics control section. That means that you may do the complete reverb effect mentioned earlier from a single plugin.
The pre-delay will return intelligibility to the beginning phrases, and make them more noticeable. Applying an EQ for reverb buses is what will return full clarity to your mix. That is of utmost importance that amateurs miss because they are not even utilizing sends. You can even apply presets to your bus, exactly like any other track in your mixer.
Never set a reverb directly to your synth and abandon it. They’re built so that they occasionally can incorporate low-end “junk” into your mix. If you mix your reverb and even add filters and effects to it, you are likely to receive a lot more space.

Using Reverb EQ Presets
It is not something that people do not do. We all use presets from time to time when we feel we need some external opinion on the processing. The only thing that might be wrong here is to leave the presets as they are.
After applying the preset, go ahead and tweak the parameters up to your taste and needs. It is counterproductive to leave them just like that. We understand that that precise preset works perfectly for you, but go ahead and try some other options as well.
The EQ will often offer some “telephone EQ” preset, but again, you will need to tweak it accordingly to your song.
The Great “Abbey Road” Reverb Trick
This can be a fairly common one, and it’s an ideal method to add dimension to your vocals without overwhelming the remainder of the mix with reverb! We cannot talk about EQing as a reverb and not mention this one.
When you add reverb to a vocal, you may suppose it’s too much and you will end up turning it down until it’s barely there. You then may compress it so you possibly can hear it more, and try different methods to hear it more and more. You’re looking for the stability of the area around a vocal without washing it out completely.
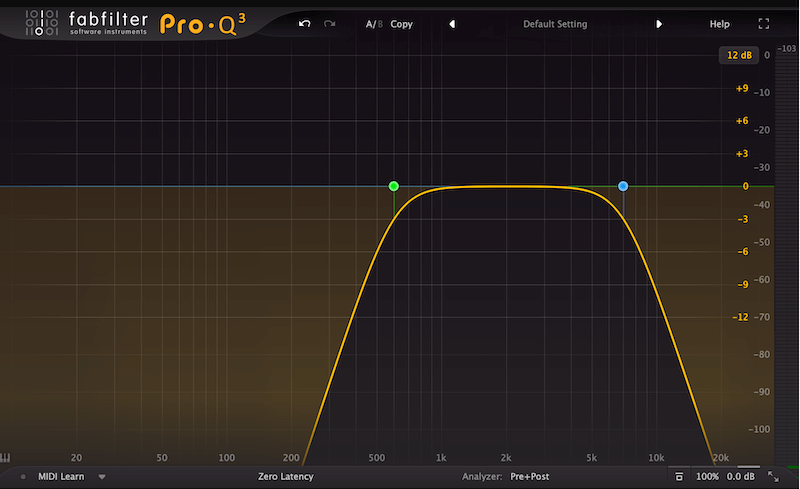
What the great people at Abbey Road discovered was they might use high and low pass filters. So take an EQ in your reverb return and high pass and low pass after it. Abbey Road engineers initially thought 600 Hz and 10 kHz was a superb start line, however, you possibly can determine for yourself what sounds finest on your mix.
You’ll discover that the low end that prompted all of the muddiness is gone instantly. For vocal reverb, you may even come all the way down to around 7 kHz, and even lower when you’d like.
Taking it a step additional, you possibly can take out the mid-range aggression. If we go around 2 kHz within the center and dip it a little bit, it would get even sweeter. It’s an extremely easy, good trick. Additionally, you can automate the position of the lower or the upper barrier and add some interesting movement when you are at a stage of transition or bridge. Explore!
Conclusion
We just want to say that we are really hyped when we need to use reverb and even more when we need to process it. This is the point where we can express our creative side in the mixing process and add our personal feel to the project.
Did you find this article useful? We believe that we hit all the important points that are out there for EQing the reverb. If you think that we missed something, please write us a comment and we will be more than happy to review that and add it to our content.
Best Mastering Equalizers: Shape Your Final Frequencies!
Best 500 Series Equalizers: Top 10 Models To Shape Your Frequencies!
Bettermaker Stereo Passive Equalizer Review: New Pultec-Style Equalizer!
Heritage Audio Motorcity EQualizer Review: Amazing 7-band Mono Passive EQ!
API Select SV14 Review: Great New 500 Series EQ from API! (2023)