EQing Drum Overheads
Introduction
It is not uncommon for drum overheads to be recorded poorly and lack the excitement, energy, and brightness necessary to propel the mix forward. The EQing of drum overheads cannot be simplified to follow a set step-by-step guide; every mix is different. While EQing overheads, we should consider certain factors, which is what the topic of this article is all about.
Cymbals are usually the first thing people grab when they want an unnaturally close and clean sound, while the whole kit is usually the first thing they grab when they want a more natural sound. If we only need the cymbals, we can high-pass the overheads to eliminate the kick and body. When it comes to this process, we usually recommend linear phase EQ.
Below in this article, we will consider some points in regard to EQing and fixing the overheads to suit your track properly. There are some tactics that you can practice to get the best possible outcome and also we will share some tricks that you can reach for.
Phase Aligning the Stereo Pair Mics
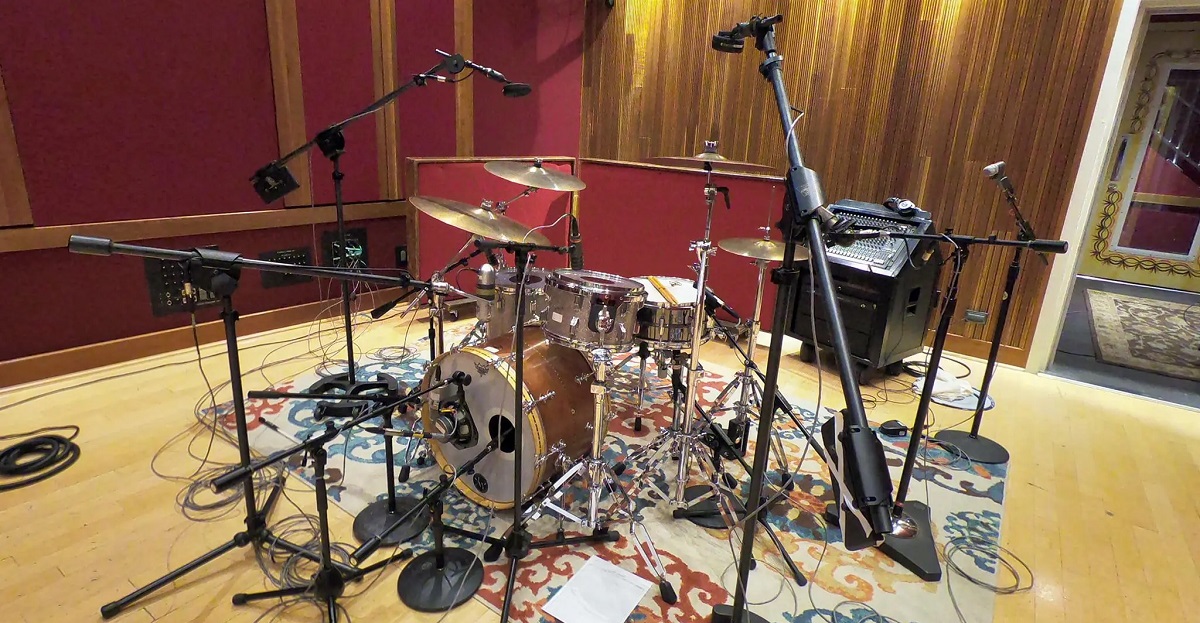
We are going to skip the tactics for recording overheads and we are going to focus mainly on the signals that we already have at hand. That topic in our opinion deserves a separate dedicated article which will come later on.
So let’s say that you already have the mics recorded and now you are at the stage to start processing them. We believe that the first thing that should be considered is the phase alignment since if this problem happens, the signals will cancel themselves, which will result in losing some information in the frequency spectrum.
Even tho the most common spot for cancellation is in the low end, that doesn’t mean that higher frequencies are secured from this phenomenon. Make sure that the tracks are aligned and that they are ready for further processing and EQing as well.
Check our article on audio phase and phase cancellation here!
Cleaning Out The Signal
Even though the signals are recorded with two separate microphones at the same time, our approach here is to process them separately first. That means first cleaning the left microphone, then the right one (frequency-wise).
You never know what one mic might pick up in opposition to the other one. So, do not overlook this process. It takes a very small amount of time, but you might end up finding something to clean that might not be apparent when listening to the signals as a whole stereo sound.
If you are done with this process, then you should move on with cutting the area that is not even actually there and that you do not need at all. Our suggestion at this point is to cut out the kick drum and leave the snare drum to the signal since they might introduce sound cancellation later on when you play the whole drum kit ad a whole.
So here, a simple high pass filter should do its job in order to achieve a clean overhead sound and to make the overheads sound natural. To avoid sounding lifeless, cymbals must be carved out before every aberrant tone is removed.
Attenuation is applied only when there is an irritating resonance in the context of the complete recording. A de-esser can be used a little bit to keep the very top end of the cymbals in check if the sound of your cymbals is a little too apparent.
If certain hits are over-sizzling your microphone, you may roll off a little top end. Once done with your cleaning, move on to other processes, after which you should return to some creative EQing.
Creative EQing
At this stage, we believe that you applied the right amount of compression to the overhead mics for them to cut through the mix and mix properly with the rest of the drums, getting a more coherent drum sound and a more transparent drum mix.
So this is where things become interesting. Here you can practice any tip and trick you have up your sleeve to make the overhead tracks sound great. Usually, here we have two approaches:
- The first one is to EQ the two tracks we have separately – this means that first, we are going to boost frequencies on the left microphone, then on the right, or
- You can group them and use EQ on them as a whole where you will be making tweaks that will affect both tracks at the same time.
Here, our suggestion is to reach out for an analog EQ or analog EQ plugin emulation to introduce some “goodness” to the signal. Even though the effect of this will be barely apparent, a 1% improvement is an improvement to the sound.
If you make more vintage and old-school music, reach out for the good ol’ Pultec EQ, if you are making more modern and popular – go for the SSL EQs. In case you are working on pop-rock or live bands, use the API EQs. This pattern always worked for us, maybe you will find it useful as well.
When it comes to picking the frequencies that you want to boost, we usually used a very simple technique to select them. Use the EQ as a volume balancer here and boost the core frequencies of the elements that need to be louder compared to the rest of the elements in the OH mics.

For example. if your cymbals are dominant and the hi-hat is a bit lower, try to find the frequencies of the hi-hat and boost them a touch. We found that a dynamic EQ works best in this case since it will work only when the hats are playing and make them louder a bit. Sometimes even 1dB of boost is enough.
The same goes with the toms. They are usually easier to mix in since they have their own frequencies that are not shared with cymbals and hats. And here is a small tip that we want to use:
- 1st approach – EQing the channels separately: Left mic is hard-panned left and the right mic is hard-panned right. Boost the right tom on the left track and boost the left tom on the right track. This will improve the stereo width and introduce an interesting note to the overheads. Aim to boost different frequencies according to the tom you are working on for an even more exaggerated effect.
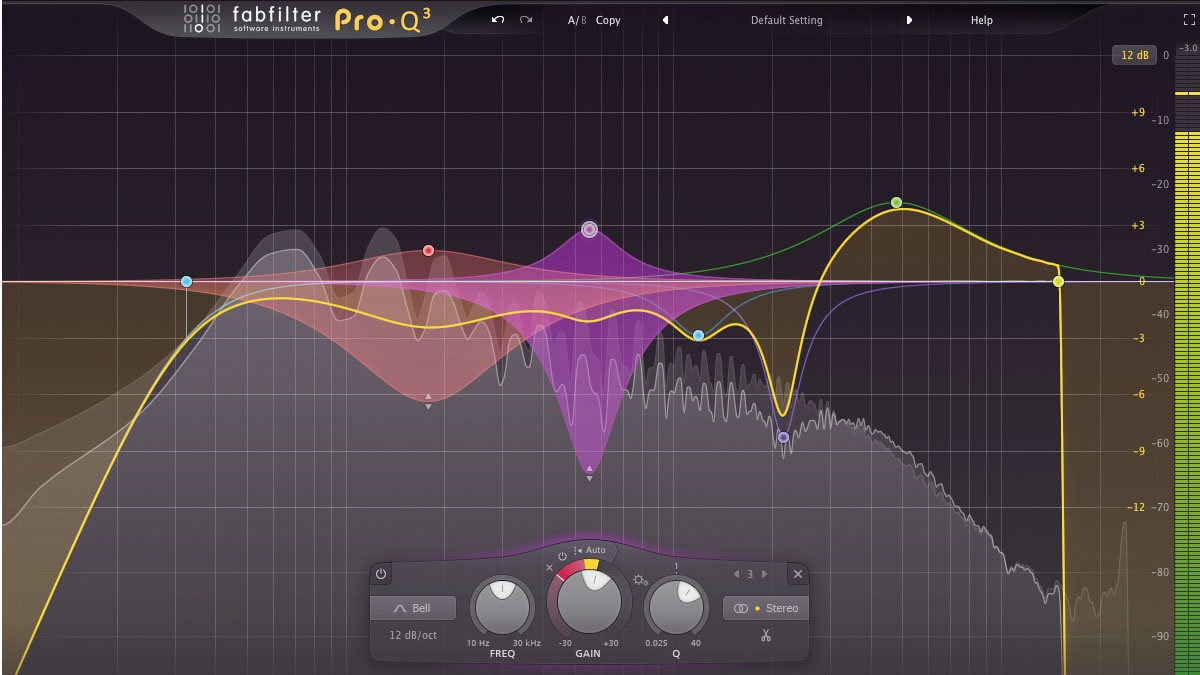
- 2nd approach – EQing the overheads as a group: Use an EQ that you can select the sides of the band you are creating. ProQ3 by FabFilter has this feature. From here, you proceed with the same mindset as above, just from one interface. Boost the left tom and set the side to be on the right and boost the right tom while setting the side on the left.
Why do we set the EQ sides opposite the tom sides? Well, by doing this, you are mixing your drums from the Audience’s perspective. This is something that always worked for us and we liked it more.
Not that there is something wrong with mixing from the Drummer’s perspective, but this is just our preference. When it comes to this decision, this is something completely up to you or the bend you are working with.
If you are working on your own music and song, you can pick whatever approach you feel more comfortable with. But if you are working for a band as a mixing engineer, we suggest checking with them what is their preference and asking them for opinions on how to EQ drums to their liking.
EQing in Context
As a final step, you can apply the same overall EQ to all of the drums as we did to the overheads. All of the sounds should be bussed together into one stereo group and an EQ should be applied to the group. Next, you will be able to sculpt the perfect master EQ for your drums based on that information.
The goal here is to double-check all the elements and EQ them properly as a whole instrument that the drum kit is. Here you will be able to make the final adjustments to shape the frequency spectrum and finalize the processing of your overheads and drum tracks as well.
Conclusion
With the information you have gained in this article, you should be able to EQ your overheads and have them sounding good. It is important to keep in mind that everyone’s original drum tracks will sound slightly different, which is why your EQ may sound different from that of others.
You should experiment with these techniques until you are able to achieve the sound you desire for your OH elements. Be aware that your ears are not the only source of information. To determine which frequencies you are hitting, use the spectrum analyzer, but always let your ears be the final arbiter.
We would be happy to address any questions you have in the comments section below, and we will be happy to elaborate on and clarify the topic with you.
Best Mastering Equalizers: Shape Your Final Frequencies!
Best 500 Series Equalizers: Top 10 Models To Shape Your Frequencies!
Bettermaker Stereo Passive Equalizer Review: New Pultec-Style Equalizer!
Heritage Audio Motorcity EQualizer Review: Amazing 7-band Mono Passive EQ!
API Select SV14 Review: Great New 500 Series EQ from API! (2023)