How to Mix Drums
Introduction
Writing about the right way to mix is a bit like dancing about architecture. There’s actually no substitution for doing it, repeatedly. I need to make that clear earlier than I get into this detailed information. What I’d love to do is offer you perspective on what to pay attention to, choices on what to work towards, and a few methods for getting from level 1 to 2.
I don’t anticipate providing you with a secret method. My hope is to provide you with some data which can expedite the educational process. I’m offering this disclaimer as a result I see too many articles claiming a “how-to-do” somewhat than a “how-to-learn”, and anybody shortchanging the truth that production is a talent that requires practice is promoting snake oil.
So, how does one mix drums? In my experience, step one is to auralize the completed sound. It is a 100% artistic choice. There isn’t any decided manner wherein your drums should sound outside of what you intend. The intention is the cornerstone of whether or not our drum treatment is successful. We have to determine creatively what we wish the listener to experience.
Usually, we wish for full, highly effective, and punchy drums. That is no surprise. However, is that all? We are able to have all of these things and have the sound really feel relaxed, or have all these things and have the drums feel aggressive. And every so often, we wish the drums to run along with a rounder, softer sound. We need to outline our objectives.
This begs the question — how do we all know what we wish? Maybe you’ve heard your favorite mix engineer say “the tune actually mixed itself.” Or, one thing to the extent of “I let the tune tell me what it desires.” That’s a result of the clues that are all contextual. The texture of the music, the which means of the lyrics and (most significantly) how the drummer is enjoying, tell us what we have to know.
1. Balance
Step one of this method for mixing drums is balance. We have to get the volume balance right before we are able to do anything.
First, solo your drum bus and turn all of your mics all the way down. Then bring up crucial parts one by one. Begin with the ingredient most vital to YOUR tune. That is often the kick or the snare. Then, one by one, bring in every part else. Balance every drum collectively till the entire drum set sounds natural.
After getting your drum set balanced, you could balance the drums with the rest of the mix. Un solo your drum bus, flip the volume all the way down, and slowly mix it in.
One trick is to ensure you’re doing this during the loudest part of the tune. When the drums are balanced in an aggressive part, they’re more prone to be nicely balanced in the remainder of the tune as well.
2. Grouping
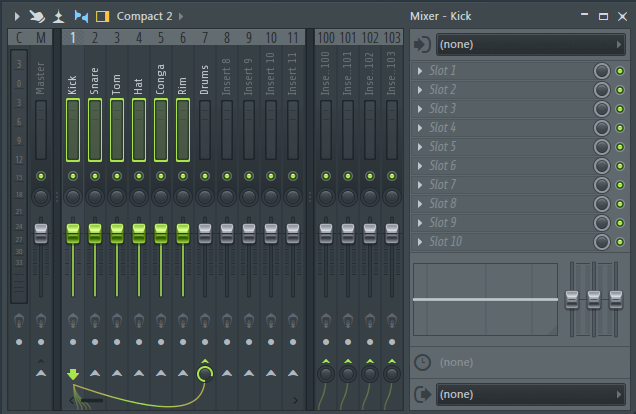
For my process, the second step is at all times the same. I group my drums collectively and output them to a subgroup.
From the subgroup, I make a few aux returns which I’ll later use for parallel processing. These will stay muted for now. It’ll additionally make a few subgroups within the drum channels. I’ll make one for the kick, the place all kick mics go, one for snare, and typically stereo groups for toms or auxiliary cymbal capture. This helps manage my thought process and consolidate channels if I’m mixing on a console.
As well as, I’ll create just a few parallel return channels for kick, snare, and a few reverb returns as well.
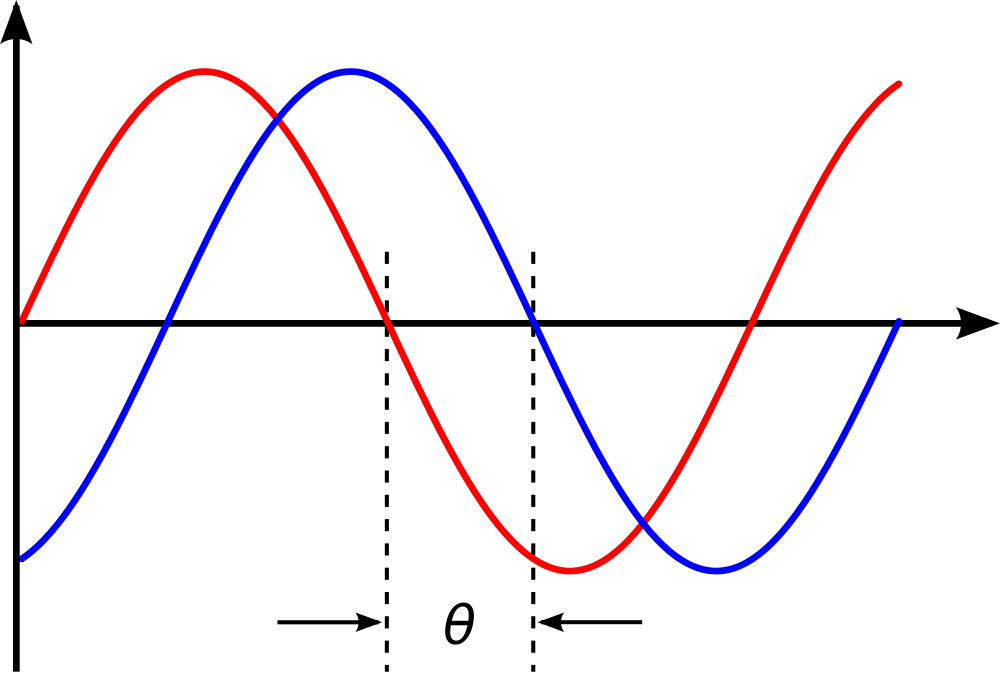
3. Check the phase
After getting your final drum tracks ready and able to go, it’s time to verify each of the tracks is in phase with one other. If one microphone was off by even half an inch during the recording process, that might trigger phase issues that make the entire drum kit sound weak and skinny.
To right phase points with drum tracks, merely zoom in on the audio track in your DAW. It needs to be simple to see which track is out of phase because the transients will probably be forward or behind the rest. Merely slide the out-of-phase track over to manually line up the transient of the primary downbeat with the opposite mics.
After correctly lining up each of the tracks you need to hear a noticeable improvement in your drum tracks.
Excellent phase alignment isn’t at all times desirable. The excellent phase within the overheads will contract the stereo image. Generally, we wish that a super robust mono center, and typically we wish for one thing very wide. Generally, we wish that a good punch from a kick drum, sometimes we desire the depth brought on by the slight timing variation.
For this reason, we have to know what we wish first. Principally, at any time when we’re altering the time relationship in exchange for a phase relationship, we’re obtaining punch and fullness at the expense of depth. You simply have to find out what’s more vital for the tune at hand.
4. Tuning Your Drums
That is a crucial part of this guide! Ensuring that your drums are in key along with your track is among the big things people miss when mixing drums in DAWs. It’s very true when you’re mixing kick drums.
In digital music, Trap & even some Hip Hop, you really need your kick drum to sing in harmony with your bass & melody. It’s a form of glue that holds every part together. So how can we do it?
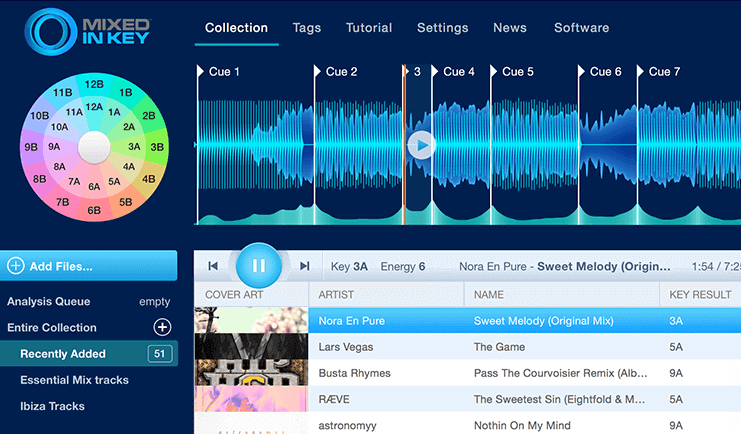
Discovering The Proper Note
The simplest way you are able to do that is by discovering the key of your track first. In case you don’t know the right way to discover out the key, there’s an awesome software known as Mixed In Key that can assist you with this.
And when you nonetheless can’t work it out: Then you can brush up on a few of your theory information, with fundamental music theory guides.
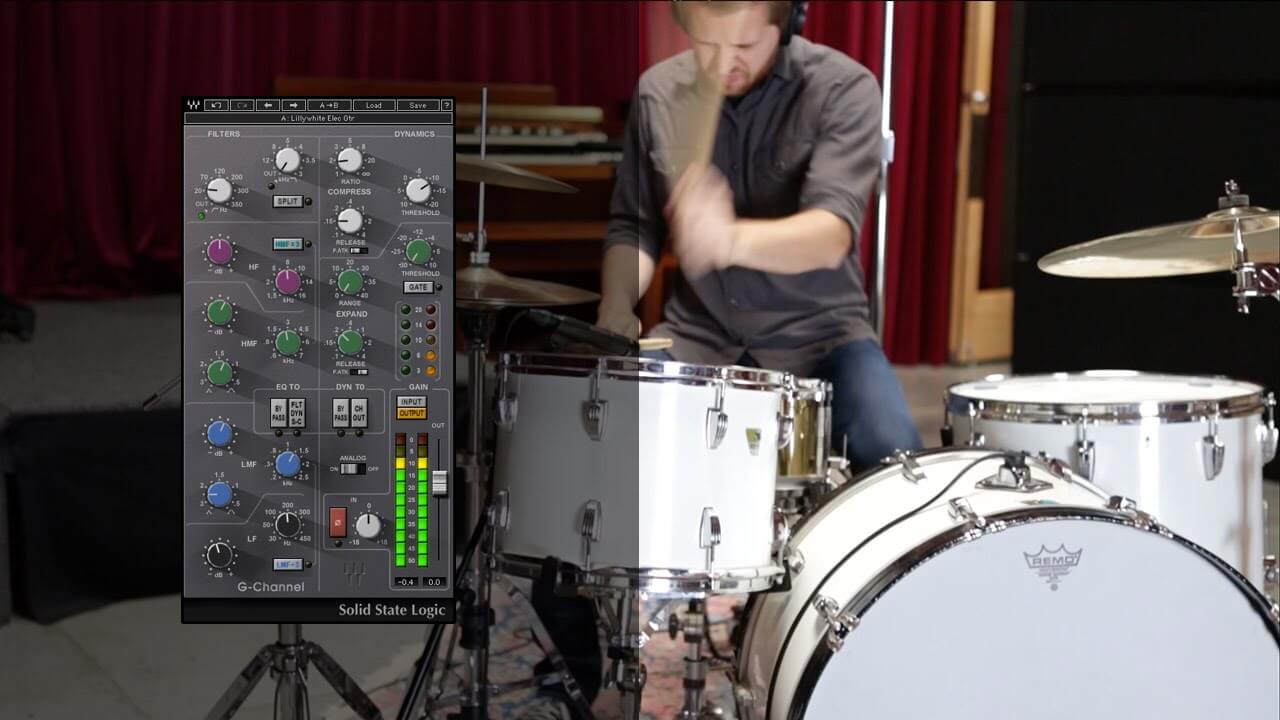
5. EQing the Drums
From there I take a look at the final treatment of the drums as a whole. How loud or soft do I need the drums in the context of the rest of the music? How bright? How clear? There’s no purpose in EQ the top end and notching out the identical room tone on every single channel if I can simply do it on the drum buss.
I’m going to establish a big image. If I would like something “analog” and “natural”, I’ll in all probability preserve most of my room tones in there and be a bit extra considered with the top end. If I would like something “poppy” and “punchy”, I’ll etch out something that isn’t foundational to the sound of the drum itself, together with all of the stuff that builds up within the lower mids, and sneak in as much sparkly top end as I can get away with.
If I crank the top end and adore it, I’ll add a de-esser to the drum buss to be able to preserve the cymbals in check. In the end, this process is a look at the entire kit.
For a more standard strategy for mixing rock drums, I usually add a broad low end from the subs and a top end from the high treble. I tend to surgically take away the low mids within the room and play up the 1-2k range relying on the way it was recorded. How to mix drums is hugely relied on how they are recorded first.
For vibier indie stuff, I’m nearly doing the exact opposite. I’ll play up the treble across the 5k range somewhat than the sparkly 10k range — and that’s if I feel it’s wanted. I’m going to be cautious about eradicating low mids and making delicate cuts, if at all.
If I’m enjoying up the low end, it’s going to be the first bass range (80-250Hz) somewhat more than the sub-frequency range. Principally, I’m trying to preserve the sound “natural” and simply ease out something which may throw off my ear.
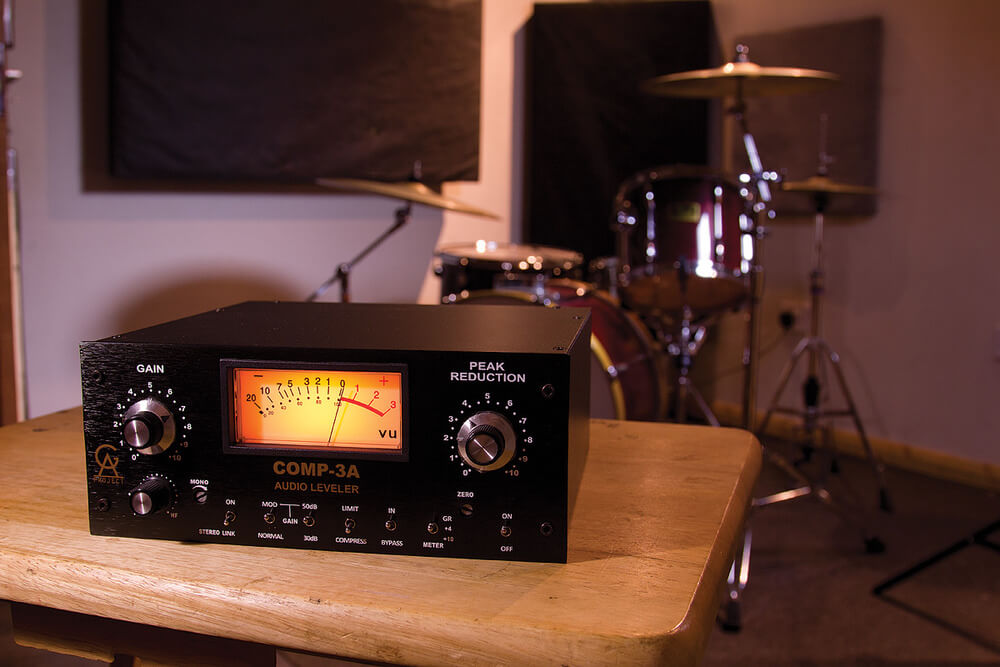
6. Compression
Compression is among the secrets and techniques to a great drum mix. Particularly on kick and snare, it’s common to see as lot as 6 dB of compression on a single channel.
For a selected punchy sound, attempt using a compressor with quick attack instances like a VCA or FET compressor.
Begin with a slow attack and quick release for a pure sound. With a slow attack time, more of the preliminary transient passes by the unit without being compressed. Slowly increase the attack time till you discover the right blend of tight and punchy.
Quick-release times are nice for snappy drums. Begin with the quickest release time possible, then slowly lower the knob till the compressor begins to “breathe” in time with the music. The gain reduction meter ought to nearly return to zero simply before the next drum hit.
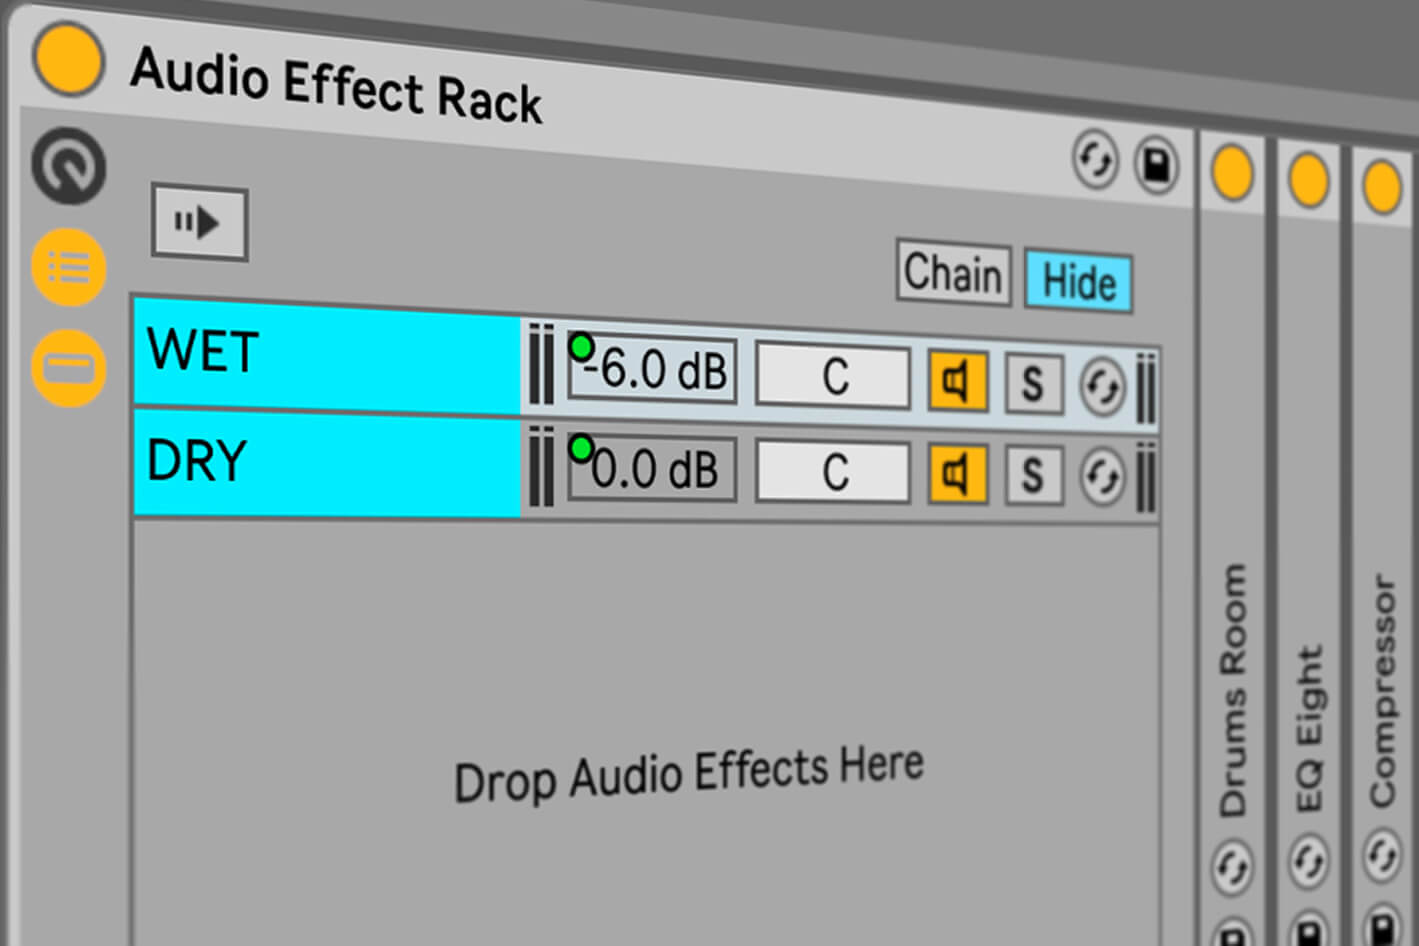
7. Parallel Processing
Parallel compression is a standard method to get much more body and punch out of drum tracks. To arrange a parallel compressor send the drums on a stereo bus to a stereo aux track. On the stereo aux track lives the compressor in parallel. We are able to both send the total drum bus to the parallel compressor, or we are able to send every individual drum ingredient to the parallel compressor.
The distinction is that sending every individual channel to the compressor permits adjusting for the relative ranges of what’s sent. For instance, you’ll be able to send extra kick and snare to the compressor than the remainder of the drum components. You’ll be able to even leave some components fully out of the compressor. Nevertheless, for simplicity’s sake, let’s send our whole drum bus to the parallel compressor.
For parallel drum settings, begin with a ratio of around 3:1. Decrease the threshold till reaching anywhere from 12dB-30dB of gain reduction. That may be a ton! Then use the attack and release parameters to control punch and sustain. The tricky factor about parallel compression is that it shouldn’t sound sonically pleasing by itself. Usually, it’s used to focus on points of the drum influence (Attack Decay Sustain Release) in an unnatural manner.
After we add it to the channels, it creates fullness. In actual fact, it might appear odd, however, we frequently want to kill a number of the initial punch (but not all) with a quicker attack. Additionally, we try for pumping with a quicker release. It is crucial that we preserve the parallel channel at a low volume relative to the drum tracks. When muting and unmuting the parallel channel to listen to its effect, we shouldn’t perceive a big volume boost.
Don’t trick yourself into thinking that it’s better with parallel compression simply because it’s too loud. Though the compression settings are dramatic, the volume drum increase with its addition ought to only be subtle, however efficient.
8. Parallel Drum Reverb
If the room mics and overheads are not offering a sufficient sense of space, it might be a good suggestion to create a parallel reverb. It may be any sort of reverb, so discover one that you just like or use a go-to. Plate reverb is a standard alternative for drums. Send the snare, toms, and high hat to the reverb and alter the send levels in the context of the mix. Usually, we wish for more reverb on the snare and toms than the other drum elements.
Reverb creates a way of distance so be cautious not to place these components too far back within the mix. Next, dial in a reverb length that’s sonically pleasing. Many engineers will use musical values to set their reverb. This requires having to transform note values into milliseconds based mostly on the BPM of the music. In case you find it tough to rely on your ears for size values, then search for how to try this conversion! It’s simple and efficient.
After that, it’s a good suggestion to EQ the reverb return. Clear up undesirable lows with the high pass and reduce out a few of the upper air with a low pass. Chances are you’ll think about notching out some mud buildup around 250 Hz also. Watch out to not thin out the reverb too much!
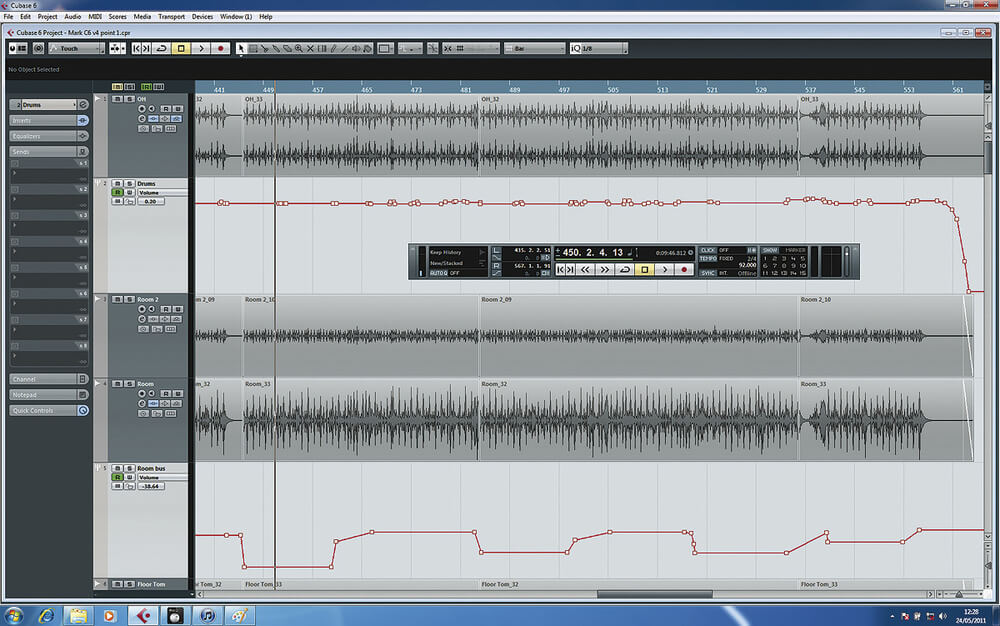
9. Set Automation
Each DAW allows you to write volume automation, which is a quite simple and efficient solution to convey your drum tracks to life. For instance, after your mix is well-set, take a nice listen to every drum channel all through the tune. Chances are you’ll discover that the hi hat’s stage is nice in the verse groove, however that should come down a touch at different instances – or that bumping it 1 dB in a certain part makes it have that much more influence.
In direction of the end of the mixing process, setting minute details with automation can additionally tighten up the way in which the drums sound in the mix, and the way in which the general arrangement is pushed home to the listener.
Ultimately, you need to have a kick that punches, a snare that cracks, toms that thunder, and cymbals that shimmer. Simply bear in mind, these tips are only a place to begin. Make sure to listen, serve the sound of the drums and the arrangement, and don’t be afraid to tweak knobs and get artistic! How to mix drums and mixing in whole surely is an artistic process as well.
Check our eBook on Mixing Tips! If you want to get a more in-depth breakdown of those tips we share, follow our link and get the “Ultimate Mixing Tips Booklet” and up your game quickly!