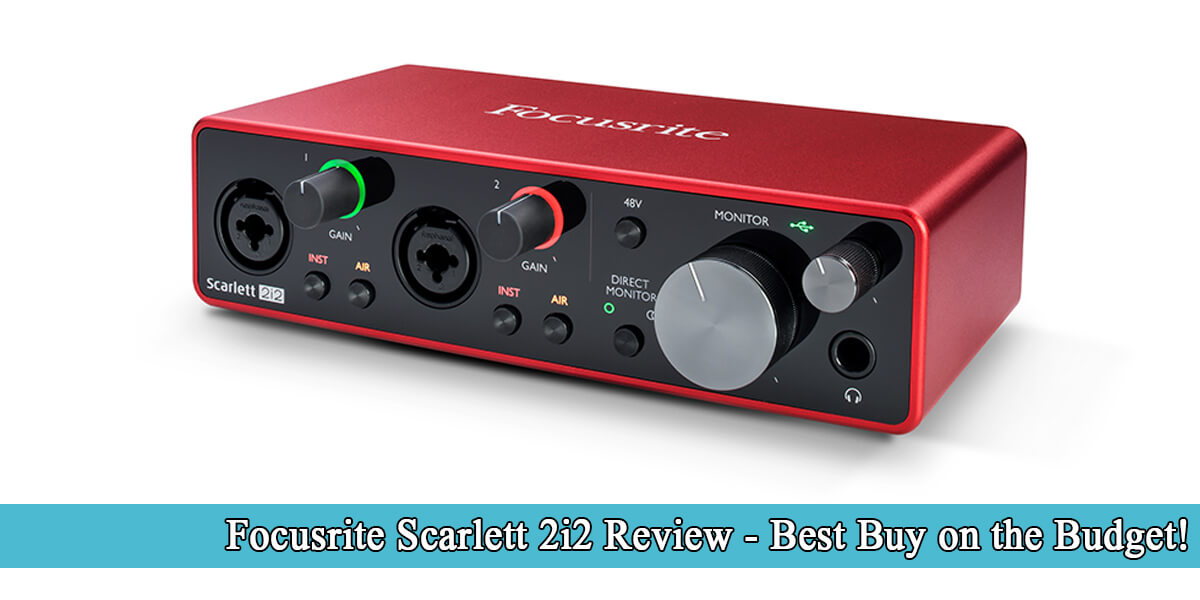
How to Start the Mix!
Introduction
Let’s talk a little about what it means to “begin mixing“. You may struggle with knowing where to begin. What do you do after importing a session? Where does all fit and how do you get going? Let us use a construction analogy to describe.
Say you would like to build a home. Congratulations, you’re prepared to custom made a home that’s all you, with all you would need. You can visualize the fancy inside, high vaulted ceilings, and the kitchen that’s pulled right from a fancy magazine.
But, all that plush decor is much later on because you are still standing in the dirt that you never cleaned up. You will not be buying fancy chandeliers, leather sofas, or appliances any time soon. You’ll have to start at the beginning and dig out the foundation.

Point of view and how to start the mix
You don’t start off with elaborate vocal reverb tricks or parallel distortion. You start off doing all the basics and go from that point. But if you are involved with the entire job from start to finish the lines become blurred a bit.
You’re tracking the project and deciding about the sounds and music production of every instrument. In the end, you are adding a little of your mixing mentality to the whole job. You have to aim for everything to sound great in the end, so that you do everything together with the end idea in mind.
Either way would be cool, there is an interesting mentality change in your thought mixing process. Depending on when you get involved in the procedure. You’re going to wind up doing lots of the same items to the mix regardless of how much you are involved.
You’re coming to it from two distinct points of view. Now, either way, you can’t begin slapping plug-ins and processors on. So before you start moving the faders around make sure you clean up all of the junk in your way.
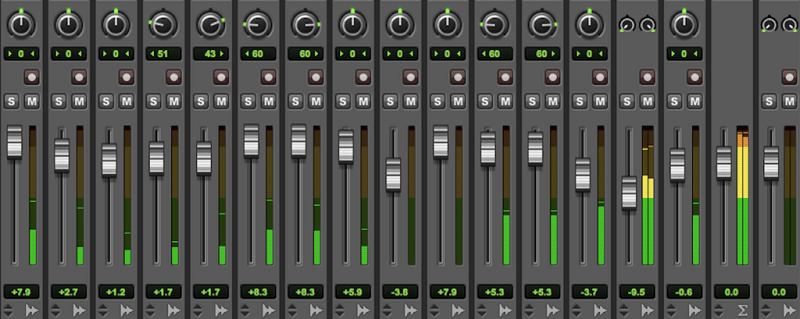
Color Coding and Labeling Tracks
As soon as we have the multi-track session laid out, we like to start with the method of coloration coding and labeling all of the tracks within the session.
Color coding and labeling is the only factor anybody can do to arrange music for mixing however it boggles my thoughts why individuals don’t do it. Sometimes we see tracks labeled like “last_export154”.
What does that even imply?
We prefer to visually see things within the mixer as groups and individuals. We believe there’s a psychological cause behind this however we are simply too lazy to find out a source. The rationale for that is it makes finding things extra easy.
Consider it like folders on your computer. If you’re on the lookout for Image#3 from Spring 2014, it would make your life easy to have a folder referred to as Spring 2014 with Image#3 inside that folder.
To simplify, we consider that this is a point that is somehow fun to do and in the end, will assist you with navigating through your project.
In case you have an enormous project where you have lots of tracks in it, you will need to do this to find every element you are after simply by looking in your sequencer and locating by color.
The identical factor applies to finding tracks in your mixer. The coloring coding is like your folders and the labeling is just like the file contained in the folder. Makes sense?
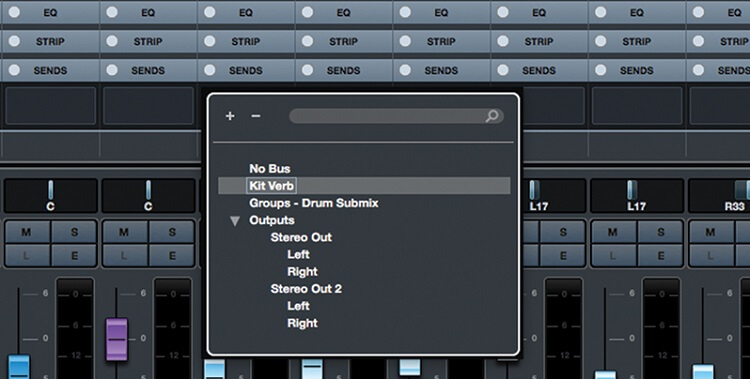
Routing the Tracks and FX Channels
This may very well be something from creating and labeling any busses you could want in the session in addition to creating your sends, returns, and aux channels.
If we all know we’re going to use a bus (typically referred to as grouping) then we love to do it at first so that after we are mixing we don’t have to turn off our creative minds and turn on the technical.
Nothing kills a music mixing session quicker than turning on the technical portion of your mind.
Busses: For bussing, set the whole lot up at first that you simply assume you will need. You may buss all of the drums collectively, the guitars collectively, and perhaps even the vocals. You’ll be able to always change things later however attempt to make this resolution early on.
Effects: You need to have already listened to the rough mix by this level so it’s best to have a thought of what sort of effects you may want. You possibly can begin with a few reverbs, a ¼ note delay, a 1/8th note delay, and perhaps a flanger or a chorus.
These don’t need to be the end, however more of a place to begin. In this manner, if you find yourself well into the mix and also you want a delay to experiment with, you might have one that you could reach for. You’re simply making an attempt to maintain the creative mixing process flowing.
We have a tendency, to begin to add effects template, which we typically advocate because it saves a whole lot of time.
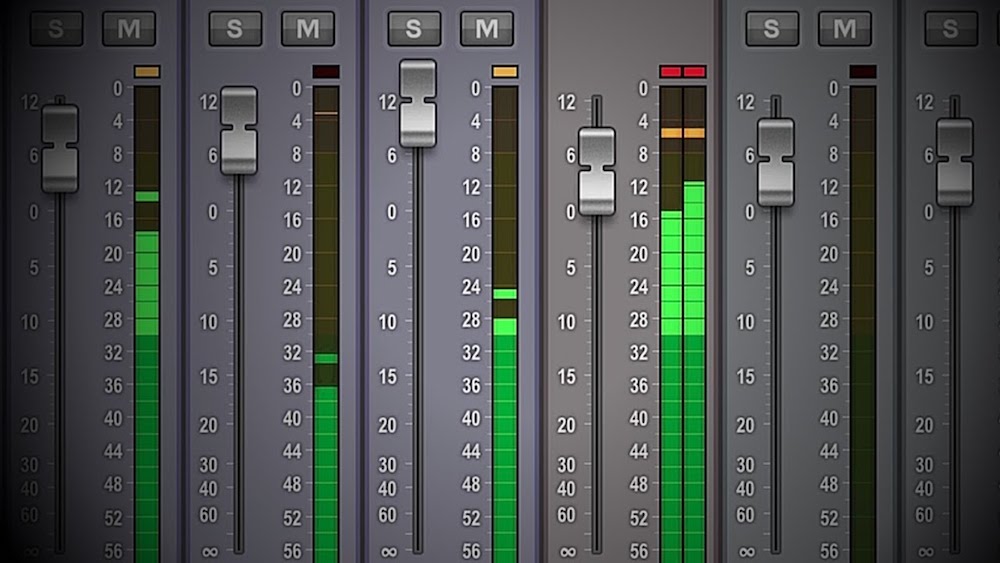
Gain Staging
In relation to producing music, one of the tough components of the entire process is nailing your mix.
However, there may be one essential part of mixing that’s usually missed by producers, inflicting their mixdowns to sound unprofessional and incomplete.
We’re speaking about gain staging, a vital process that can take your mix to the next stage. By the end of this text, you’ll have a greater understanding of the gain staging process, and how you can use it to maximize the standard of your mixdowns.
To start, a gain stage refers to any level in production where you may control the amount level of a device or track. Gain staging is the method of managing all of those volumes ranges inside a project with the aim of reaching the cleanest mix possible.
Right here’s a quick walk-by of this process utilizing delicate synths sounds like Serum for instance. On the plugin itself, it would be best to set the output to an applicable stage earlier than sending it to any effect units.
From there, you’ll make sure the levels of these units are sitting accurately before sending all of it to the master channel, which is the ultimate gain stage.
In doing so, you’ll develop a stable gain construction inside your mix that can make it simpler to get an expert mix.
Through the use of correct gain staging in your individual productions, you may be sure that your final product shall be freed from excess noise and distortion. We have a full article dedicated to this topic, so make sure to check it out in detail as well.
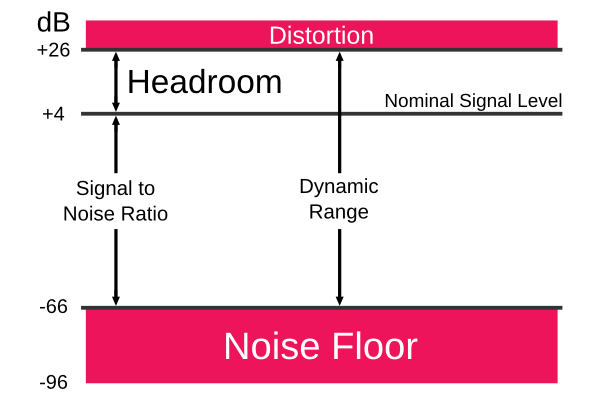
Creating Headroom
Time to provide your mix with just a small haircut. A little bit, a tiny cut there. Balance those levels and don’t be reluctant to sacrifice components of the big chop. Get loose.
Obtain a basic image of your level before you go mad with effects. Trim them so that they do not clip later. Consider headroom early.
Maintain the last goal in mind while you balance all your tracks.
This will provide you a rough mix idea of how every track will fit together. Processing may smooth out your confusing thoughts.
Mix the most important element first
So you’ve found the most crucial section of your tune, and looped it in your edit window. Now are ready to tackle it, but then what? Just begin mixing the most crucial instrument first.
Now, what exactly do I mean? Every element and effect boost the song so all of them are important to the final mix. So, you need to begin with the instrument that is not only likely to be most prominent in the mix but significant.
If you are feeling the drums to be of the most importance, or a grand piano is a centerpiece, then start there. Use your EQ, use compression, and whatever else to make that element shine, and then start adding tracks to it. You’ll then compare these tracks to your first track, adjusting their EQ and compression.
Just to avoid masking the leading track. If your tune is a piano pop tune, then it may be great to start with the piano, so make it sound full, warm, and dynamic.
Subsequently layer in the bass, drums, and acoustic guitar, and maybe complete with all the vocals. Every time you add an element, make sure it fits together with all the one(s) that came before it.

Begin with the Drums
By beginning with the drums, you give all of these tracks his finest consideration and his clearest focus. As soon as you are getting the drum sound you are after, you can then bus all the drum tracks to at least one drum group fader (Aux, VCA, and so forth) and move on.
In our workflow, we like to do that after which even hide the drum tracks. Why? So we are not tempted to go fidgeting with the individual tracks once more. One slight change and the entire drum mix can collapse.
That’s what’s so tough about mixing drums. So by giving them particular consideration at the start, you may know they sound good and you may move on from there.
Drums Actually Are One Instrument
The earlier you may mix the drums down to at least one track (visually we mean) then you may actually begin mixing. Why? Because drums actually ought to be handled as one single instrument. They’re no totally different than a bass guitar or lead vocal.
When you mix the drum tracks to an ideal balance of tone and punch, it’s finest to neglect them as individual tracks and as an alternative deal with how they match within the mix as a single instrument.
This can assist you to suppose a bigger image of how your mix sounds like in the listener’s ear. You’ll be able to ask questions like, “Do the drum sound loud enough?” and make the adjustment with one fader.
The question of, “Are the drums vivid enough?” is now merely corrected with a tiny little bit of EQ on one track. Easy, sensible, realistic.
Our personal suggestion, most of the time, is to start with the drums. We believe in the genre we are working on, the drums are the crucial element of it.
Also, our personal style when mixing Hip Hop is to have banging drums and vocals – and everything else will fit perfectly into the mix. That brings us to the next element we want to work on.

Begin with the Lead Vocal
Arguably, a very powerful component of any mix is the lead vocal—which is why it is sensible to start out there and work your way back. This method works finest with sparse preparations, where the vocal has loads of space to shine.
Since it may be tough to tell if the vocals are in tune without some other instruments within the mix, it’s finest to start out with the first rhythmic component within the mix as well. Oftentimes, that is an acoustic guitar or piano. Drums as well.
Begin by correcting any frequency points with the vocal. Use a high-pass filter to roll off any undesirable low frequencies, and a de-esser to tame any harshness within the highs.
Use compression lightly to help preserve the vocal on the front of the mix will be helpful, however relying on the track, it could be finest to manually automate the vocal level for an extra natural sound.
Next, work on creating an area for the vocal utilizing reverb and delay. Because you don’t have to worry about matching decay instances to the snare or different instruments, you’ve obtained more freedom to experiment.
To help preserve the other instruments in the identical space, it’s finest to send every track to the identical effects bus at various ranges.
With the simple cut of the low frequencies and trimming all the spots that need fixing in the vocals, we are at a great starting point to fixing this main element. By following simple rules of thumb when approaching the vocals, we should have a great image and laid down a path that is easy to follow.

Bottom to Top Mix
A much less common however very efficient strategy is to start out of your lowest bass parts and assemble the mix vertically.
The first step stands out as the bass, 808, deep kick drum, or whatever is dominating the sub-range, after which transferring up to, say, a kick drum or bass guitar — or whatever resides within the natural bass range.
You then progress to the following deepest element, perhaps a synth or keyboard, or bassy vocal or snare. And you then proceed up the ladder till you end off with the hi-hats or tambourine, or whistle or guitar, no matter is dominating the treble.
The important thing to creating this strategy work is that if you get to the elements which can be designed to stay in the identical range, you mix them into one homogenized component (equivalent to string layers, synth stacks, drum layers).
The big benefit to this strategy is that it makes your EQ choices actually clear since you begin from the premise that you’re assigning primary frequency ranges to certain parts. Mixing the low end first then moving up to the upper region is not that common approach, but in some instances can be very useful.
If you have a song that is mostly bass-based, then sorting out the lows first will leave up important space for the other elements in your tune. By the simple use of compression, EQing, and balancing, your lows should be in the place to be for the rest of the song.

Rest of the Tune
As soon as your mix has its star and its selling level, the following step is to let all the things else fall into place and help the tune. If all of the earlier steps had been achieved appropriately, we discover that this part of the mix doesn’t take as a lot of time as you would possibly assume.
Since you already handled the mix’s focus, the task is now to ask yourself if the remaining parts are supporting the principle part or distracting from it. Answering this question, when approaching every track, will inform you of the following moves to be made.
The precise order of instruments moving ahead can largely be left to one’s personal desire. The best way to do this is to move on with the next most important element and fit it in your mix. According to our experience, this is the next logical step you need to take.
Typically beginning with the elements which can be probably the most distracting and working backward could be useful. Oftentimes, we discover this to be the bass or different low-end parts, as they maintain a whole lot of energy and can mask the vocal or essential melodic parts.
We will solo out these problematic instruments together with the key parts of the tune and give attention to the connection between the two: adjusting how they’re sitting collectively by EQing out competing frequencies or controlling distracting dynamics.
As soon as things are interacting properly, we reintroduce the other instruments back in and end the mix.
On different occasions, working on parts that spotlight the core of the tune and really feel like almost as vital as the main parts could be a good strategy. By mixing these “fun” parts like percussion tracks or background vocals to be bright, vibey, and supportive of your lead vocal or essential drum groove, you’ll rapidly get your mix feeling thrilling, which can maintain you impressed to continue.

Mixing Effects of the Track
That is a strategy that, so far as we do know, is one of the last steps in finishing your mix. The thought of this strategy is to create your reverb and delay returns right initially of the mix (and infrequently print them) and group them with any room captures that had been taken throughout track.
You begin with these parts and dedicate the primary stage of the mix to mixing all the “space” sounds. The aim of that is to create a unified space for the elements to stay in — a three-dimensional picture that’s plausible to the ear. This is one thing that you should always take care of.
Whereas this strategy isn’t essentially efficient for genres where synthetic/unrealistic/disjointed space is okay (Pop, EDM, Hip-Hop), it may be exceptionally helpful for genres that need an extra natural feeling ambiance like Jazz, Singer-Songwriter, Classic Rock, or genres that need a definite and totally “designed” sense of space.
The benefit to this strategy is that you simply create a functioning stereo picture right from the get-go. Front-to-back imaging and space are without doubt one of the toughest points of a mix to nail down, and this strategy actually takes out the guesswork and allows for a really determined world for the musical parts to stay in.
We additionally discover that having the tonality of the space already locked down actually helps guide the mix of the dry parts. This might be the last thing you need to take care of before finalizing the mix.
There are other things that you should do after this one, and that is to rest your ears and brain and come back the next day to make final touches and bounce out the song.
Frequently Asked Questions
Q: What are the standard mixing ranges for every instrument?
A: To get instruments to sit down in their very own space within the mix, you should make sure that one track doesn’t mask the other. Keep away from frequency masking by filtering much less essential frequencies from instruments that don’t need these frequencies, for instance, filter low frequency and low-mid frequencies from an acoustic guitar in a rock mix. Additionally, use panning and reverb to position instruments across the soundstage.
Q: How do you balance a mix?
A: First, hardpan all instruments right or left apart from the kick drum, bass guitar, and vocals – leave these within the middle. Discover the loudest and quietest elements of the music and create two-loop markers. Bring all your instrument faders down. Next, on the loudest part of the music, set the vocal fader so that it is level dances around -20 dBFS.
Now change your output from Stereo to Mono, utilizing a plug-in, stereo fader panning, or your console’s mono button in case you have one. Flip the vocal volume to a ‘can simply make it out’ level and begin to bring up the other faders so you’ll be able to hear every instrument within the music. Do that for the two loops you made earlier and adjust to discover a pleasing balance.
Now turn the volume again as much as your normal monitoring level and change back from mono to stereo. You should now have a reasonably good preliminary mix balance. End this process off later with some automation when static fader levels make one instrument too loud or too gentle when they should not be.
Q: How do you get good at mixing?
A: There is no such thing as a simple reply to this question. Like getting good at something, mixing improves with expertise and time. Mixing requires the best balance of study, copying different people’s processes and adapting them for yourself, practice, comparison, extra practice, and refining your personal tastes, workflow, and processes, and technical know-how. Keep studying, working towards, and learning – you’re going to get good!
Conclusion
The way you decide how to start the rough mix determines how you’ll end the mix. Having the plan to get from point A to Z will store massive amounts of hassle down the line and usually gives better audio.
No matter if you use Cubase, Pro Tools, or any other DAW, the process should always be the same.
What approach do you prefer? Maybe there’s an approach we have not included. If so, feel free to leave your ideas in the comment section below.