What Is Noise Floor
Introduction
When you are studying audio theory, everything seems simple, but once you start practicing, everything changes. Rather than doing anything else, you spend most of your time fixing audio. As soon as you receive recordings, you begin to treat them. It’s just a matter of learning how to handle (or prevent) issues and moving forward.
When you record your recordings, doesn’t it just annoy you when you hear an annoying humming? How does it affect your work and your music? Do you really understand what it is and where it comes from? The question is, do you know what you can do to prevent it?
The noise floor is something that resembles a background noise that is being recorded into the signal, but this is more of a hum than any natural sounds that happened behind the microphone. In our opinion, the noise floor is probably the most unwanted noise that can happen on an audio signal.
So if you are facing such trouble, you have come to the right place if you’d like answers to how to get a low noise floor, reduce it from the audio dynamic range and check if any of your gear is generating this also known as equipment noise. Let’s dig in now.
What Is Noise Floor Exactly?
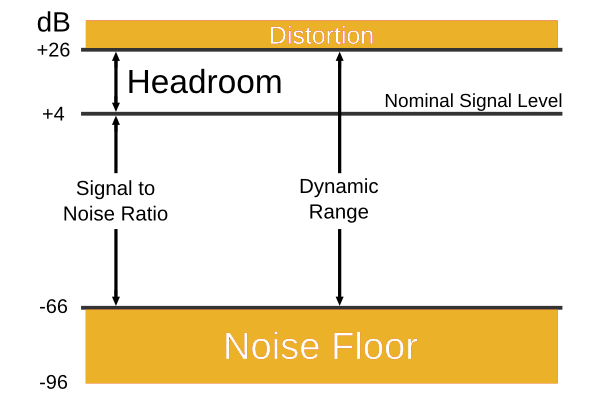
A certain amount of noise is generated by electrical components by themselves, such as hum, hiss, rumbles, and so on. Generally speaking, the noise floor refers to the amount of sound that a piece of gear naturally produces when not being used with a signal. Noise floor refers to the total amount of noise created by all of the individual pieces of equipment placed at rest in a complete setup.
Noise floors can be incredibly low, even inaudible, in today’s systems, especially if everything is done in the box. Back in the days of analog tape, it was of greater importance from a technical standpoint. It was done to ensure that the recorded signal level was above all hums and quiet hisses in the console, on and off the tape machines, and in the outboard gear.
The studio’s overall noise floor is also influenced by any outside background noise. Homeworkers are subject to the noise from their air conditioners, traffic passing by outside, birds chirping, and other unwanted noises. In order to keep the floor low and quiet, studios try to block out as much external noise as possible.
So in both cases when working at home and in professional studios, there are steps that should be taken to reduce the noise floor and all the outside-factor noises that could be recorded in the signal that will pose a problem later on. Let’s check the basics now.
Measuring Noise Floor
The noise floor can be measured by a variety of methods. Let’s begin with digital systems since they use dBFS (Decibels, Full Scale). It is common knowledge that the dBFS scale is used to measure audio volume, with 0 dBFS representing the loudest possible sound that could be recorded. We’ll begin seeing the levels of the meter drop from the 0 dBFS level to -10, -20, -30, etc., as the sound level decreases (gets quieter).
Soundcards use the dBFS scale to measure input and output signals at the converter stage of the (digital audio) conversion. The sound pressure level (SPL) meter is another method of measuring the noise floor. SPL is usually used to measure ambient noise in studios, on a dB scale similar to dB. This is important to know if you want to measure any noise sounds and compare them before and after analysis.
Reducing Noise Floor in Recording
The first and most important point that will help you with many other problems and decision-making sessions is to add acoustic treatment to the room you are going to work and record in. Why is this? Well, the answer is pretty obvious. Every external noise that leaks into the recording space is a potential problem that can be embedded in the recording.
So to preserve clean audio recording you need to take care of this first. We are not going to list the other benefits of acoustic treatment, but there are many – so do not overlook this process.
Next is to get an isolated-bottom mic stand that will not transfer any vibrations or cause any pops and clicks from not being stable on the floor. All these movements will cause air pressure to the mic capsule, resulting in a hum or hiss. Also, having a pop filter will help in this regard, so get one as well.
After sorting these logistics, the next thing is to get balanced audio cables. There is no doubt that these cables will generate the best possible outcomes for the recording, and even if you spend a little bit more than usual on a cable, you will be getting the best of the best with a lifetime warranty. Here are some XLR cables we listed that you can get to avoid such problems.
And lastly in this whole chain of points to take care of to reduce noise floor are the microphone and the preamp. They also have an internal noise floor that cannot be eradicated, but you need to cope with it. The thing you can do in terms of this is to look for preamps and microphones that are having a minimum self-noise that is suitable for modern recordings.
If you are recording more vintage genres and your vocals can handle having a little bit of hum in them, maybe you do not need to worry too much about this, but if you need clean and transparent voice recordings, you can check out several suggestions of microphones and preamps in the box below.
Reducing External Noise Floor Causes
Since we already covered some of this in the acoustic treatment point above, we are going to move on and list some other reasons that can create noise floor and increase the electrical noise and atmospheric noise in our recordings.
The most annoying is the noise generated by faulty outlets. Check this example out. An audio engineer friend of ours was using a 500 series rack which was powered with a regular power cable and plugged into a regular power outlet. Everything was new, the units and the modules, but his recordings were having weird sounds in them. What was the problem you are asking?
Well, it was the ground loops and the noises it generates. So to avoid ground loops, try different power outlets or a power strip that is treated for ground loops and avoid some of these common noise problems.
Maybe it sounds that these are minor problems, but when they stack up on each other, you will notice you have a really audible noise problem that you need to eradicate really fast. Do not overlook outside noise as well. As we mentioned, computer fans, the air conditioner, electrical interference – all of this is important to be handled to get recordings without any noises.
Reducing Noise Floor In The Mix
Even though all these points are taken care of and you sorted everything out before recording, you might still end up with audible noise in the mix. Or, if you are working for a client, you might get a project that has a bunch of noise recorded in the signal and you need to take care of it now in the latter stages.
Well, it is good that there is software that is able to reduce these unwanted sounds even in digital systems. There are a bunch of plugins that are de-hummers and de noisers that work specifically on the frequencies of these noises and are able to fix something that was missed in the recording stage.
For the noise floor low frequencies, like some subby fuzzes or hums, maybe a simple high pass filter will help out to sort it out, but if there is a need for more complex signals, reach out for some of these plugins and you are good to go.
Check these plugins out:
- Brusfri by Klevgrand
- Restoration Suite 2 by Acon Digital
- Extract: Dialogue by Acon Digital
- Restore Plugin Bundle by Sonnox
- poltergate by denise
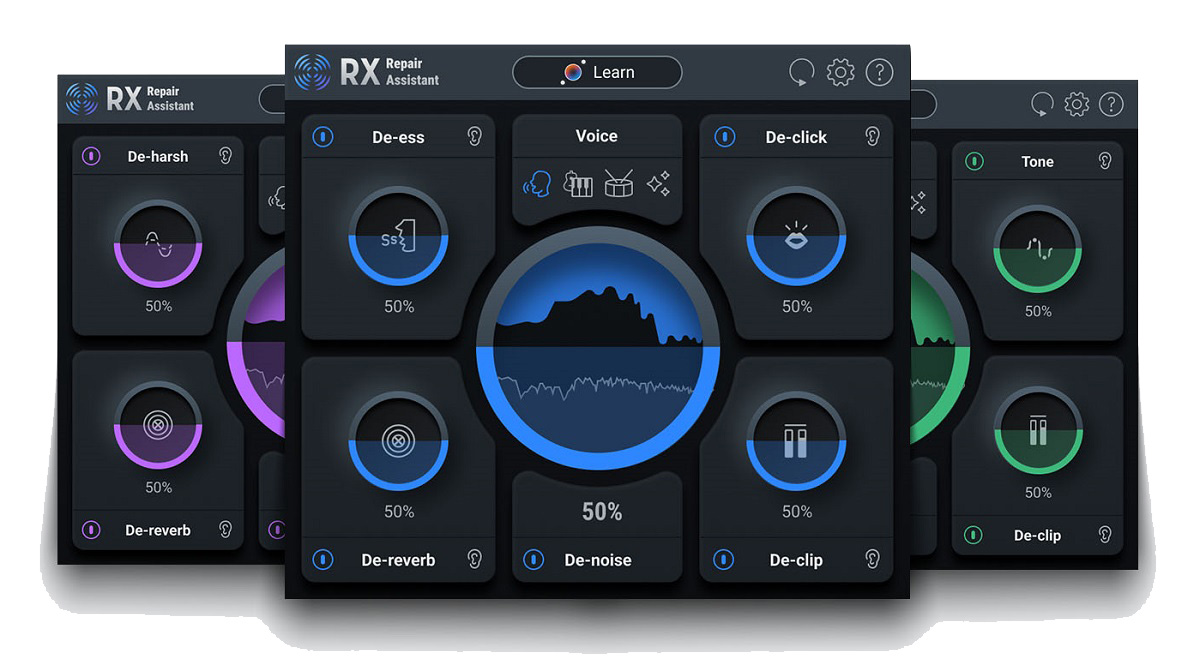
- RX 10 Elements by iZotope
- Esspresso by Klevgrand
- ReSample by 2nd Sense Audio
Conclusion
What can we say more about this? The noise floor is unwanted and should be taken care of no matter what caused it. Trying to sort it out at the source is the best option to get clear recordings, but if you happen to have it already in them, try to fix it in the mixing stage. So do not fret about the noise floor, just address the problem and try to solve it without any panic and carry on!
If you think that we missed something about this topic, please let us know in the comments below and we will be more than happy to update our article to provide more insights about the whole noise floor topic.


