Techivation T-Exciter Review
Introduction
We are very excited to introduce to you the brand new plugin from Techivation – T-Exciter. As the name suggests, this is an exciter plugin that you will be able to use for both single channels, groups/busses, and on the master channel as well.
Even if it appears to have a very simple interface, this is a powerful plugin that you can use to add some shine, air, wetness, or crispiness to your mix and you will understand why we used these words to explain what can be done for you in terms of feel.
Here are some of the words from the developer when it comes to explaining what this plugin does:
“Techivation T-Exciter is a plug-in designed to bring life and energy to sounds. It helps brighten the high frequencies in a very musical and smooth way. It also adds more width to sound without losing its power. This plug-in helps you instantly bring any sounds to life.”
www.techivation.com
Before we move on with the parameters and knobs on the plugin, we just want to let you know that we will start with the Effect Modes that the plugin offers since they give the coloration to your sound, even tho there is a bigger Excitement knob in the middle of the plugin UI.
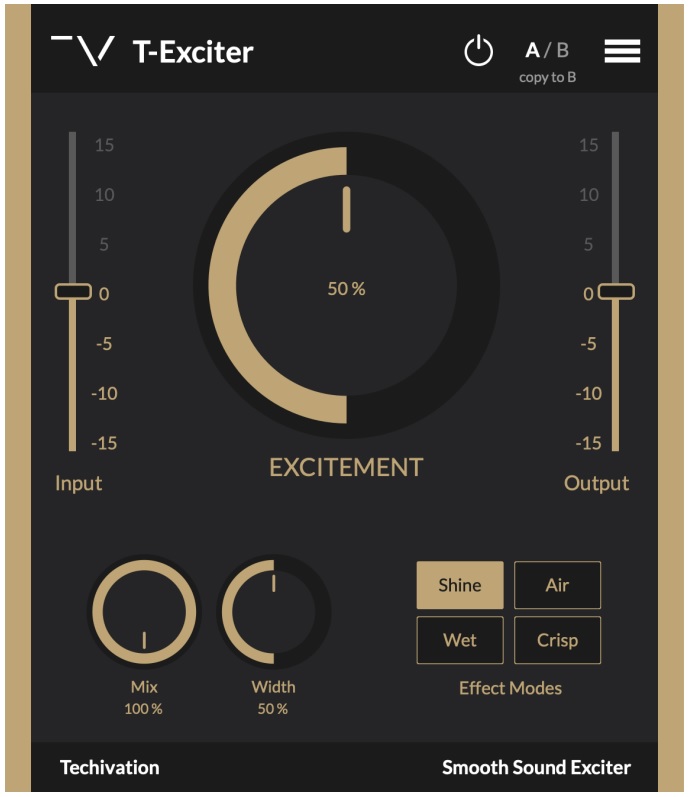
Effect Modes
Air: As the name of this mode suggests, this mode adds air to the sound making it more ethereal and open, but also adds a touch of musicality to the signal you are processing.
Shine: The Shine mode has the ability to make all the sounds appear a little bit sharper and brighter and to expose the little details of the signal by making them more audible.
Crisp: The characteristic that this mode has is to bring all the stuff up front and in your face, making it good for main elements like vocals and lead instruments.
Wet: The Wet mode glues everything together in a smooth way and injects general excitement by enhancing the ambiance. Really good when added to the mix/master bus.
Excitement Knob
This is the knob that actually inserts the previously set mode into the signal. As per usual you will have the area from 0 to 100%, depending on how much you want to add from the goodness. A little tip here is that if you double-click on the knob, it will go back to the default value.
Width and Mix Knobs
The next in line in the bottom left corner you have two additional knobs that will help you to shape the processing. The mix knob should already be known to you – you are setting the balance between the processed and unprocessed signal. The width knob will assist you to add depth and width to your mono or stereo signals and will widen them out in the stereo space.
One warning before you engage with the Width knob is to be careful and follow the spectrum analyzer and watch out for the anti-phase. Our personal preference when it comes to signals going to the anti-phase region is to have only short signals there and have the main elements out of that area for the sake of mono compatibility.
Input and Output Level
On the left and the right of the big excitement knob, you can find the input and the output level sliders that will help you balance the levels. These are important when it comes to maintaining the sound levels before and after processing.
- Undo
- Redo
- Show Presets Folder
- Presets
- Save Preset As…
- Load Preset…
- Default Preset
- GUI Scale
- Account info
- About T-Clarity
- Support
Conclusion
This plugin will definitively find a place in the arsenal of plugins that we already use. With its simplicity and effectiveness, we believe that many other people will find it useful. We are happy to say that we were surprised by its performance since it significantly improved the signal quality.
We also tried it on a master channel and the whole track went to a brand new level. We highly suggest you try it out and we believe that you will have it in most of your sessions at the end.
In case you are having any questions in regards to this plugin, please let us know in the comment section below or reach out to the developer – Techivation.

